


If you want to collect event registrations in WordPress without manually transferring attendee data, this guide shows you the complete workflow. You’ll learn how to build an event registration form with Contact Form 7, connect it to virtually any CRM, email marketing platform, spreadsheet, or custom system using Contact Form to API, map form fields correctly, configure authentication, and test the integration. By the end, every registration will be routed automatically to your preferred platform in real time, eliminating manual data entry and making attendee management significantly more efficient.
Most WordPress site owners running events end up with the same problem: registrations come in through a form, and then someone has to manually copy that data somewhere useful. Into a spreadsheet. Into a CRM. Into an email list. It takes time, and it creates errors.
This guide shows you how to build an event registration form directly in WordPress and route every submission automatically to whatever platform you use to manage attendees, whether that is HubSpot, Mailchimp, Google Sheets, or a custom internal system.
The approach uses Contact Form 7 to build the form and Contact Form to API to handle the event registration form integration. Every time someone registers, their data gets sent to your destination platform in real time, through a direct API connection. No CSV exports, no manual entry, no third-party event platform required.
If you manage workshops, webinars, meetups, courses, or community events and want registrations to land where they are actually useful, here is the full workflow.
What Event Registration Management Actually Means for a WordPress Site Owner
Event registration management covers three things: collecting sign-up data, confirming attendees, and getting that data to wherever it needs to go. That is the full scope for most event organizers. Collect, confirm, route.
It is worth separating registration from ticketing, since the two are often lumped together. Registration is about data collection and confirmation. Ticketing adds a payment layer and controls physical or digital access, seat assignments, badge printing, and entry validation at the door. The majority of WordPress-based events, webinars, workshops, local meetups, and online courses, need registration. They do not need full ticketing infrastructure.
WordPress is a reasonable starting point for registration because your site and your audience are already there. Adding a form plugin is significantly simpler than onboarding an entirely separate event platform and sending your audience somewhere new to sign up.
This post is for organizers who want a straightforward registration workflow inside WordPress without replacing their existing CRM or email tools in the process.
What Your Event Registration Form Needs Before You Think About Sync
Before connecting your form to any external platform, get the form itself right. The most common mistake is building a form that collects more than the destination can use, or collecting field names that do not match what the API expects.
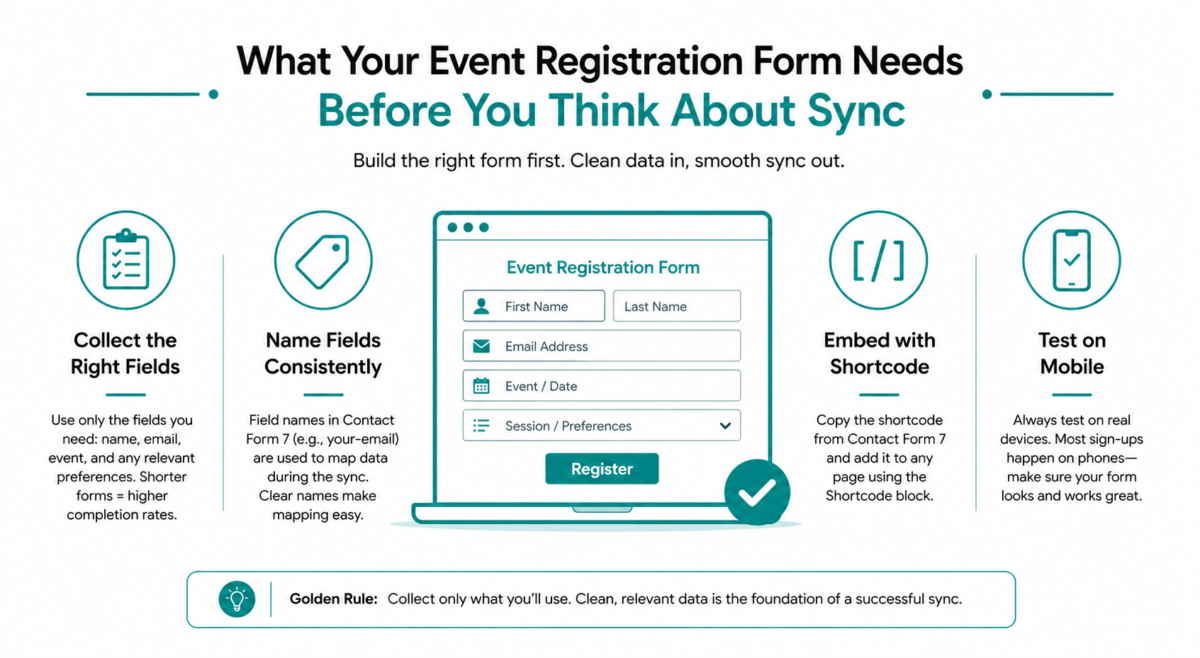
The minimum viable field set for most events
- First name and last name (or a single full name field)
- Email address
- Event selection or event date, if you run multiple events
- Any session, dietary, or accessibility preference fields relevant to your specific event
A webinar registration typically needs two fields: name and email. A multi-day conference with breakout sessions may need eight. Match the form to what you will actually use in your confirmation email and in your destination platform. Long forms hurt completion rates, particularly on mobile, so only add a field if it serves a real downstream purpose.
Field naming matters for the sync step
Contact Form 7 assigns a name attribute to each field when you build the form. That name is what Contact Form to API uses to map form data to your API. For example, if you name the email field your-email in Contact Form 7, you will reference that same name when configuring the field mapping later. Consistent, readable field names make the mapping step considerably easier.
Embedding the form on a WordPress page
Once you have built the form in Contact Form 7, it generates a shortcode. Copy that shortcode and paste it into any page or post using the WordPress block editor by adding a Shortcode block. The form renders inline on the page.
Test the form on a mobile device before publishing. A significant share of event sign-ups happen on phones, and Contact Form 7 renders responsively by default, but always verify on actual hardware.
How Contact Form to API Connects Your Registration Form to External Platforms
Contact Form to API is a popular WordPress plugin that intercepts Contact Form 7 submissions and forwards the data to any REST API endpoint you configure. It does not build forms, store submissions, or manage your attendee data. Its job is to take what someone types into your registration form and send it to the platform where you actually want that data to live.
Every form submission triggers an API call. Contact Form to API handles the authentication, the field mapping, the HTTP request method, and the data payload. The destination platform receives the data as if it came from a native integration.
Destination platforms it works with
You can route event registrations to any platform that exposes a REST API. Practical examples include:
- CRMs: HubSpot, Salesforce, Zoho CRM
- Email marketing platforms: Mailchimp, ActiveCampaign, Klaviyo
- Spreadsheets: Google Sheets via a Google Apps Script webhook or a similar endpoint
- Team communication: Slack via incoming webhooks
- Custom internal systems: any booking system, internal database, or customer portal with an API endpoint
Why This Is Different From Ecosystem-locked Form Builders
Most form plugins that offer built-in integrations maintain a fixed list of supported connectors. If your CRM is not on the list, you are out of luck. Contact Form to API does not work from a connector list. You configure the endpoint URL, the authentication method, and the field mapping yourself, which means any platform with a REST API is a valid destination.
What you need before you start
You will need two things from your destination platform before configuring Contact Form to API. First, the API endpoint URL, which you find in your platform’s developer or API documentation. Second, your authentication credentials, which is usually an API key or a Bearer token from your account settings.
Be aware that some platforms use OAuth 2.0 rather than a simple API key. OAuth adds complexity, requiring you to generate and refresh access tokens through a more involved authentication flow. If your destination requires OAuth, consult that platform’s developer documentation separately.
Step-by-Step: Build Your Registration Form and Route Submissions to Your Platform
This section walks through the complete workflow, from installing the plugins to testing a live submission. The example uses HubSpot as the destination platform, but the same steps apply to any REST API endpoint.
Step 1: Install Contact Form 7 and Contact Form to API
In your WordPress admin, go to Plugins then Add New. Search for Contact Form 7 and install and activate it. Then search for CF7 To Any API and install and activate that as well.
Contact Form 7 is the prerequisite. Contact Form to API only processes submissions that come through Contact Form 7 forms.
Step 2: Create the registration form in Contact Form 7
In your WordPress admin, go to Contact then Add New. Give the form a clear name, such as Webinar Registration or Workshop Sign-Up.
Add the fields your event requires. A standard webinar registration form might look like this in Contact Form 7’s form editor:
- [text* your-first-name placeholder “First name”]
- [text* your-last-name placeholder “Last name”]
- [email* your-email placeholder “Email address”]
- [select your-event “Morning Session” “Afternoon Session”]
Note the field names you assign (your-first-name, your-email, and so on). You will use these exact names when mapping fields in Contact Form to API.
Save the form and copy the shortcode it generates. Add the shortcode to your registration page using the WordPress block editor.
Step 3: Find your destination platform’s API endpoint and credentials
Log in to HubSpot (or your chosen platform) and navigate to its developer or API settings. For this, we will go on with most widely used platforms HubSpot and Mailchimp.
For HubSpot, the Contacts API endpoint for creating a contact is:
https://api.hubapi.com/crm/v3/objects/contacts
To authenticate, generate a Private App access token in HubSpot under Settings then Integrations then Private Apps. Copy the token.
For Mailchimp, the subscriber endpoint follows this format:
https://us1.api.mailchimp.com/3.0/lists/{LIST_ID}/members
Replace us1 with your server prefix and {LIST_ID} with your audience ID. Generate an API key under Account then Extras then API Keys.
Step 4: Configure the API connection in Contact Form to API
In your WordPress admin, open the Contact Form to API settings. Select the form you just created and add a new API configuration.
Enter the endpoint URL from Step 3. Set the HTTP method to POST. Add your authentication credentials in the headers section. For HubSpot, the header is:
Authorization: Bearer {your-access-token}
For Mailchimp, authentication uses Basic Auth with the username apikey and your API key as the password.
Step 5: Map your form fields to the API parameters
This is the step that most guides skip over, and it is the one most likely to cause problems if done carelessly. Field mapping tells Contact Form to API which value from the form submission should go into which parameter in the API request body.
Here is what a mapping table looks like for HubSpot:
| Contact Form 7 Field Name | HubSpot API Parameter | Notes |
|---|---|---|
| your-first-name | firstname | Maps to HubSpot contact first name |
| your-last-name | lastname | Maps to HubSpot contact last name |
| your-email | Required field for HubSpot contact creation | |
| your-event | hs_lead_status or custom property | Use a HubSpot custom property for event name |
For Mailchimp, the parameter names follow Mailchimp’s merge field convention:
| Contact Form 7 Field Name | Mailchimp API Parameter | Notes |
|---|---|---|
| your-first-name | FNAME | Mailchimp merge tag for first name |
| your-last-name | LNAME | Mailchimp merge tag for last name |
| your-email | email_address | Required field at the top level of the request |
| your-event | EVENT | Requires a custom merge field in Mailchimp |
Field mapping errors, where a form field name does not match the expected API parameter, are the most common reason a sync fails. If submissions are not appearing in your destination platform, the first thing to check is whether the field names in the mapping match exactly, including case sensitivity.
Contact Form to API surfaces the API response in its log, so you can see the HTTP response code and any error message the destination platform returns. A 4xx error usually indicates an authentication problem or a malformed request. A 422 error often points to a missing required field or a field name mismatch.
Step 6: Configure the confirmation message
Back in the Contact Form 7 settings for your registration form, set up the Messages tab to show a clear confirmation after submission. Something like “Thank you for registering. You will receive a confirmation email shortly.”
You can also configure Contact Form 7’s Mail tab to send an automated confirmation email to the registrant. This is handled entirely within Contact Form 7 and is separate from the API routing that Contact Form to API manages.
Step 7: Test the connection
Submit a test entry through the form on your WordPress site. Then check two things.
- First, verify the record appears in your destination platform. For HubSpot, check the Contacts section. For Mailchimp, check the Audience list you configured.
- Second, check the Contact Form to API log in WordPress to confirm the API call returned a 200 or 201 success code.
If the record does not appear, review the log for error codes and cross-check your field mapping against the platform’s API documentation. Do not go live until a test submission lands correctly in the destination.
Sending to multiple platforms simultaneously
If you need registrations to sync to more than one destination at the same time, for example to both HubSpot and Mailchimp, Contact Form to API also supports multiple API endpoint configurations per form.
Which Platforms Can You Sync Event Registrations To?
Contact Form to API works with any platform that exposes a REST API. For event registration form integration, the most practical destinations fall into four categories.
CRM destinations
HubSpot, Salesforce, and Zoho CRM all support creating or updating contact records via REST API. Sending registration data to a CRM makes sense when your primary follow-up is sales-oriented. The event name, registration date, and contact details land directly in the CRM, and your sales or account team can follow up without waiting for a manual import.
Salesforce has one of the more complex API configurations in this category. It uses OAuth 2.0 and requires a Connected App to generate a client ID, client secret, and access token. First-time configuration takes longer than simpler API key destinations.
For a detailed walkthrough of connecting WordPress forms to HubSpot, see how to connect a contact form to HubSpot.
Email marketing destinations
Mailchimp, ActiveCampaign, and Klaviyo let you add registrants directly to an event-specific audience segment or tag. This is useful when your post-event communication strategy runs through an email platform rather than a CRM. You can add registrants to a pre-event drip sequence automatically the moment they sign up.
For a step-by-step guide on the Mailchimp setup, see connect CF7 to Mailchimp.
Spreadsheet and operations destinations
Smaller teams often manage attendee lists in Google Sheets or Airtable. Neither platform has a direct REST API for simple row insertion in the way that CRMs do, but both support webhook-based integrations. For Google Sheets, you can set up a Google Apps Script web app that accepts a POST request and writes data to a sheet. Contact Form to API sends the submission data to that endpoint.
This approach works well for organizers who do not have a CRM and want a lightweight, searchable attendee list without adopting new software.
Custom and internal API endpoints
If your organization runs a custom booking system, internal database, or customer portal with an API endpoint, Contact Form to API can route registrations directly there. This is the most technically demanding destination type because the API behaviour varies by system, but it is also where the plugin’s flexibility matters most. No pre-approved connector list means any endpoint that accepts a POST request is a valid destination.
Sync destination reference
| Destination Type | Example Platforms | Primary Use Case |
|---|---|---|
| CRM | HubSpot, Salesforce, Zoho CRM | Sales follow-up, attendee tracking, lead routing |
| Email Marketing | Mailchimp, ActiveCampaign, Klaviyo | Pre-event sequences, list segmentation, post-event nurture |
| Spreadsheet / Ops | Google Sheets (Apps Script), Airtable | Lightweight attendee lists, smaller events |
| Custom / Internal API | Custom booking systems, internal databases | Enterprise systems, custom portals |
One honest note on destination quality: the sync is only as capable as the destination platform’s API allows. Salesforce, for example, supports extensive data operations through its API but requires a more involved configuration. A simple webhook receiver for Google Sheets is easier to set up but more limited in what it can do with the data after it arrives.
Managing Registrations After the Form Goes Live
Getting the form live and the sync working is the hard part. Managing registrations on an ongoing basis is mostly a question of knowing where your data lives and what happens when something changes.
Handling duplicates and data conflicts
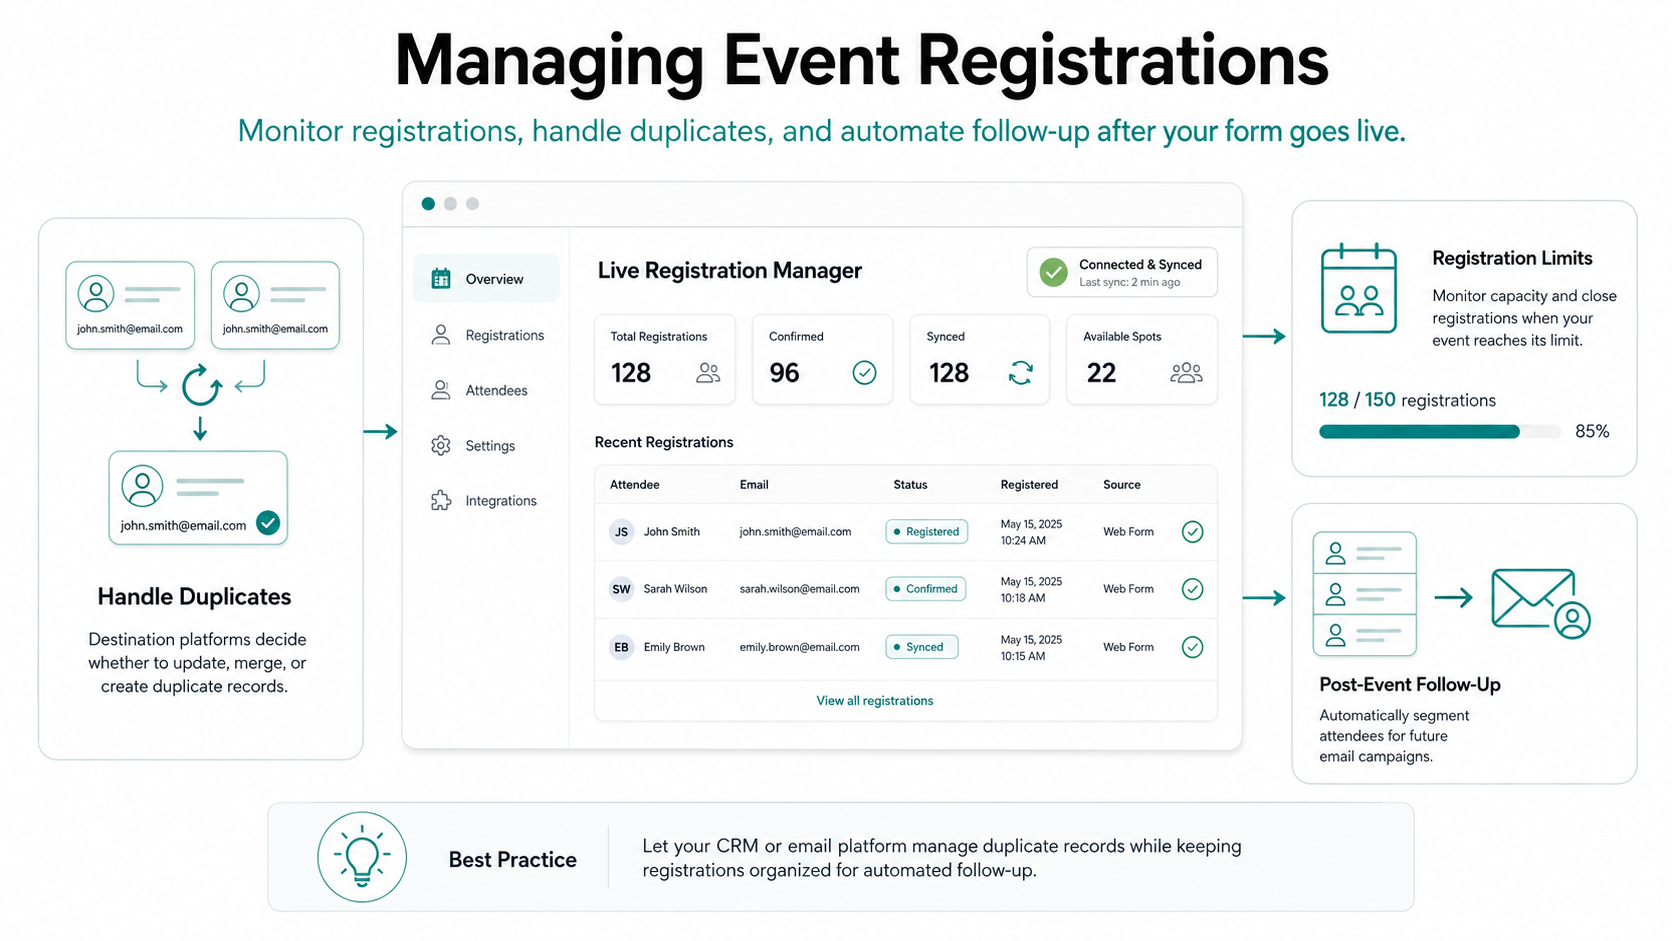
If someone registers twice using the same email address, what happens in your destination depends on how that platform handles duplicate records. HubSpot will update the existing contact record if the email address matches. While, Mailchimp will update the subscriber’s data if they are already on the list. Some platforms create a duplicate; others merge.
This is a real operational concern. Before going live, test a duplicate submission in your destination platform to understand its behaviour. Contact Form to API sends the data as configured; deduplication logic is handled by the destination platform, not by the plugin.
Setting a registration cap or closing the form
Contact Form to API does not include a built-in registration cap or form-close-by-deadline feature. These are form management concerns rather than API routing concerns.
Contact Form 7’s own ecosystem includes capacity plugins that can disable a form once a threshold is reached. Evaluate these separately based on your event’s requirements.
Post-event follow-up
Because your registrant data is already in your email platform or CRM by the time the event ends, running a post-event follow-up sequence requires no additional data work. Create a segment or tag in your destination platform for attendees of a specific event and send to that segment. The event registration form integration that routed the data on sign-up makes the follow-up segment automatically available.
Conclusion
Running event registrations through WordPress is straightforward once the form and the sync layer are both in place. Contact Form 7 handles the form. Contact Form to API handles getting the submission data to wherever it is useful, your CRM, your email list, a spreadsheet, or a custom system.
The setup takes some initial configuration, particularly getting the API credentials and field mapping right. But once it is working, every new registration goes directly to your destination platform without any manual work. Your follow-up lists stay current, your CRM records reflect actual registrants, and you do not have to touch a CSV between events.
Need help with your integration? Browse our practical API integration tutorials or watch our video guides to see how Contact Form to API connects Contact Form 7 with popular CRMs, webhooks, and REST APIs, without custom coding.
Frequently Asked Questions
- How do I sync event data to Salesforce from WordPress?
To sync WordPress event registrations to Salesforce, use Contact Form to API to POST form submission data to the Salesforce REST API. You will need a Salesforce Connected App to obtain your client ID, client secret, and access token. In Contact Form to API, configure the Salesforce Contacts or Leads endpoint, map your form fields to the corresponding Salesforce API parameters, and add your access token as a Bearer authorization header in the request. Test with a single submission and verify the record appears in Salesforce before going live. See our complete step-by-step guide on connecting Contact Form 7 to Salesforce using Contact Form to API.
2. What event data should be synced to a CRM?
Sync the data that enables follow-up action: registrant name, email address, company or organization if relevant, the specific event they registered for, and the registration date. Avoid syncing fields your team will never act on. Unnecessary data creates noise in the CRM and complicates deduplication. If your event has sessions, syncing session selections can help you segment post-event communication by topic. Attendance confirmation, meaning whether someone actually showed up, is useful but requires a separate check-in step beyond what a registration form submission captures.
3. How do I embed an event registration form on my website?
Build your form in Contact Form 7. When you save it, Contact Form 7 generates a shortcode. Copy that shortcode and paste it into any WordPress page or post. In the block editor, add a Shortcode block and paste the shortcode into it. The form renders inline on the page. Test the form on a mobile device before publishing, since a significant share of event sign-ups happen on phones.
4. What is the difference between event registration and ticketing?
Event registration collects attendee information and confirms a sign-up. It covers who is coming and gives the organizer a list of attendees to communicate with before and after the event. Ticketing adds payment processing and access control, managing paid admissions, seat assignments, and entry validation at the venue. Most WordPress-based events, webinars, workshops, and community meetups, need registration only. Paid in-person events with capacity constraints typically need a ticketing layer, which dedicated platforms like Eventbrite handle more completely than a WordPress form plugin.
5. What is the best free event registration form plugin for WordPress?
For form building, Contact Form 7 is the most widely used free option. It handles field creation, form design, and confirmation messaging without cost. For routing form submissions to an external platform, Contact Form to API is designed specifically for that purpose. It connects Contact Form 7 to any REST API endpoint, including CRMs, email tools, and databases, without requiring custom development.
Evaluate based on what you actually need. If your primary requirement is form design and local storage, start with Contact Form 7. If you need registrations to sync automatically to an external platform, Contact Form to API handles that API routing layer.
6. How do I connect an event registration form to a CRM?
Connect a WordPress event registration form to a CRM by installing Contact Form 7 to build the form and Contact Form to API to handle the event registration CRM integration. In Contact Form to API, you configure the CRM’s REST API endpoint URL, add your API key or access token as an authentication header, and map each form field to the corresponding CRM field name. Once configured, every form submission triggers an automatic API call that creates or updates a contact record in your CRM. No manual CSV export or import is needed. For the full configuration reference, visit the Contact Form to API documentation.


