Integrating Contact Form 7 (CF7) with Salesforce CRM allows you to automatically send form submissions from your WordPress website directly into Salesforce Leads.
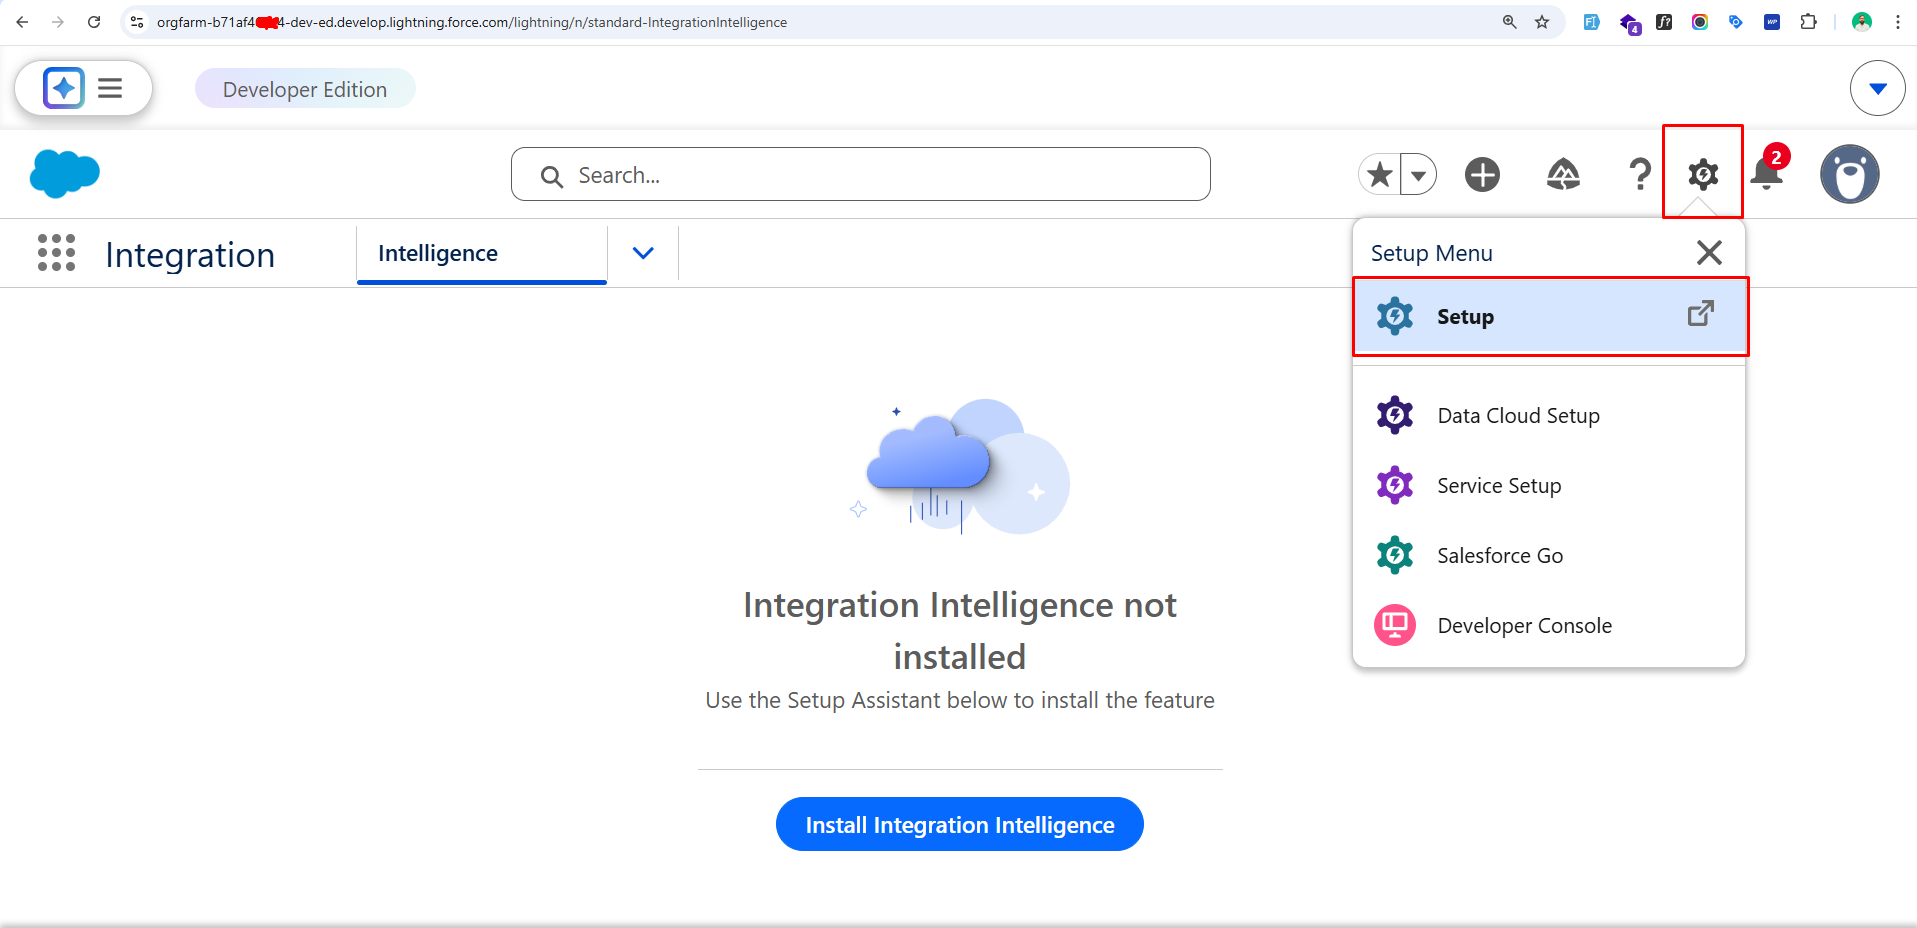
Step 1: Go to Setup
-
Login to your Salesforce account. – https://login.salesforce.com/
-
Click on the Gear icon (⚙️) in the top right.
-
Click Setup.
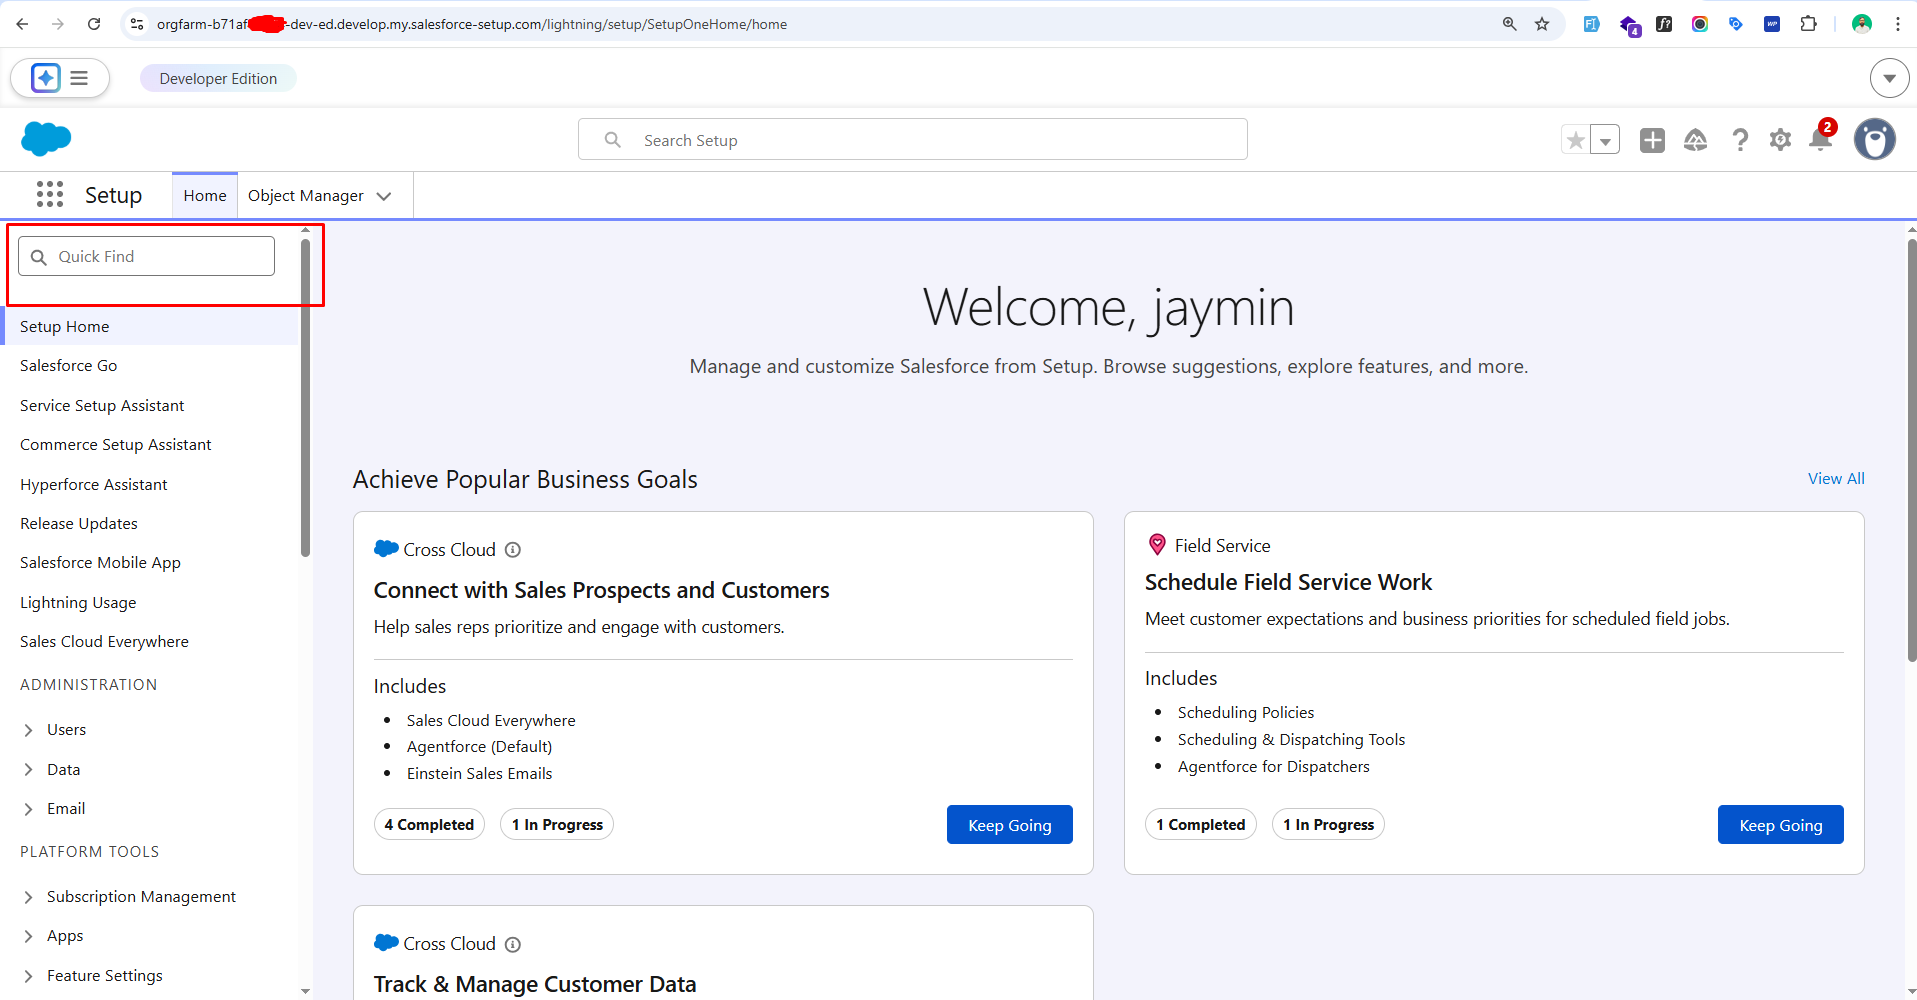
Step 2: Create a Connected App
-
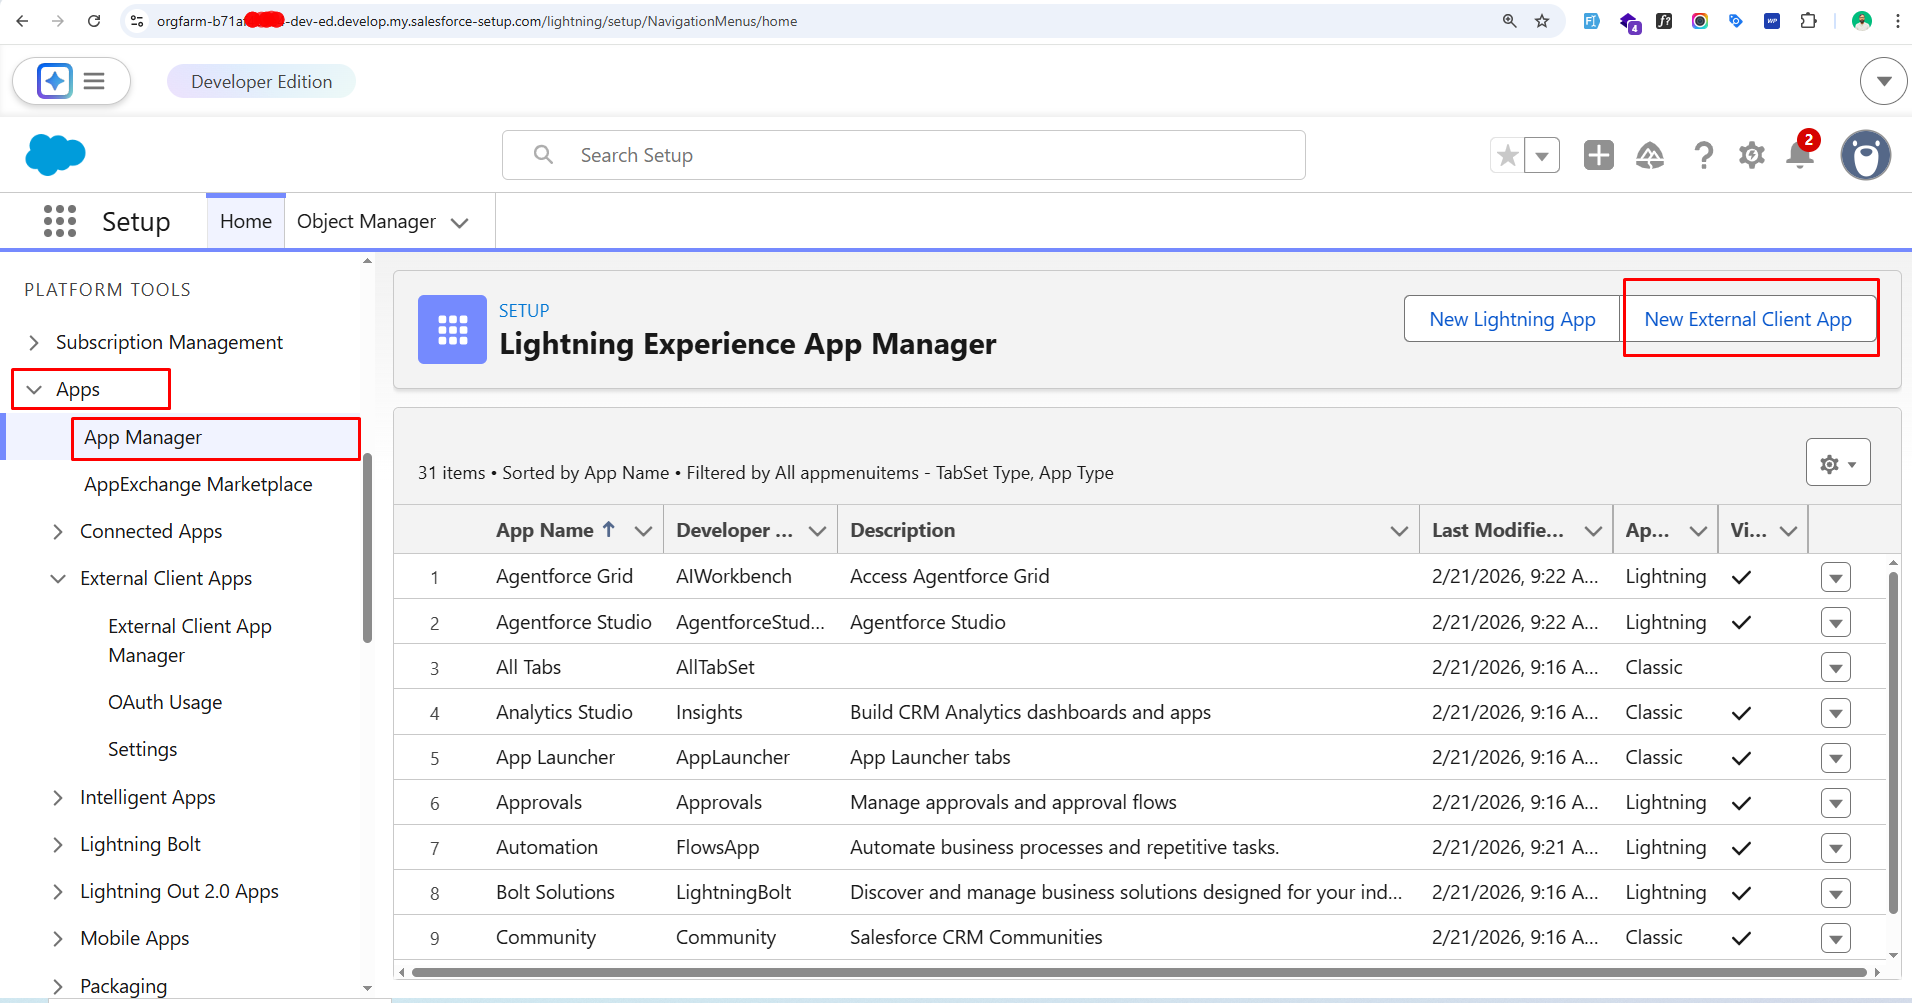
In the left sidebar search box, type App Manager.
-
Click App Manager.
-
Click New External Client App (top right).
Step 3: Fill Basic Information
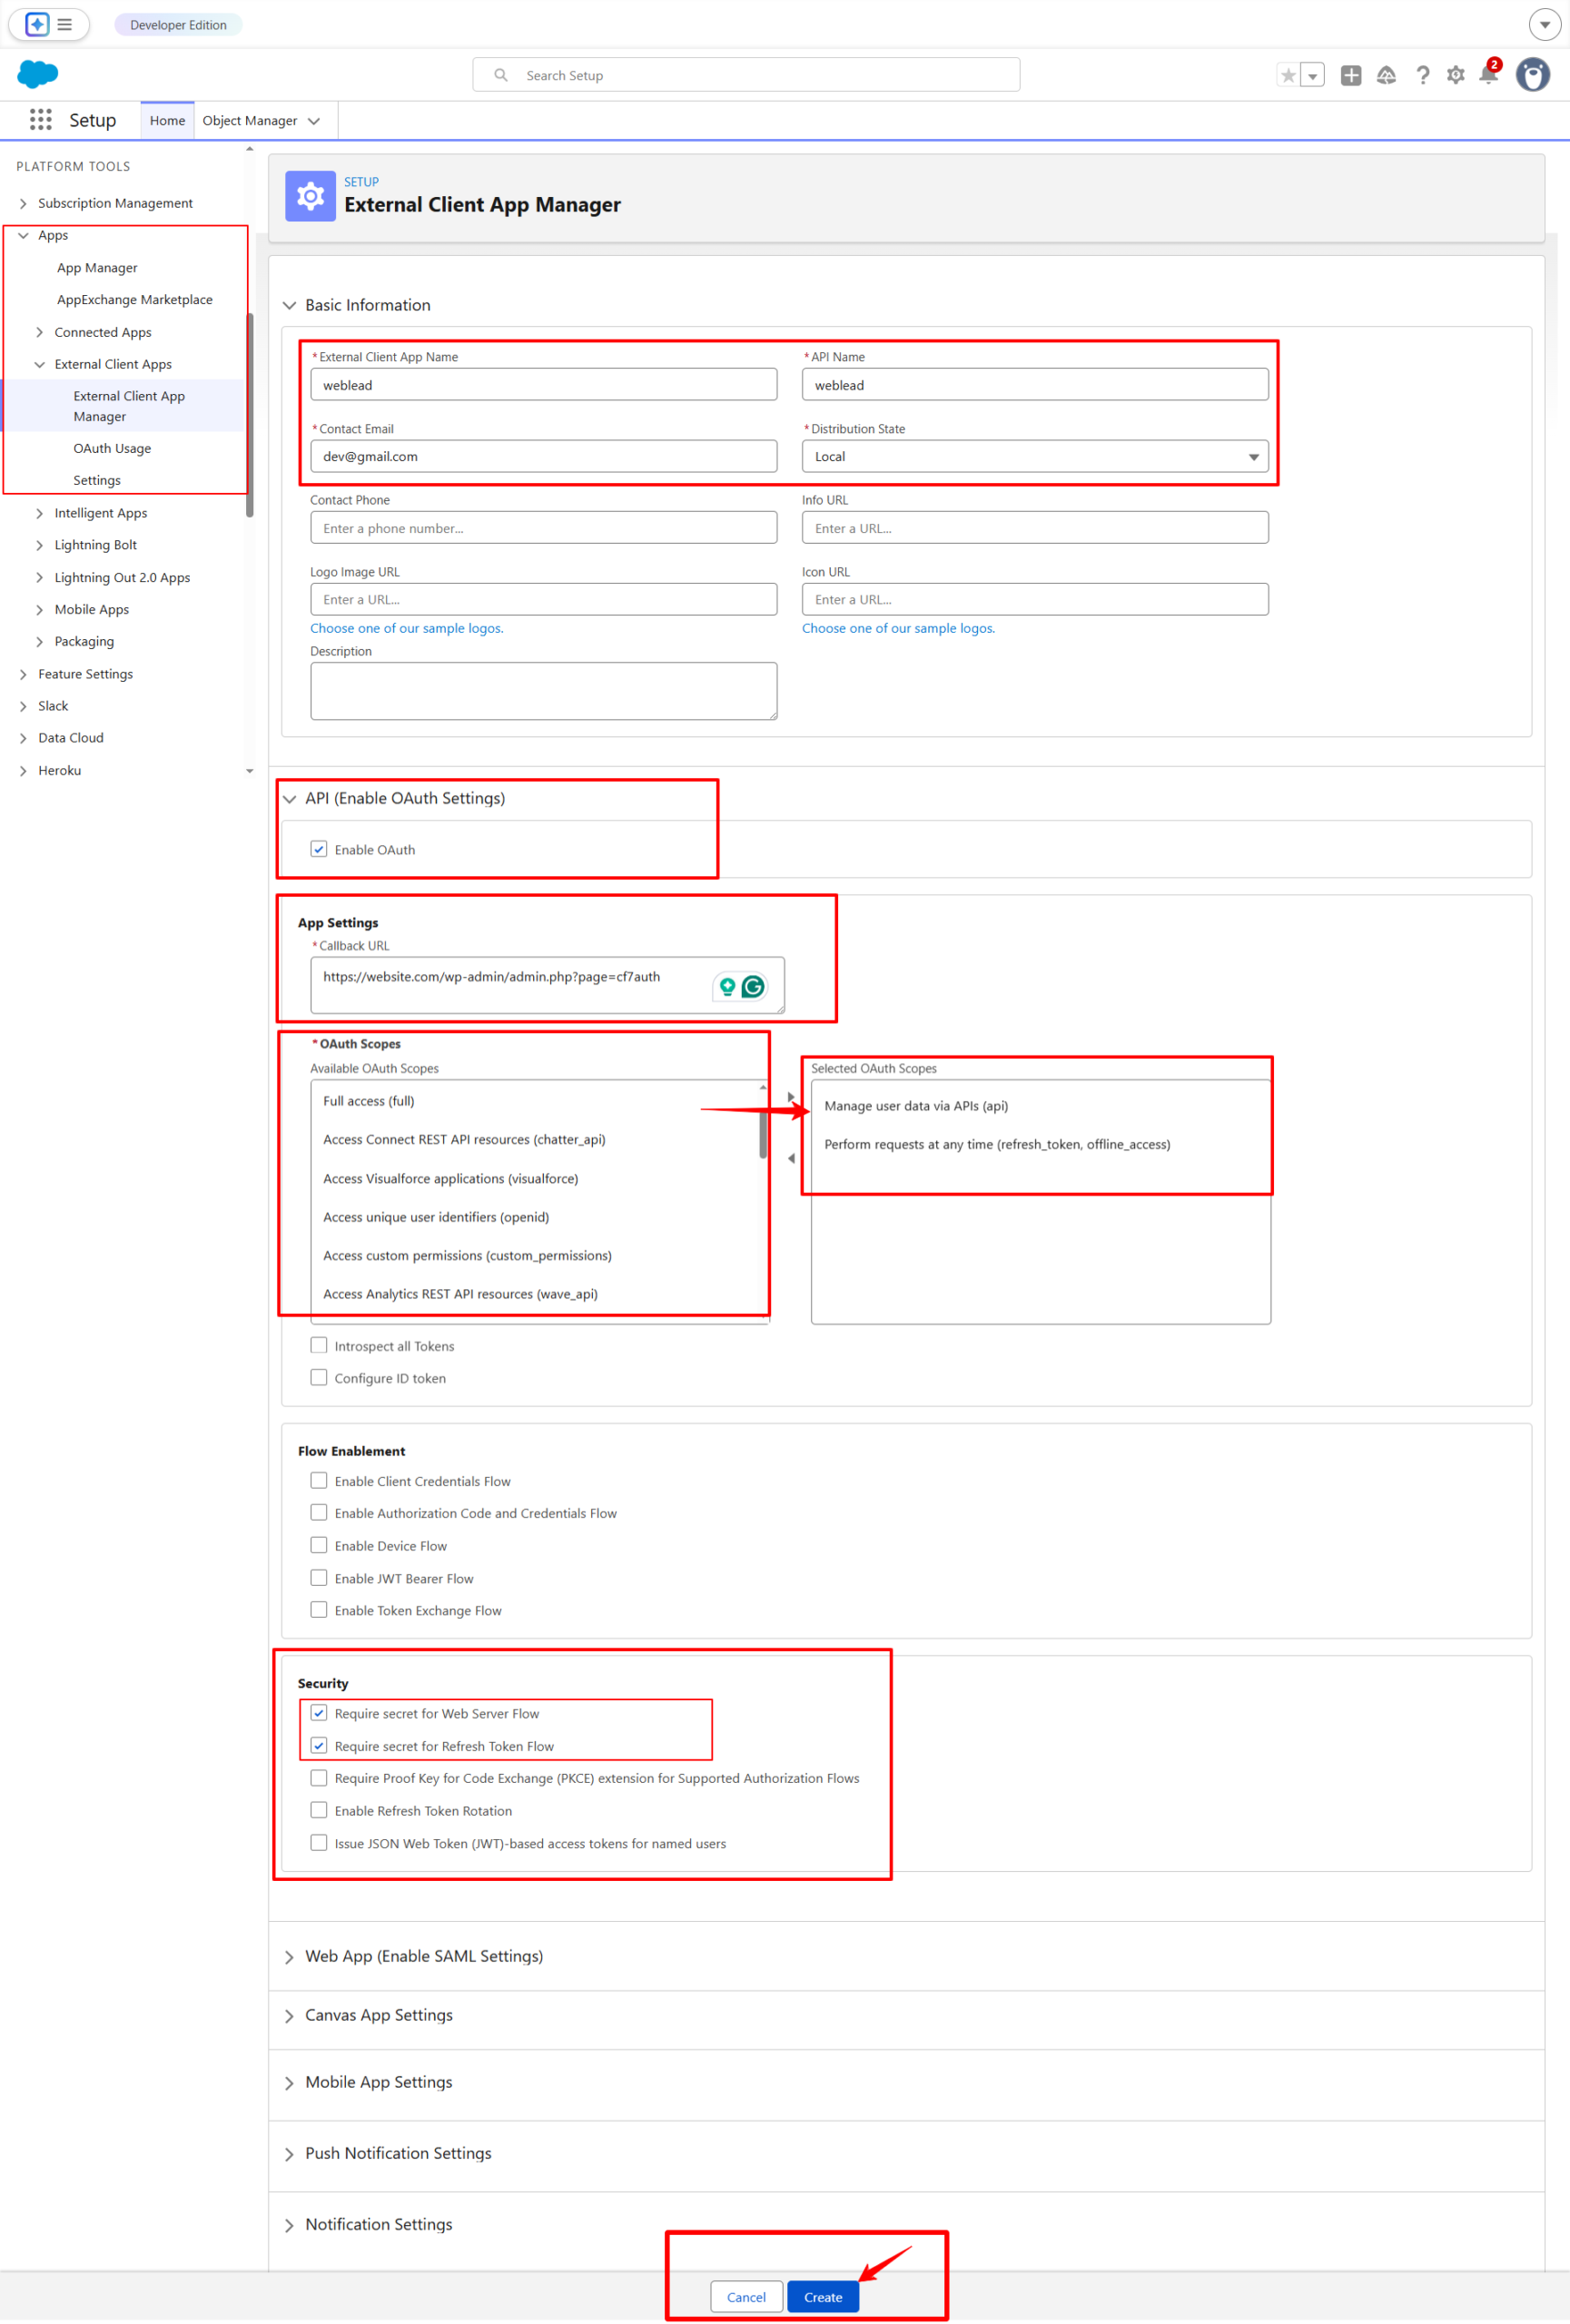
Fill in:
-
Connected App Name → Example:
Weblead -
API Name → Auto-filled
-
Contact Email → Your email
-
Check Enable OAuth Settings.
-
Callback URL https://website.com/wp-admin/admin.php?page=cf7auth
-
Under Selected OAuth Scopes, add:
-
Access and manage your data (api) -
Perform requests on your behalf at any time (refresh_token, offline_access)
-
-
Click Save
⚠️ Salesforce may take 2–10 minutes to activate the connected app.
Step 4: Get Client ID & Client Secret from Salesforce
After creating and saving your External Client App, follow these steps to retrieve your credentials:
-
Go to Setup in Salesforce
-
Navigate to: Apps → External Client Apps → External Client App Manager
-
Locate and click the app you just created.
-
Open the Settings tab.
-
Under OAuth Settings, click on Consumer Key and Secret.
⚠️ Note: Salesforce may require email verification before displaying the Consumer Secret. If prompted, complete the verification process to reveal the secret.

Step 5: Configure OAuth in WordPress (Auth Master)
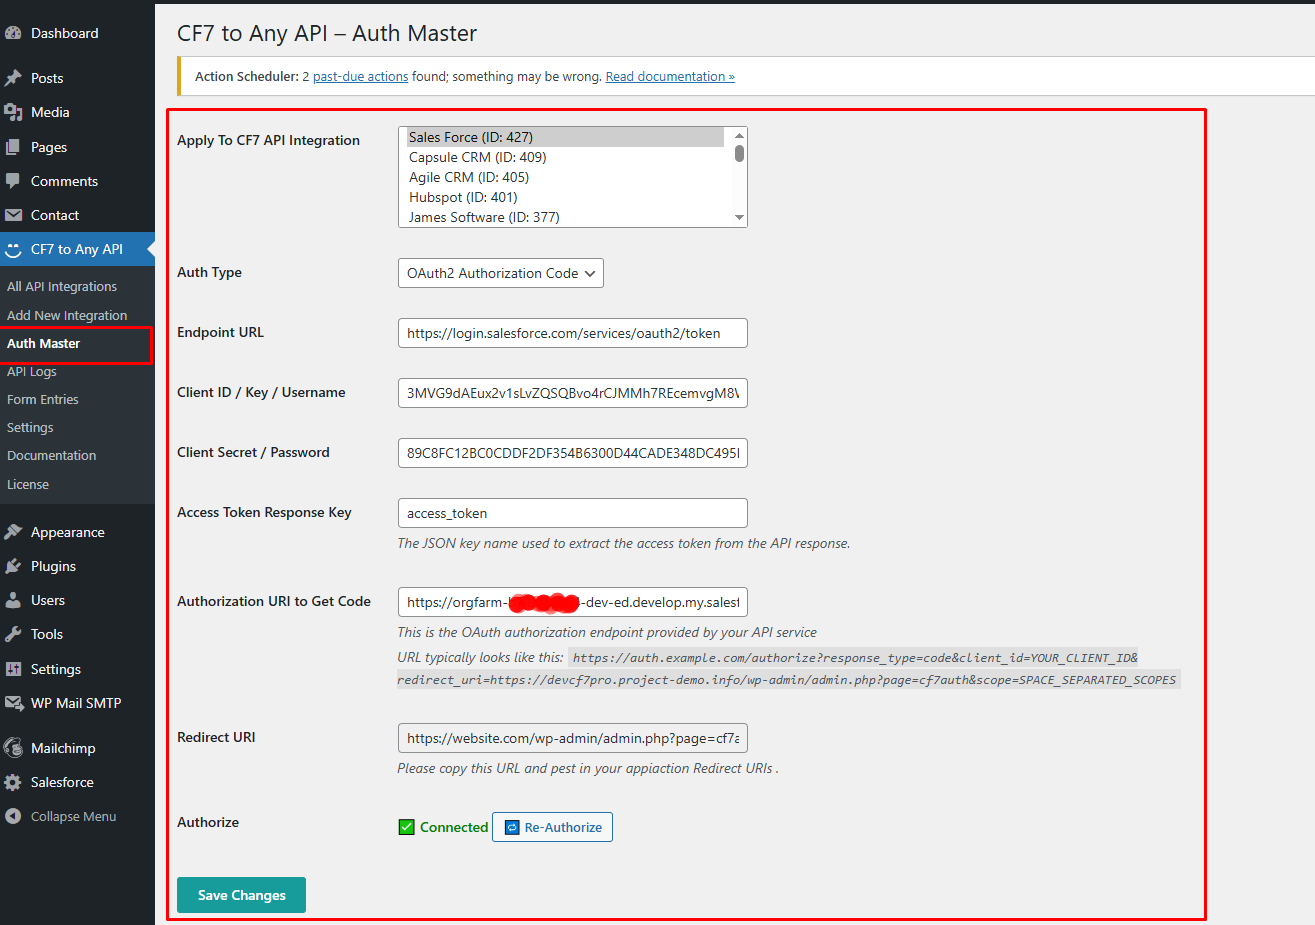
- Go to: CF7 to Any API → Auth Master
- Auth Type : OAuth2 Authorization Code
- Endpoint URL: https://login.salesforce.com/services/oauth2/token/
- Client ID: Paste Salesforce Consumer Key
- Client Secret: Paste Salesforce Consumer Secret
- Access Token Response Key: access_token
- Authorization URL: https://orgfarm-b7sda856-dev-ed.develop.my.salesforce.com/services/oauth2/authorize?response_type=code&client_id=YOUR_CLIENT_ID&redirect_uri=https://website.com/wp-admin/admin.php?page=cf7auth
- Redirect URI: Copy from plugin and paste in Salesforce app if not already added.
- Click Authorize → You should see: ✅ Connected
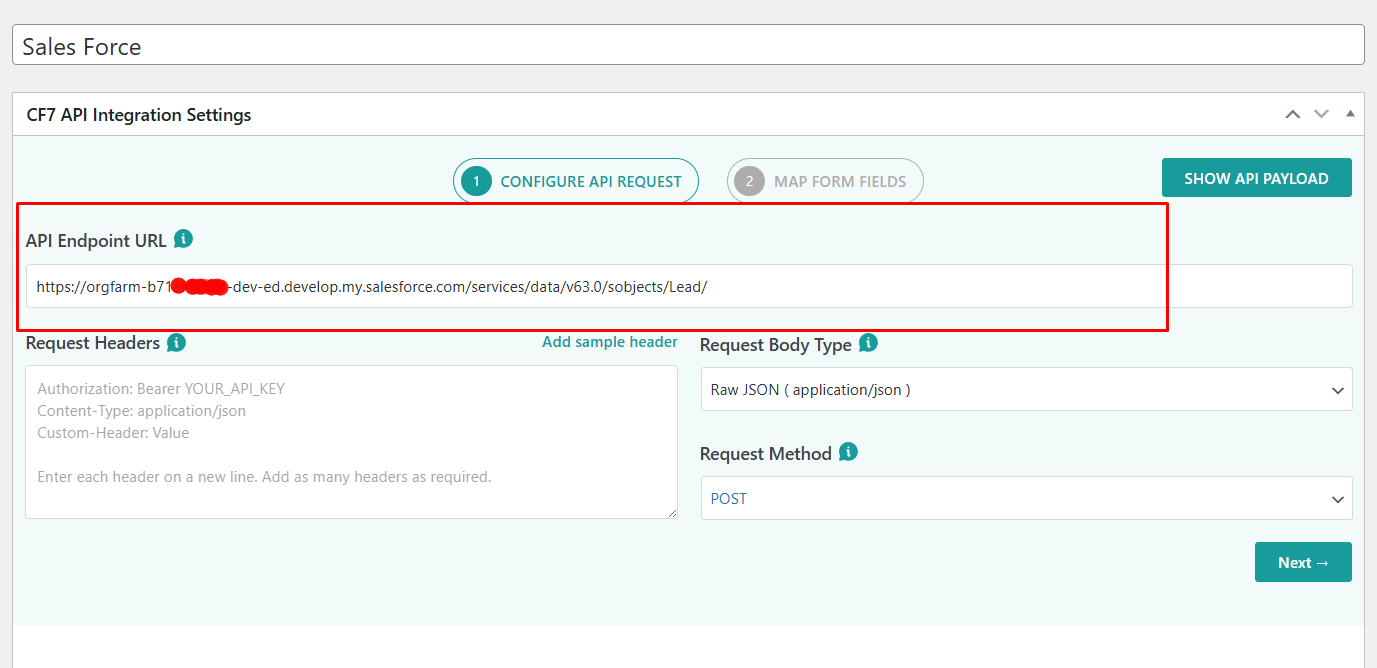
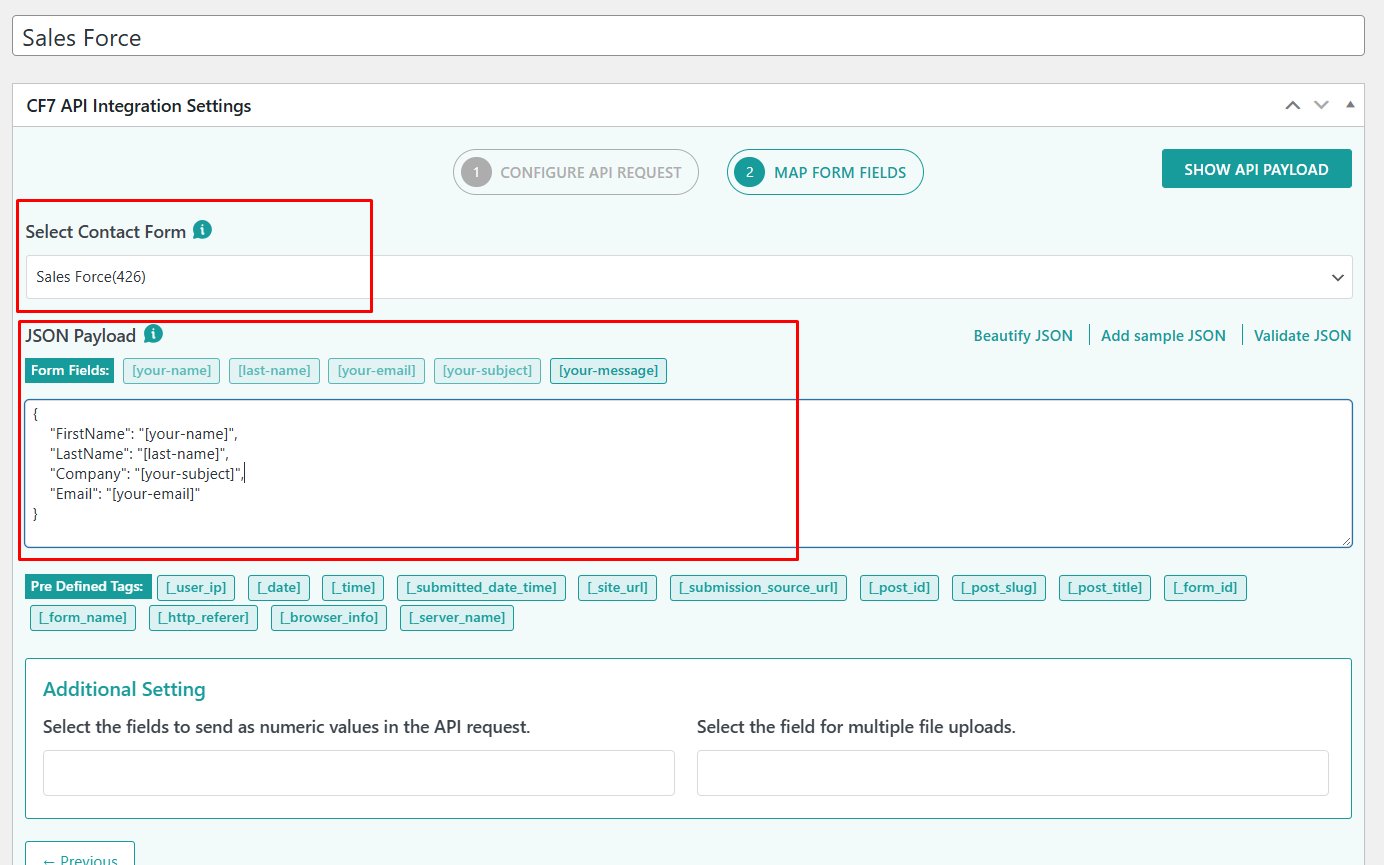
Step 6: Configure Salesforce API Request
Now go to: CF7 to Any API → All API Integrations → Add New Integration
- API Endpoint URL To create a Lead: https://yourdomain.my.salesforce.com/services/data/v63.0/sobjects/Lead/
-
Version matches your Salesforce version
-
Instance URL matches your org
Request Method: POST
Example JSON Payload:
“LastName”: “[last-name]”,
“Company”: “[your-subject]”,
“Email”: “[your-email]”
}
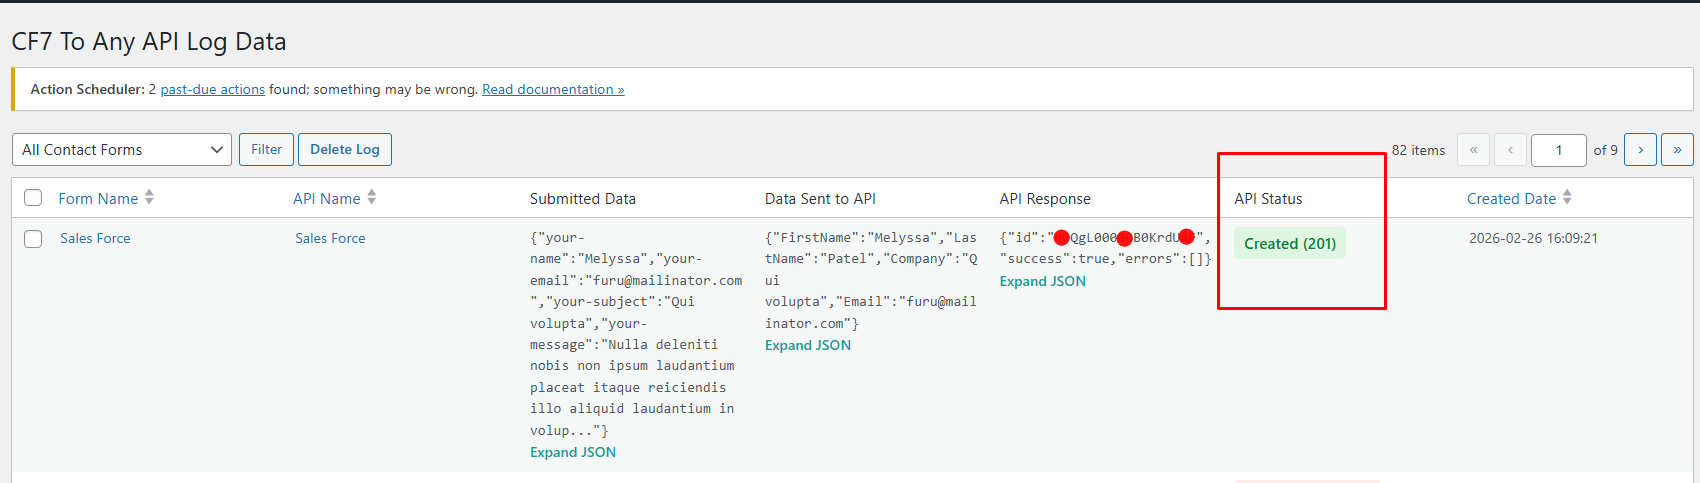
Test the Integration
Submit your Contact Form.
Go to: CF7 to Any API → API Logs