

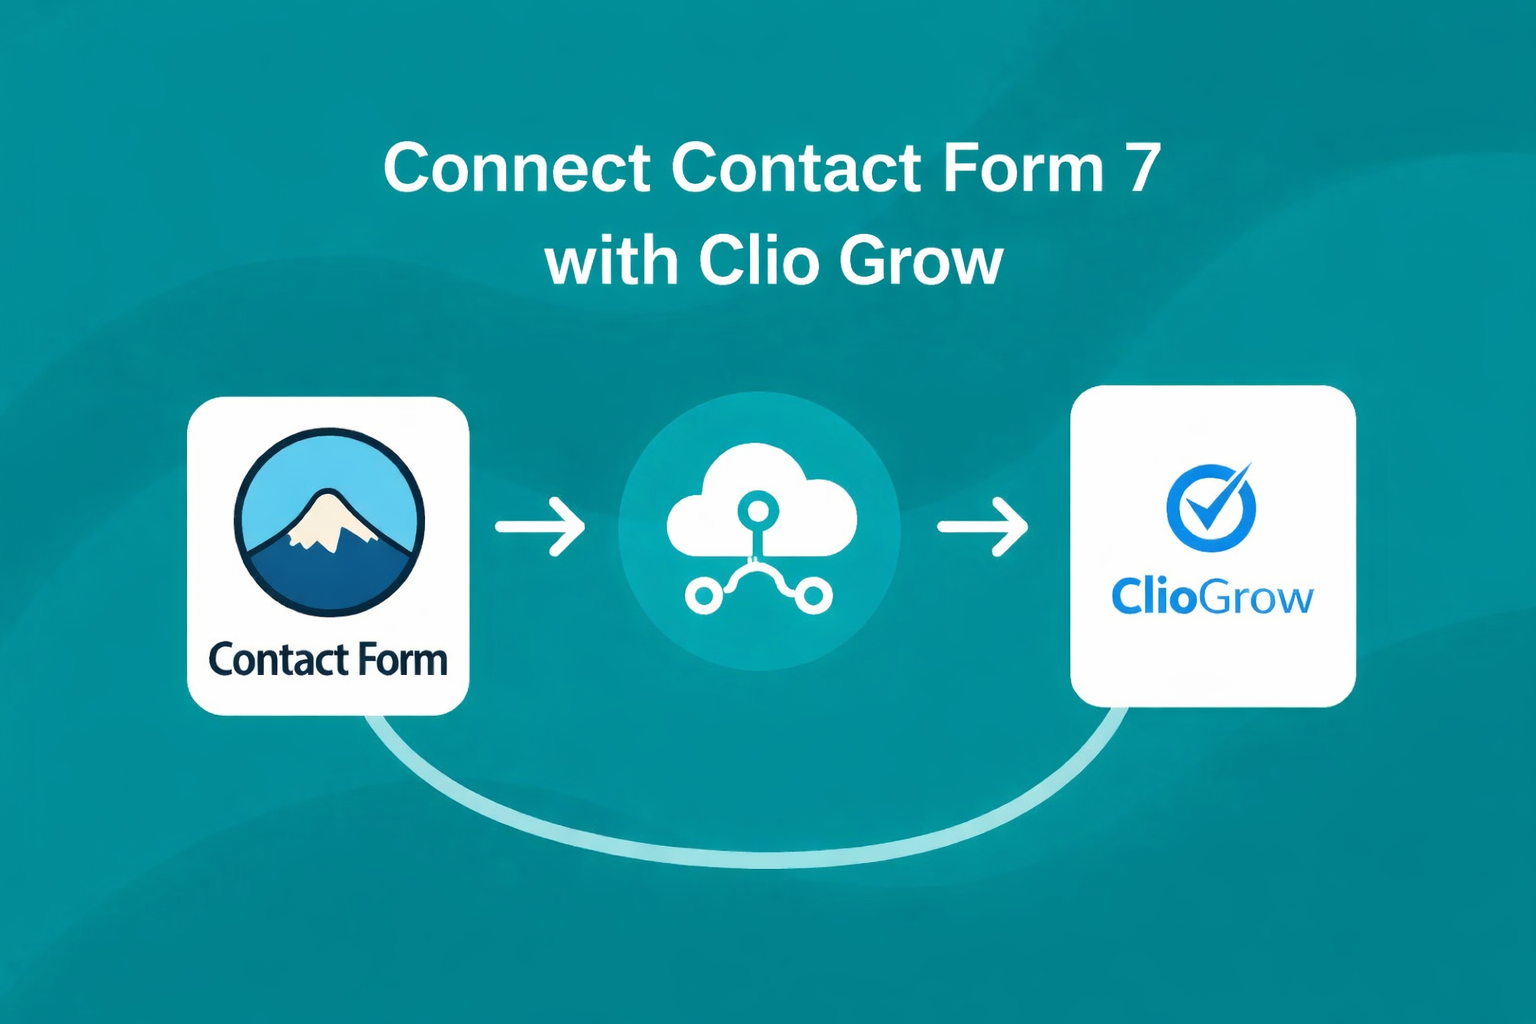
Managing leads manually between your website and CRM can slow down your workflow and increase the risk of missing important client inquiries. By integrating Contact Form 7 with Clio, you can automatically send form submissions directly to your Clio account as leads.
Using the OAuth2-based AuthMaster add-on, you can securely connect Clio’s API with Contact Form 7 without complex coding. Once configured, every form submission on your website will automatically create a lead in Clio, helping you streamline client intake and improve efficiency.
Watch the Video Tutorial: CF7 with Clio Integration (Step-by-Step)
Prefer a visual walkthrough? Watch our complete step-by-step video tutorial on how to connect Contact Form 7 with Clio using AuthMaster (OAuth2).
👉 Watch here:
Follow the steps below to set up the integration successfully.
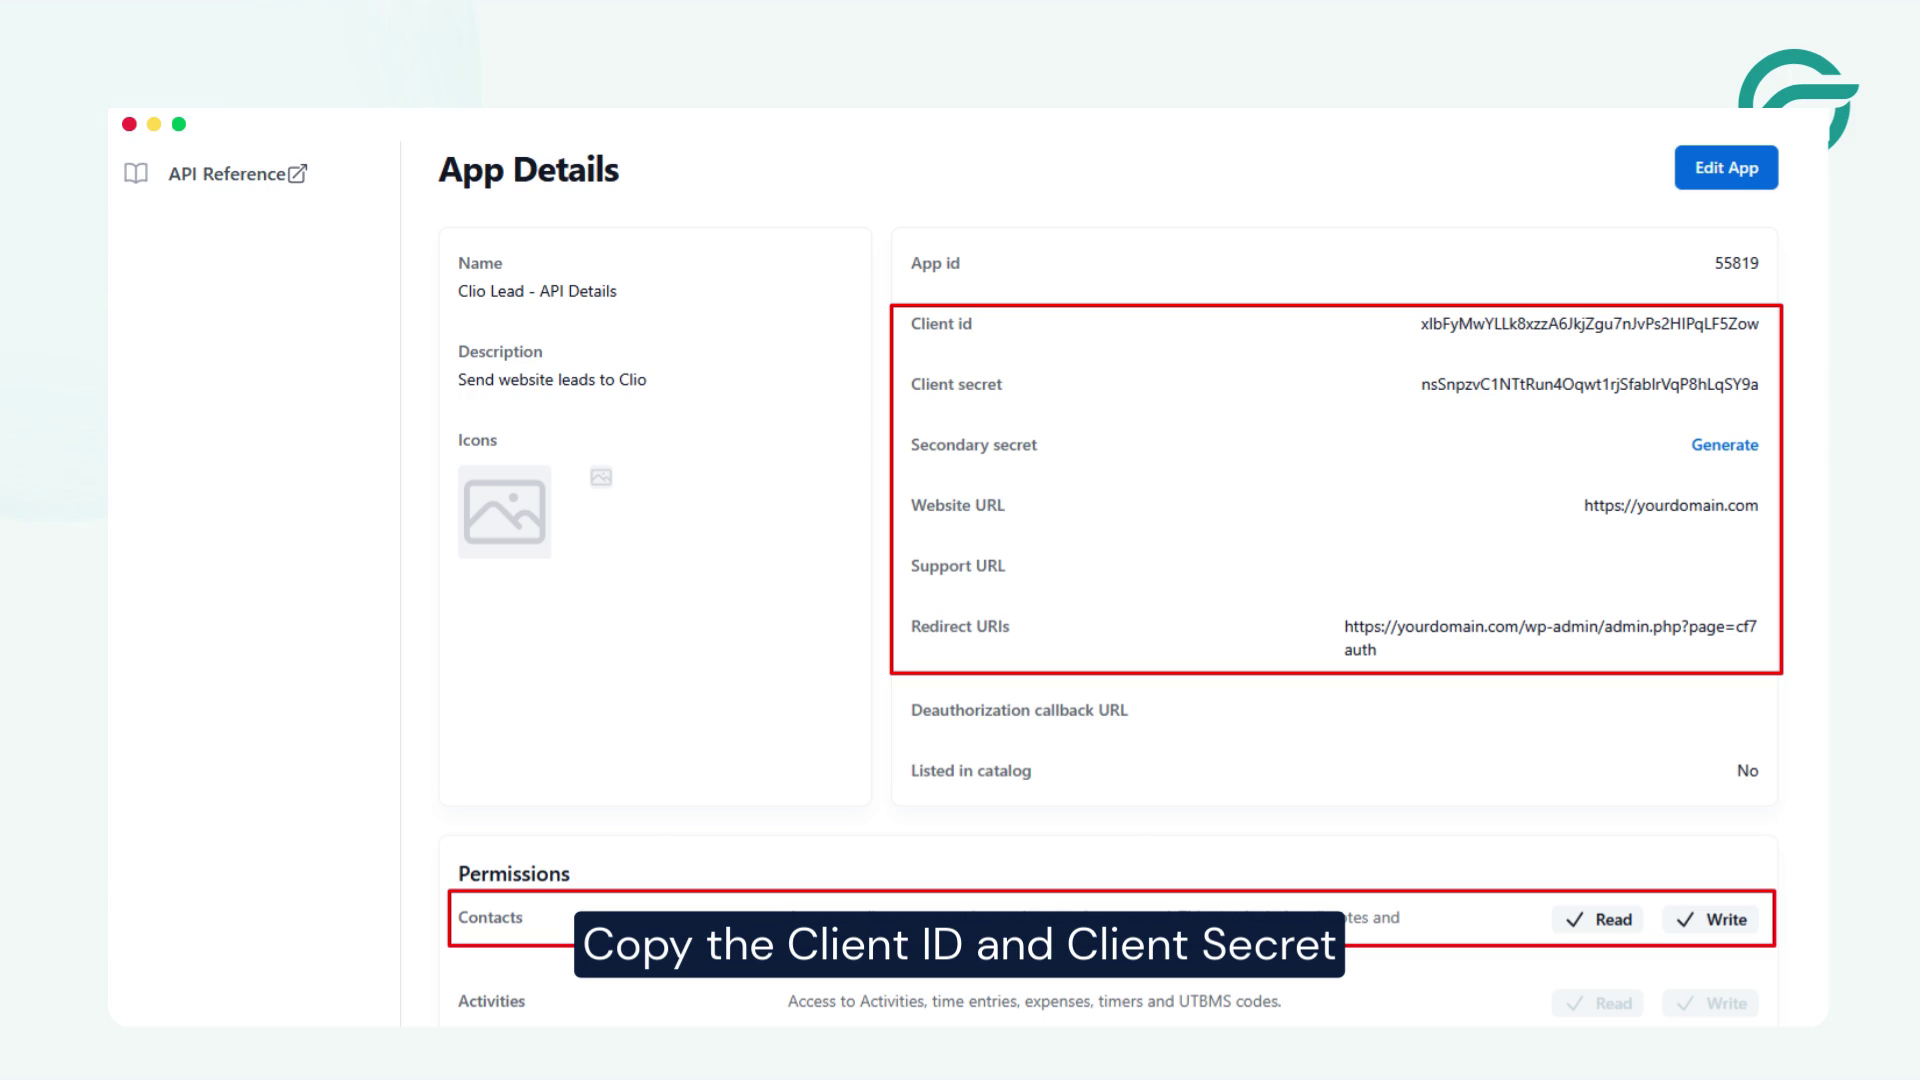
Step 1: Create a New App in Clio
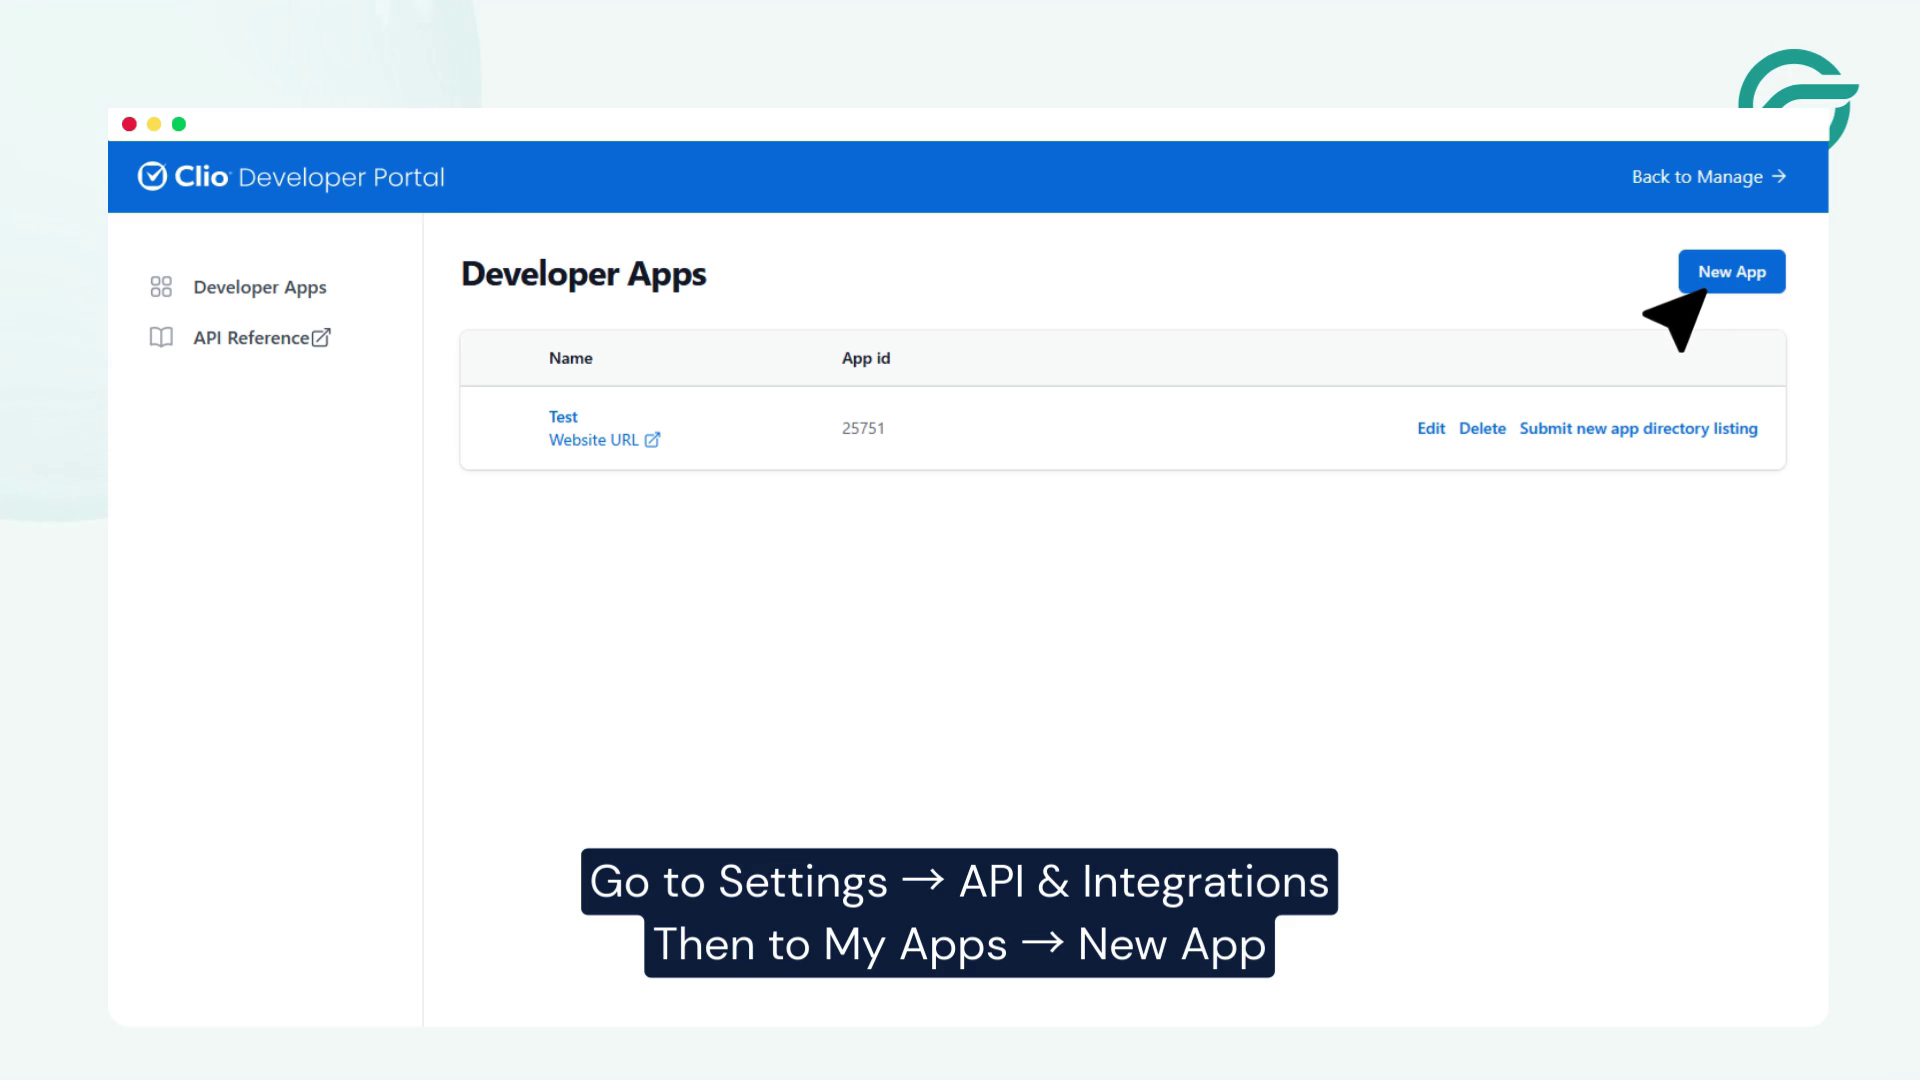
- Log in to your Clio account.
- Go to Settings → API & Integrations.
- Click My Apps → New App.
- Create a new app.
- Copy the following credentials:
- Client ID
- Client Secret
You will need these for authentication in WordPress.
Step 2: Create a New Integration in WordPress
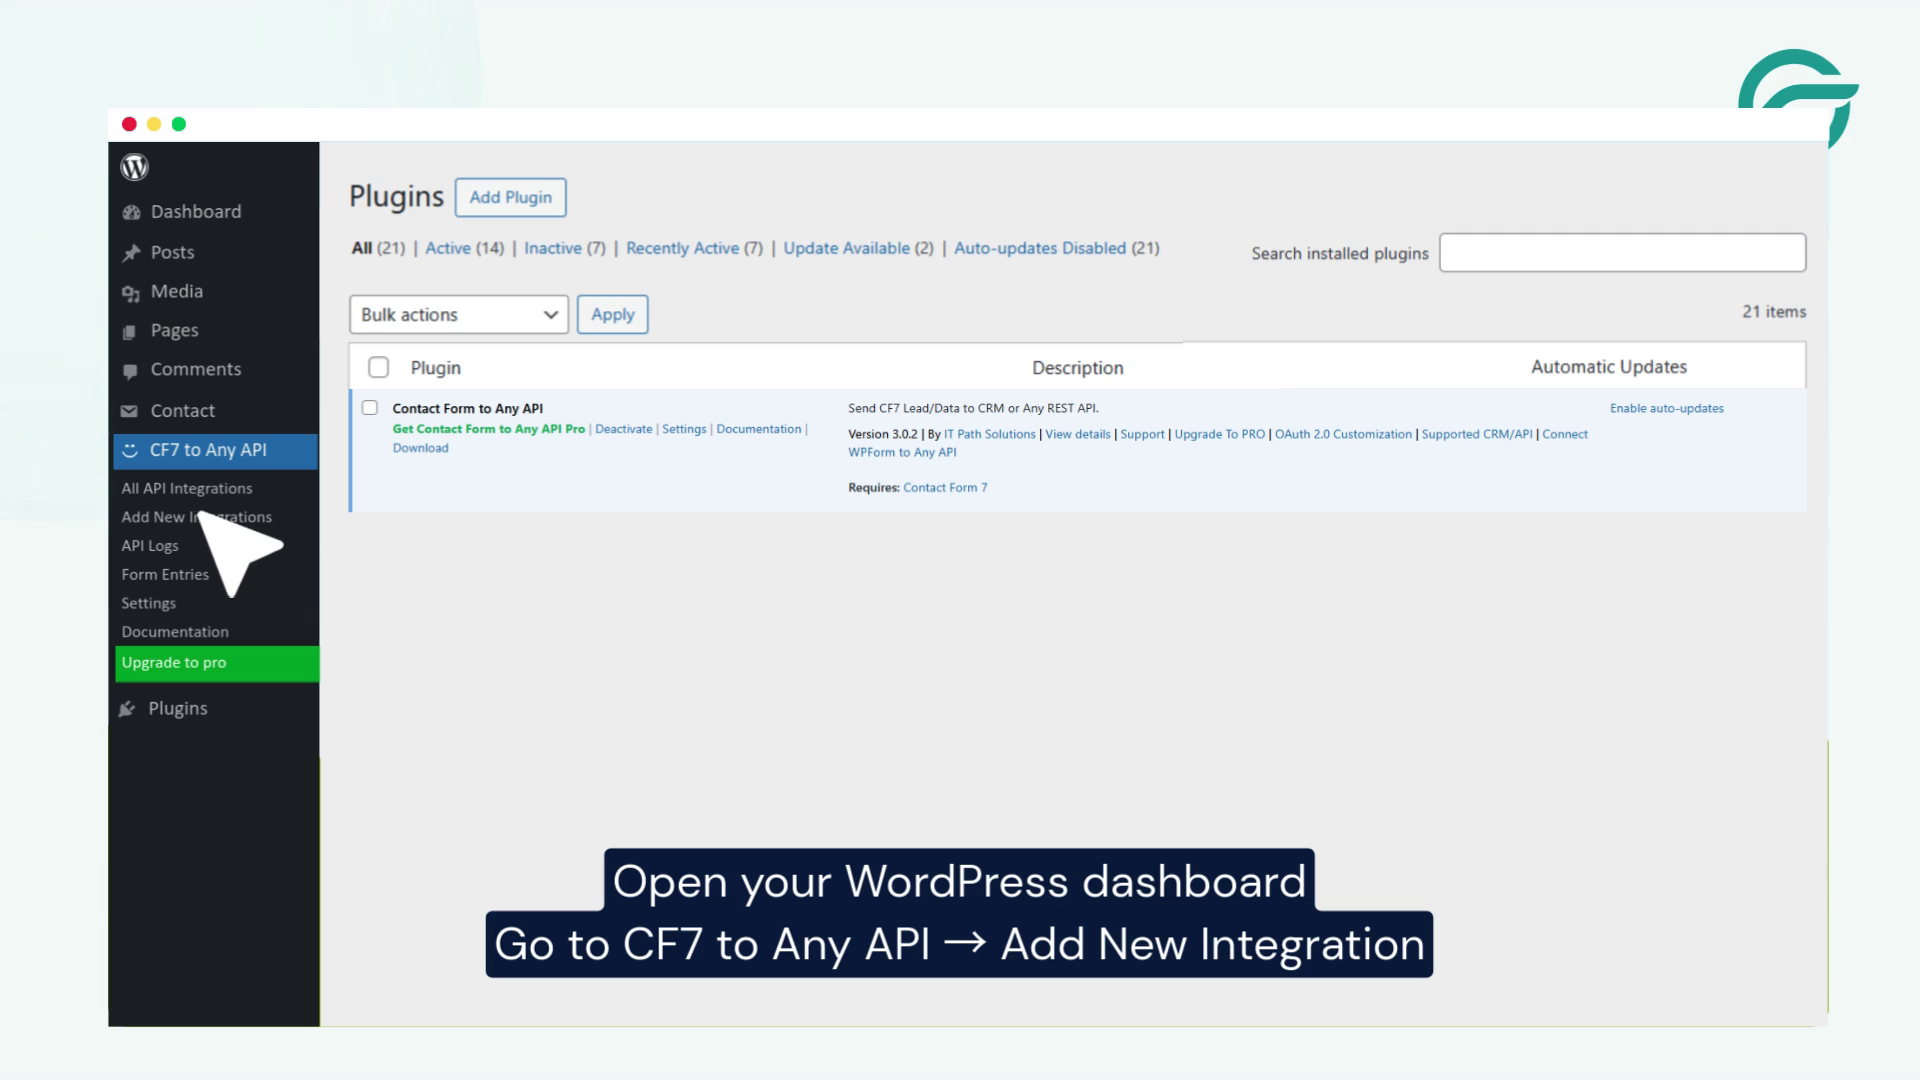
- Open your WordPress dashboard.
- Navigate to:
Contact Form 7 to Any API → Add New Integration - Add a title for your integration.
Example: Clio Lead Integration
Step 3: Configure OAuth2 Using AuthMaster
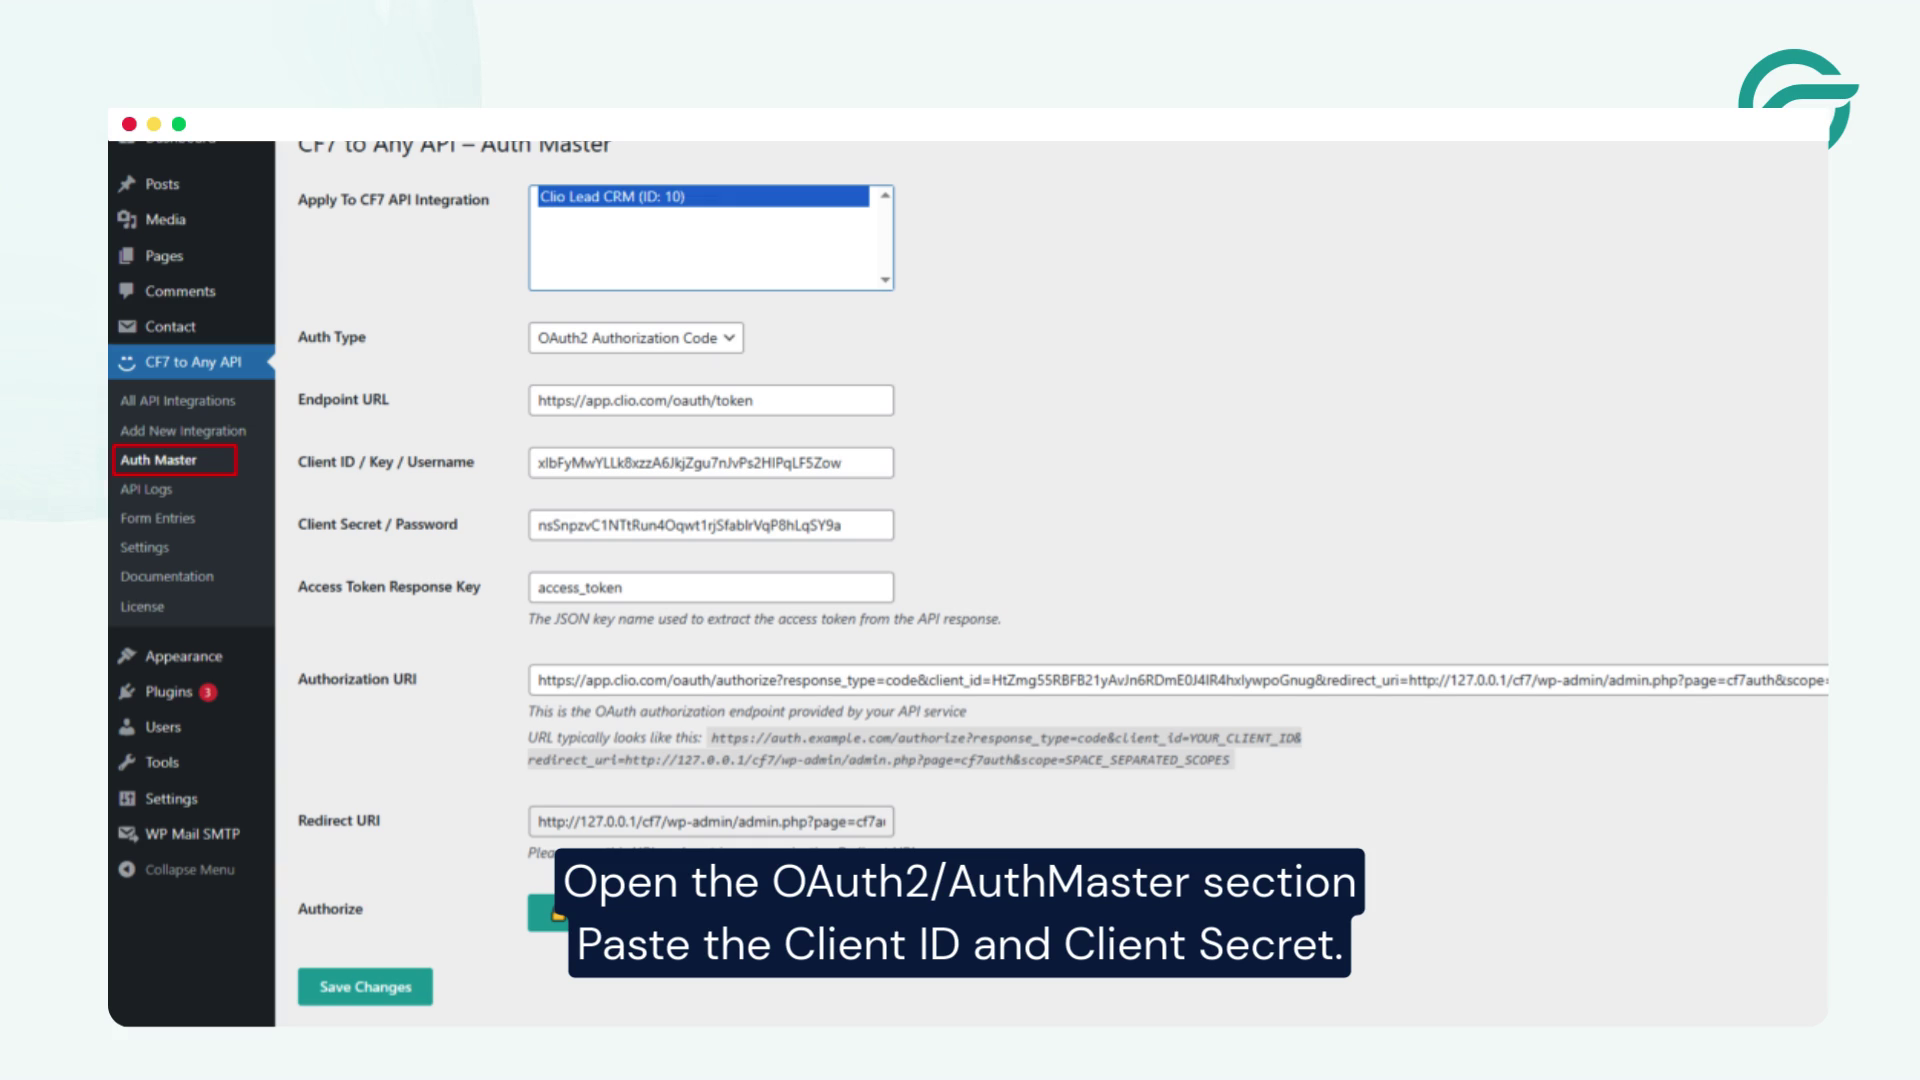
- Open the OAuth2/AuthMaster section inside the integration settings.
- Paste the following details:
- Client ID
- Client Secret
Note: AuthMaster is a paid add-on available for $99.
- After configuration:
- Copy the API URL generated by AuthMaster
- Use the dynamically generated Bearer Token for secure authentication
This ensures secure communication between WordPress and Clio.
Step 4: Add the Clio Leads API Endpoint
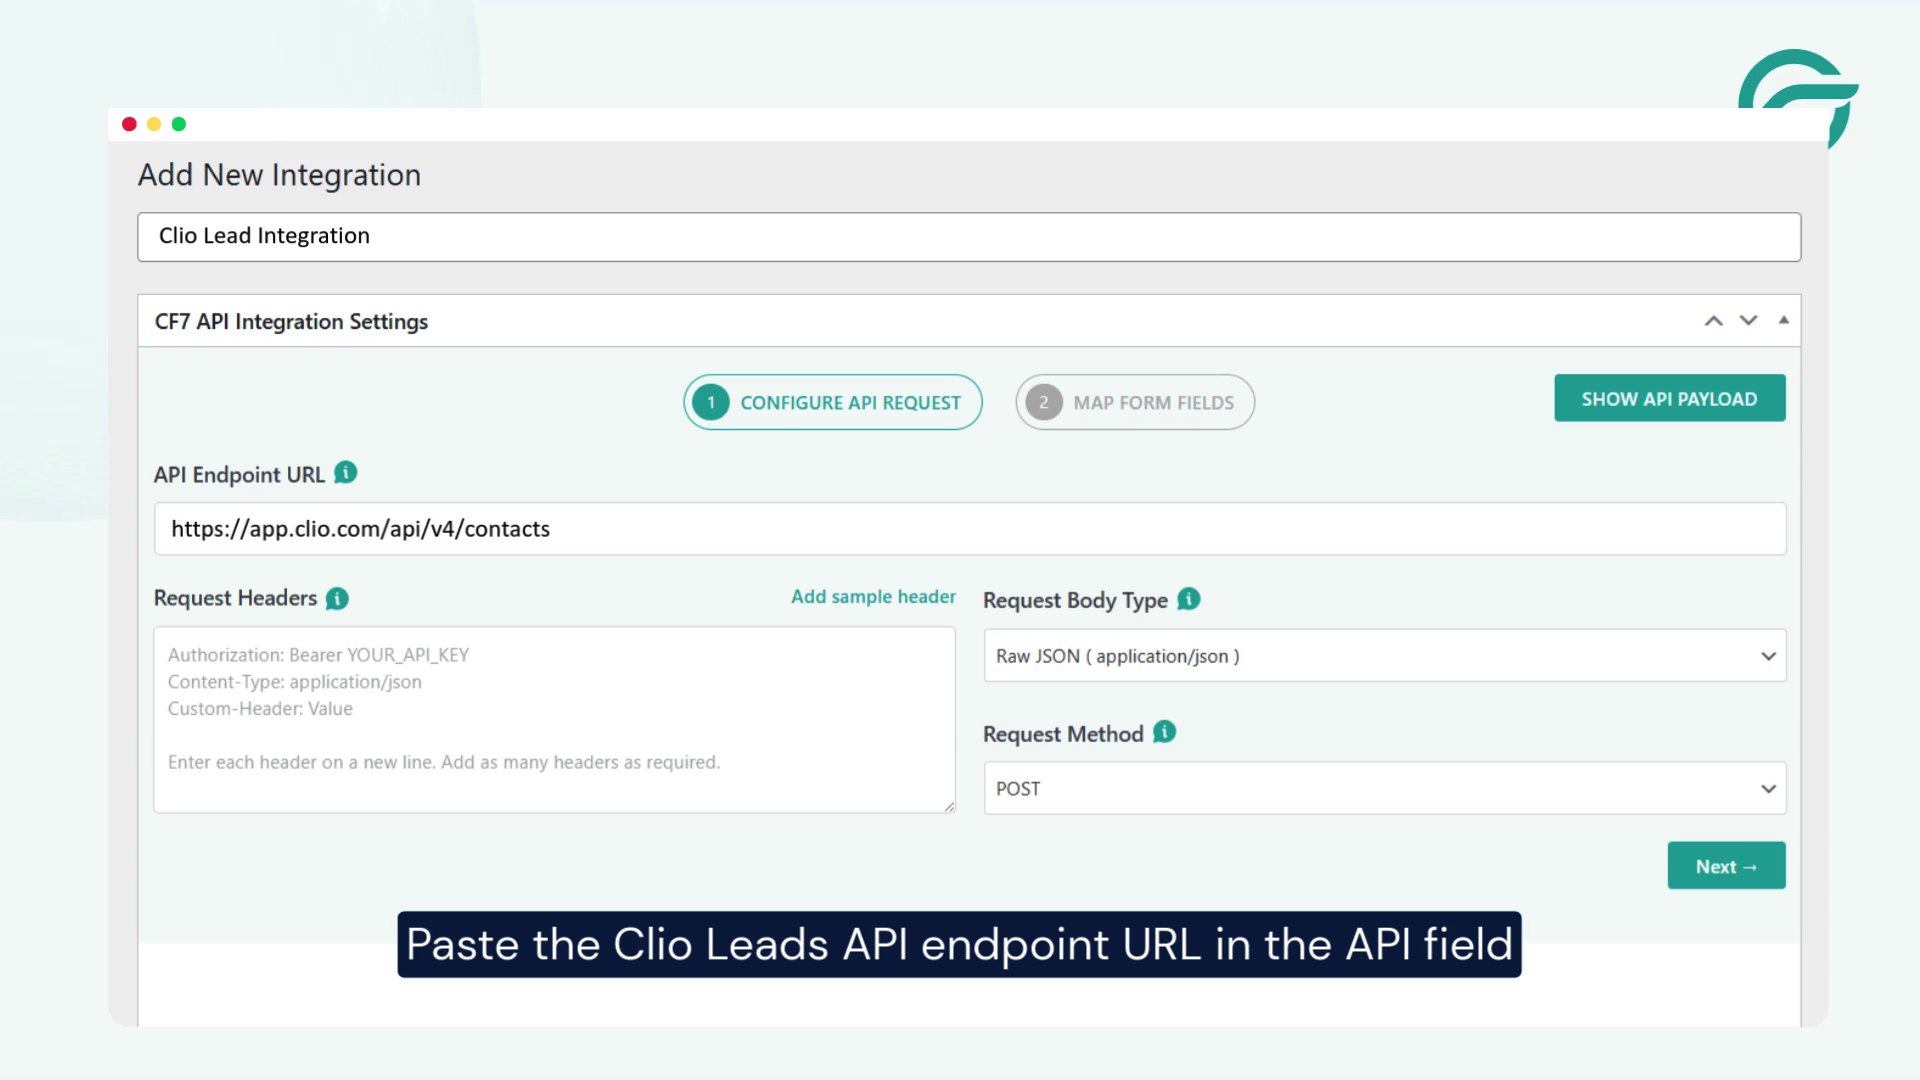
- Paste the Clio Leads API endpoint URL into the API Endpoint field.
- Ensure the Bearer token is properly applied via AuthMaster.
This endpoint will receive and process lead data from your contact form.
Step 5: Select Your Contact Form
Choose the Contact Form 7 form you want to connect with Clio.
Only submissions from this form will create leads in your Clio account.
Step 6: Map Clio Fields with Contact Form Fields
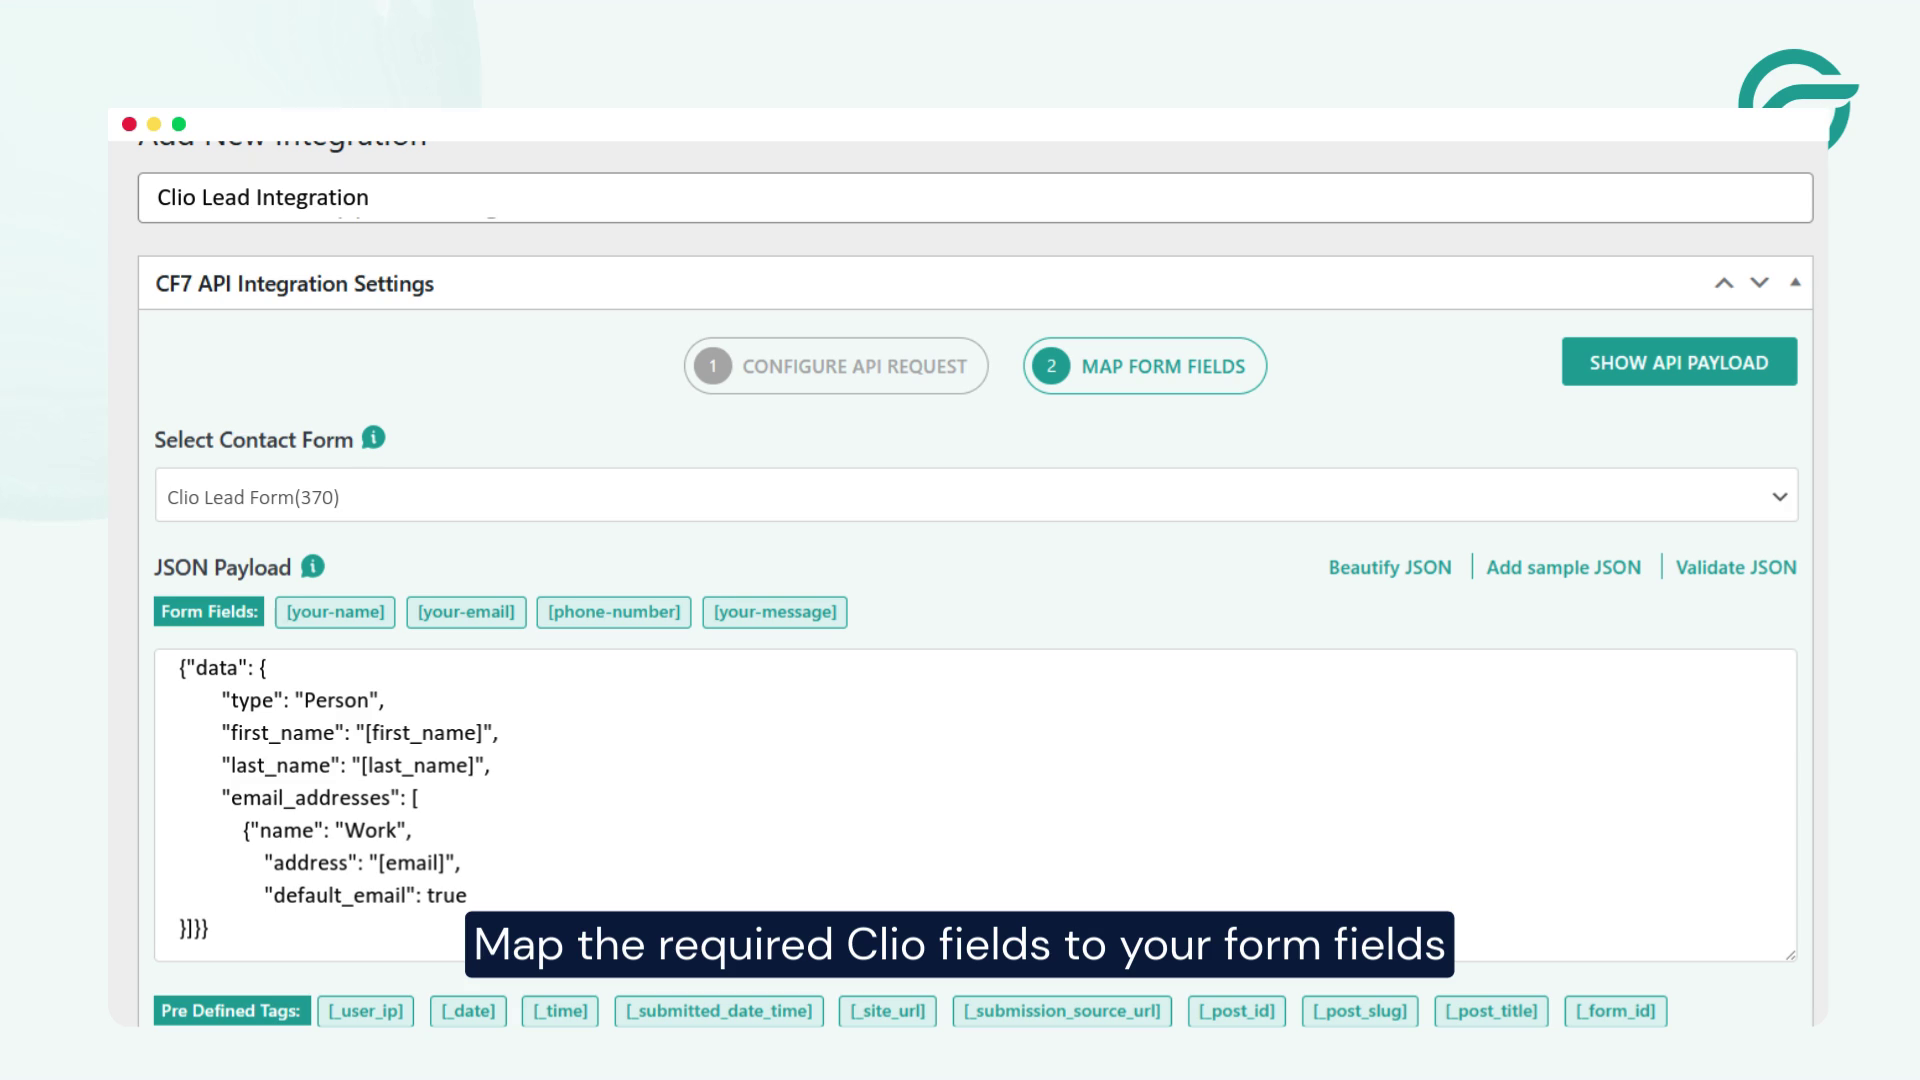
Map the required Clio lead fields with your form fields, such as:
- Name
- Phone
- Message
- Lead details
This ensures accurate lead creation inside Clio.
Step 7: Save and Activate the Integration
Click Save Integration to activate the connection.
Your WordPress site is now ready to send data to Clio.
Step 8: Test and Verify the Integration
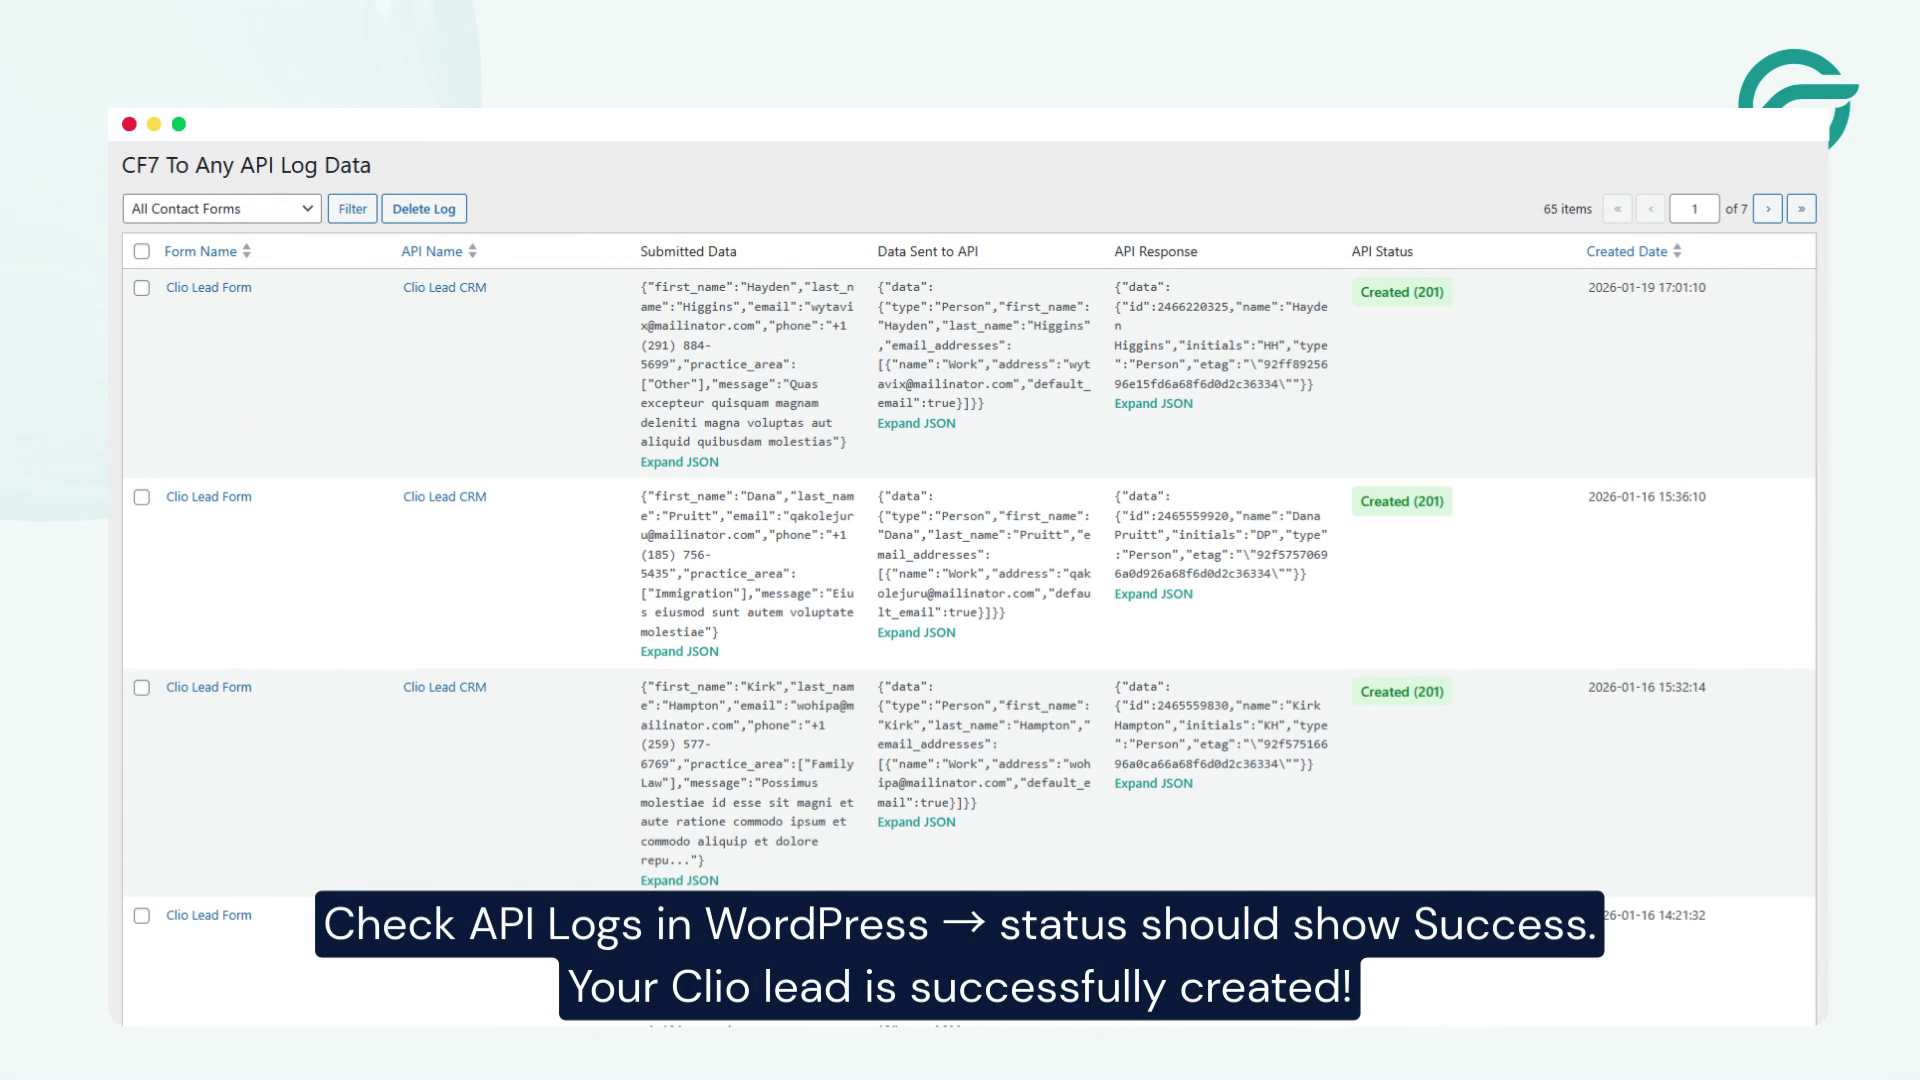
- Submit a test entry using your contact form.
- Go to API Logs inside WordPress.
- Check the status — it should show Success.
- Log in to Clio and confirm the lead has been created.
Your Clio lead integration is now working successfully
Conclusion
Integrating Contact Form 7 with Clio using AuthMaster allows you to automate lead creation securely using OAuth2 authentication. This eliminates manual data entry, improves response times, and ensures every client inquiry is captured efficiently.
Once configured, your website automatically sends lead data to Clio in real time, helping your team stay organized and respond faster to potential clients. This integration is especially valuable for law firms and legal professionals who want to streamline their client intake process and improve workflow automation.


