



Connecting Contact Form 7 with Less Annoying CRM can help WordPress users streamline the process of capturing and managing leads. Instead of manually transferring information from website form submissions into a CRM, you can send contact data directly to Less Annoying CRM through its API. This can reduce repetitive data entry, improve lead management, and help ensure new inquiries reach your CRM more efficiently.
The Contact Form to Any API plugin makes this integration easier by allowing you to configure the Less Annoying CRM API endpoint, add the required authentication details, and map Contact Form 7 fields to the appropriate Less Annoying CRM fields. Once configured, form submissions can be sent to Less Annoying CRM automatically, helping you keep customer and prospect information organized in one place.
In this guide, we’ll walk you through the process of connecting Contact Form 7 with Less Annoying CRM in WordPress. You’ll learn how to sign in to your Less Annoying CRM account, create a new integration in WordPress, configure the API endpoint and request headers, select your Contact Form 7 form, map your form fields using a JSON payload, and submit a test entry to verify that the integration is working correctly.
Watch the Video Tutorial: CF7 with Less Annoying CRM Integration (Step-by-Step)
Before following the written steps, you can watch the complete integration setup in this quick video tutorial.
Follow the steps below to create your Less Annoying CRM integration in WordPress.
1. Sign in to Your Less Annoying CRM Account
First, sign in to your Less Annoying CRM account using your account credentials.
Make sure you have access to the Less Annoying CRM settings and permissions required to enable the Programmer API and create an API key.
2. Open WordPress
Next, log in to your WordPress admin dashboard.
From here, you can configure the integration between your Contact Form 7 form and Less Annoying CRM using the Contact Form to Any API plugin.
3. Go to Contact Form to Any API → Add New Integration
From your WordPress dashboard, navigate to:
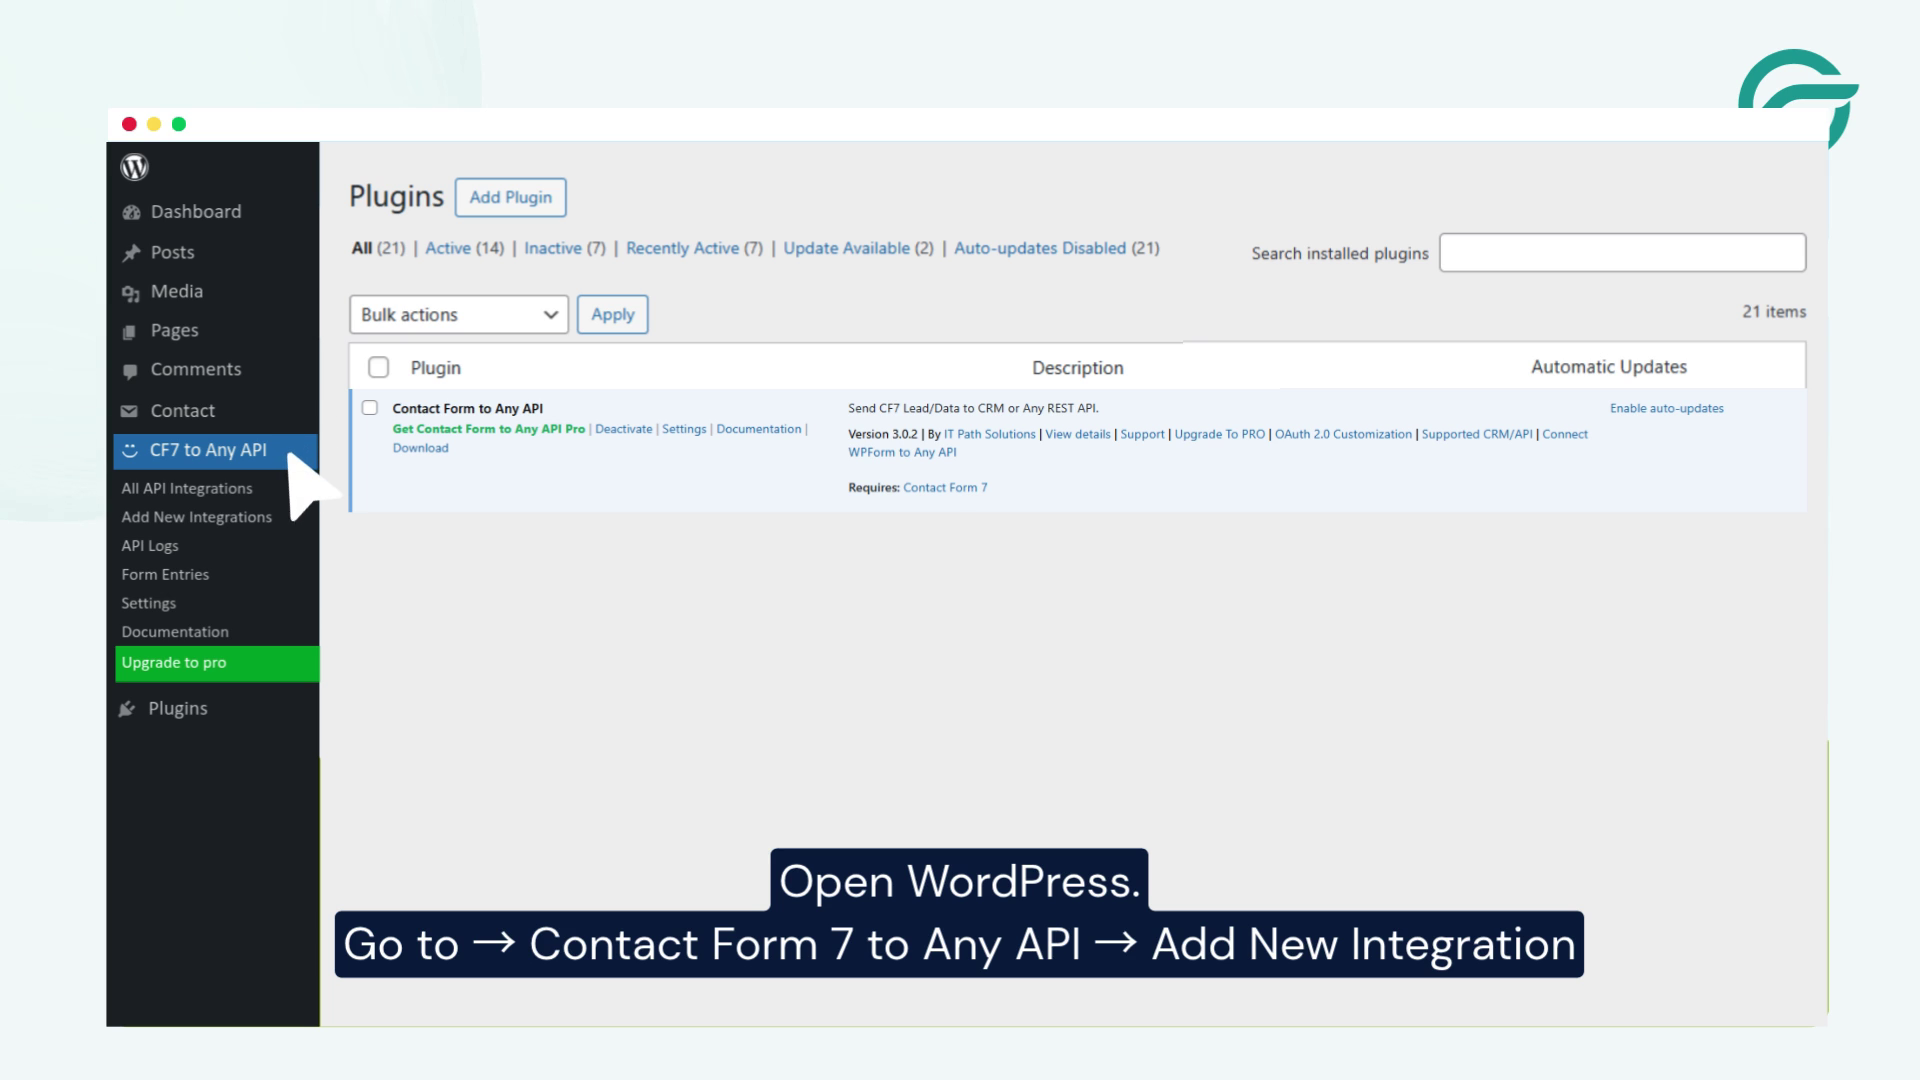
Contact Form to Any API → Add New Integration
This will open the integration setup screen where you can configure the Less Annoying CRM API connection.
4. Add a New Integration Title
Enter a title for your integration so you can easily identify it later.
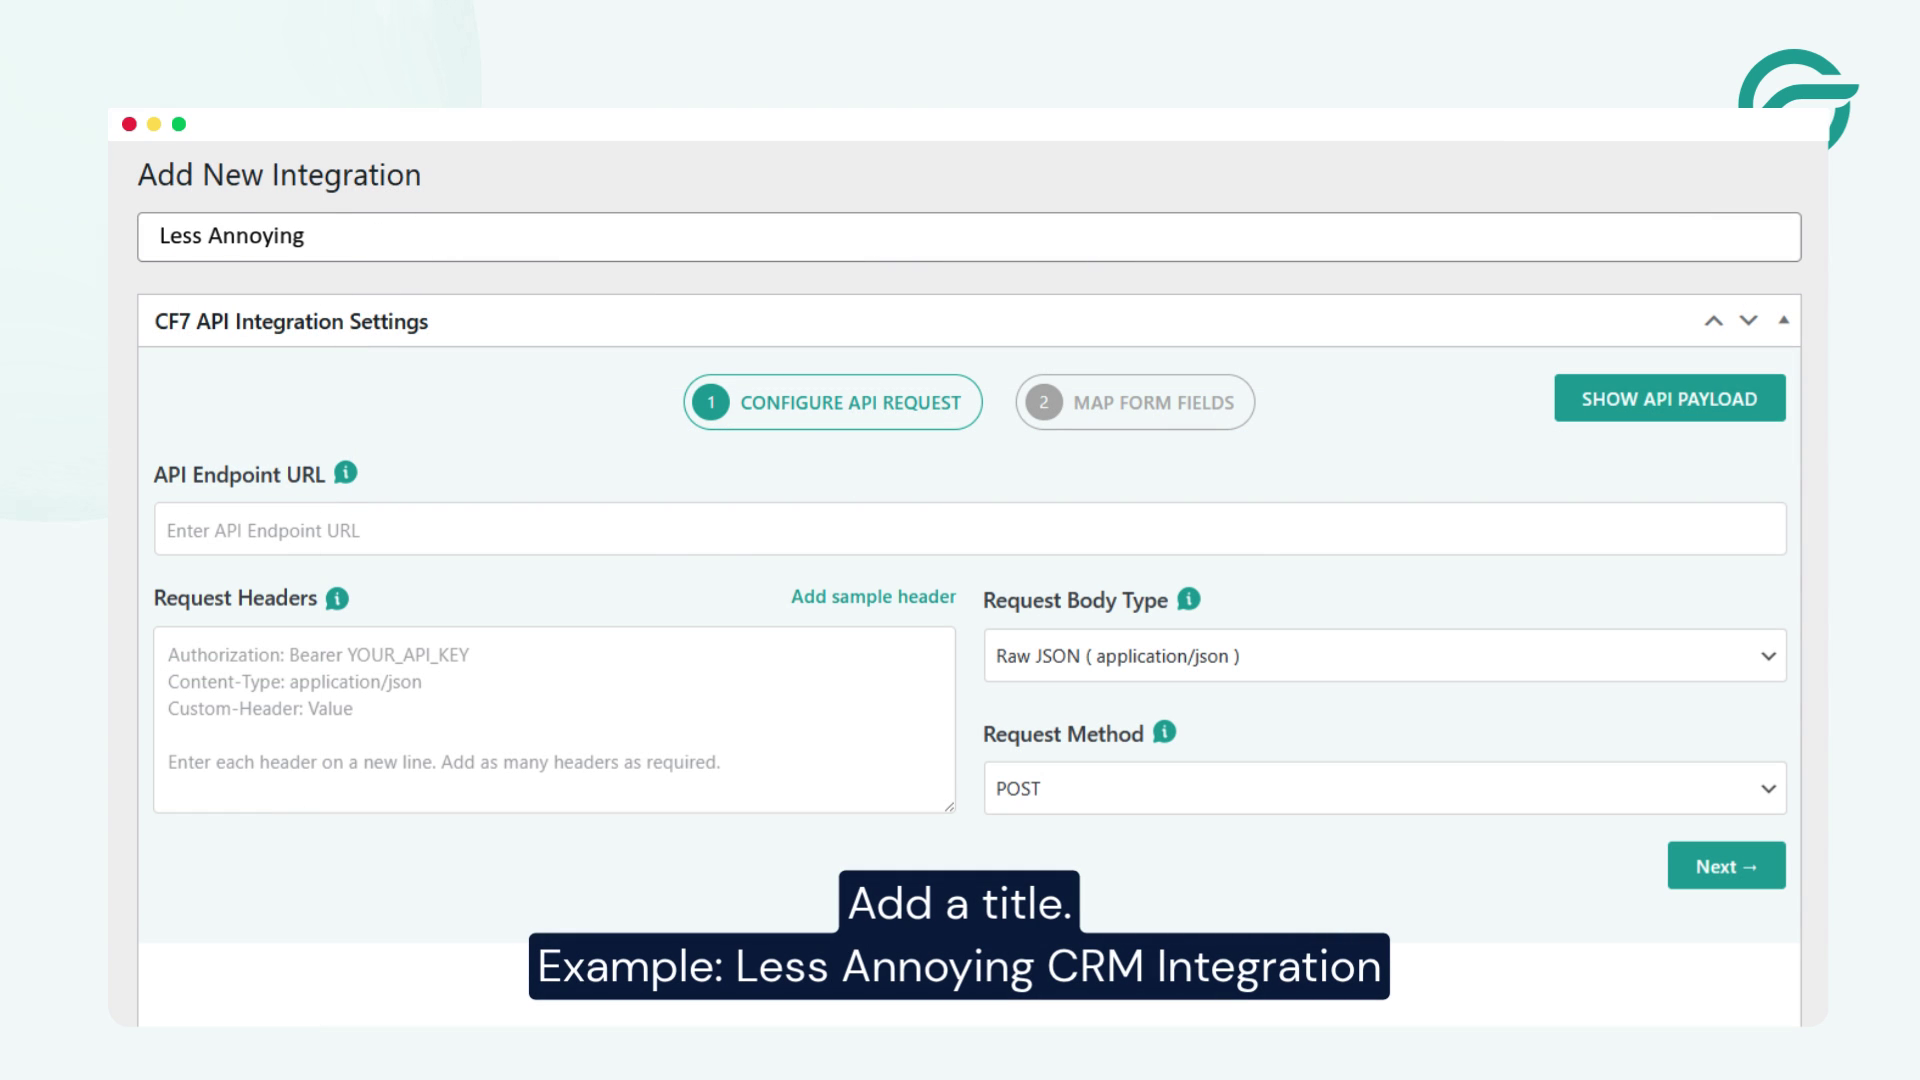
For example:
Less Annoying CRM Integration
You can use any descriptive name that helps you recognize the purpose of the integration.
5. Go to Less Annoying CRM Documentation and Copy the API Endpoint URL
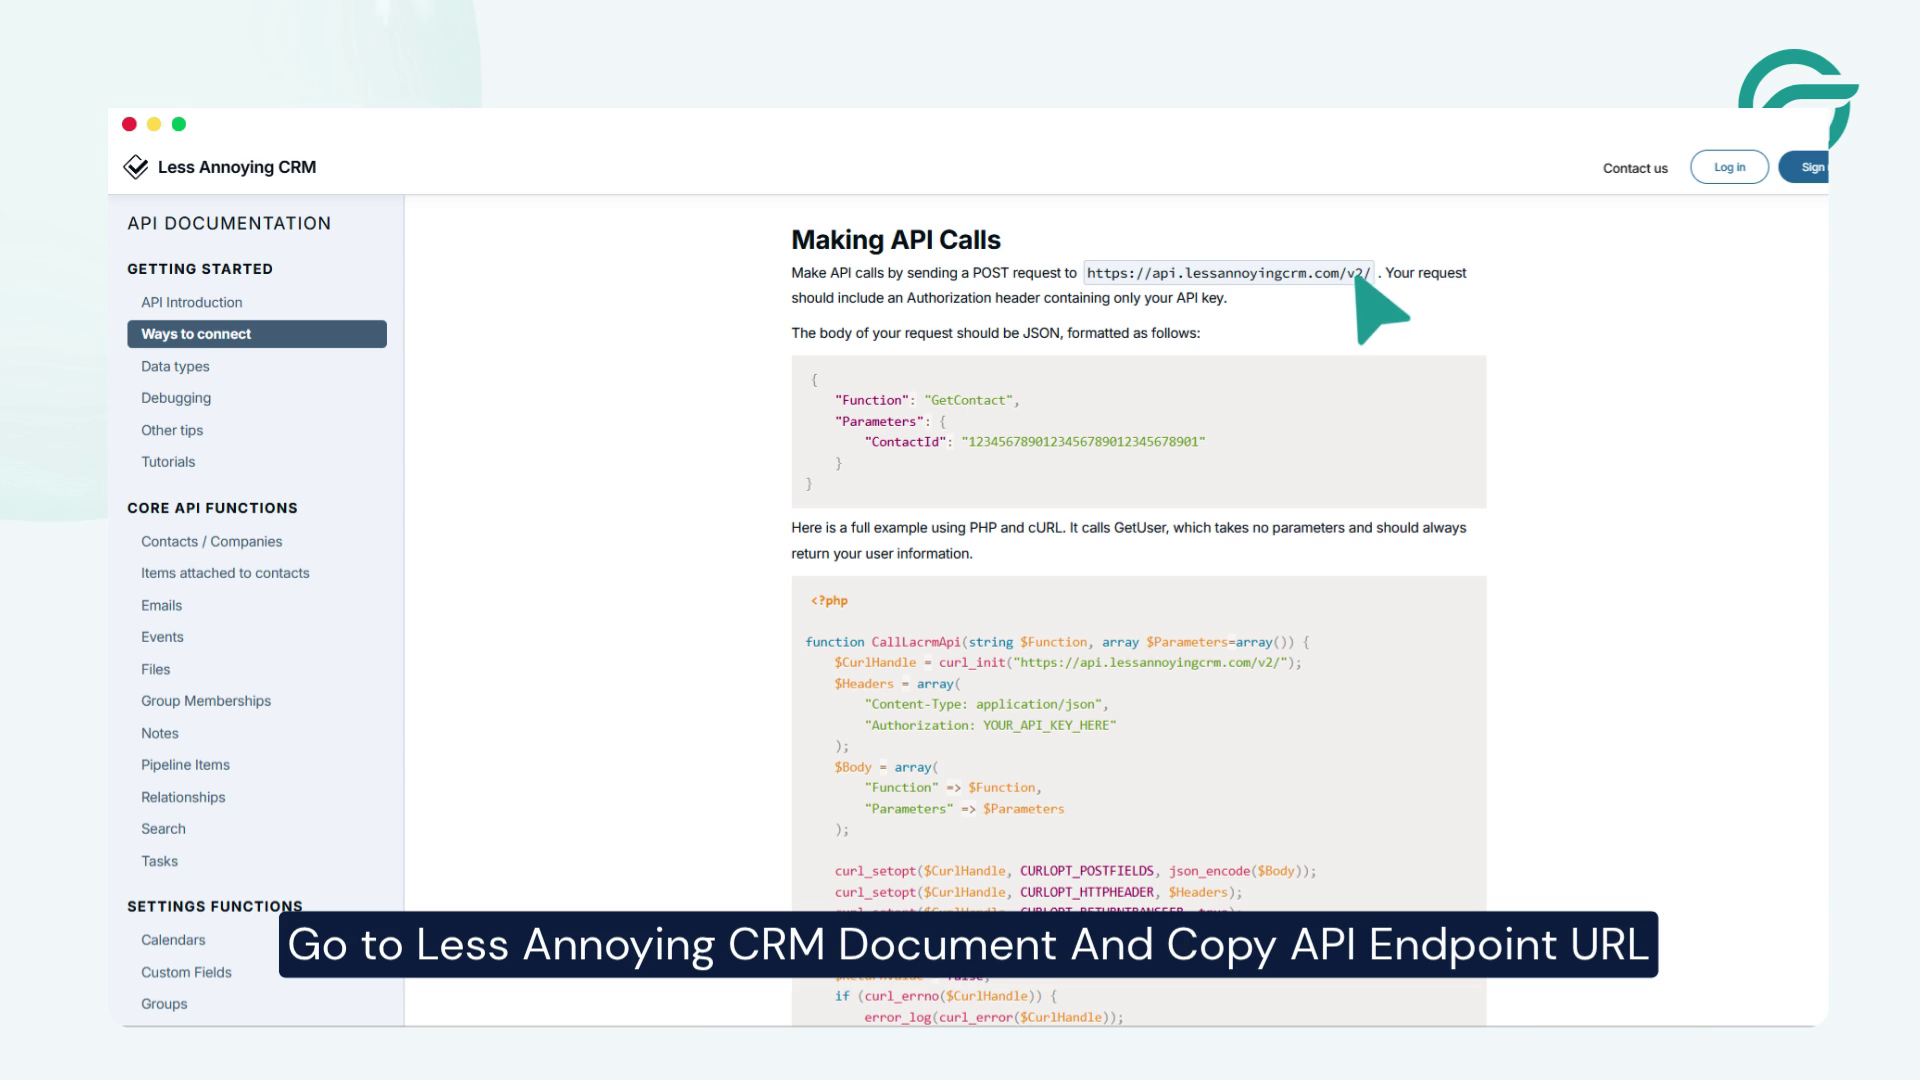
Next, go to the Less Annoying CRM documentation and find the API endpoint URL required for your integration.
Copy the API endpoint URL provided by Less Annoying CRM.
6. Add the Less Annoying CRM API Endpoint in WordPress
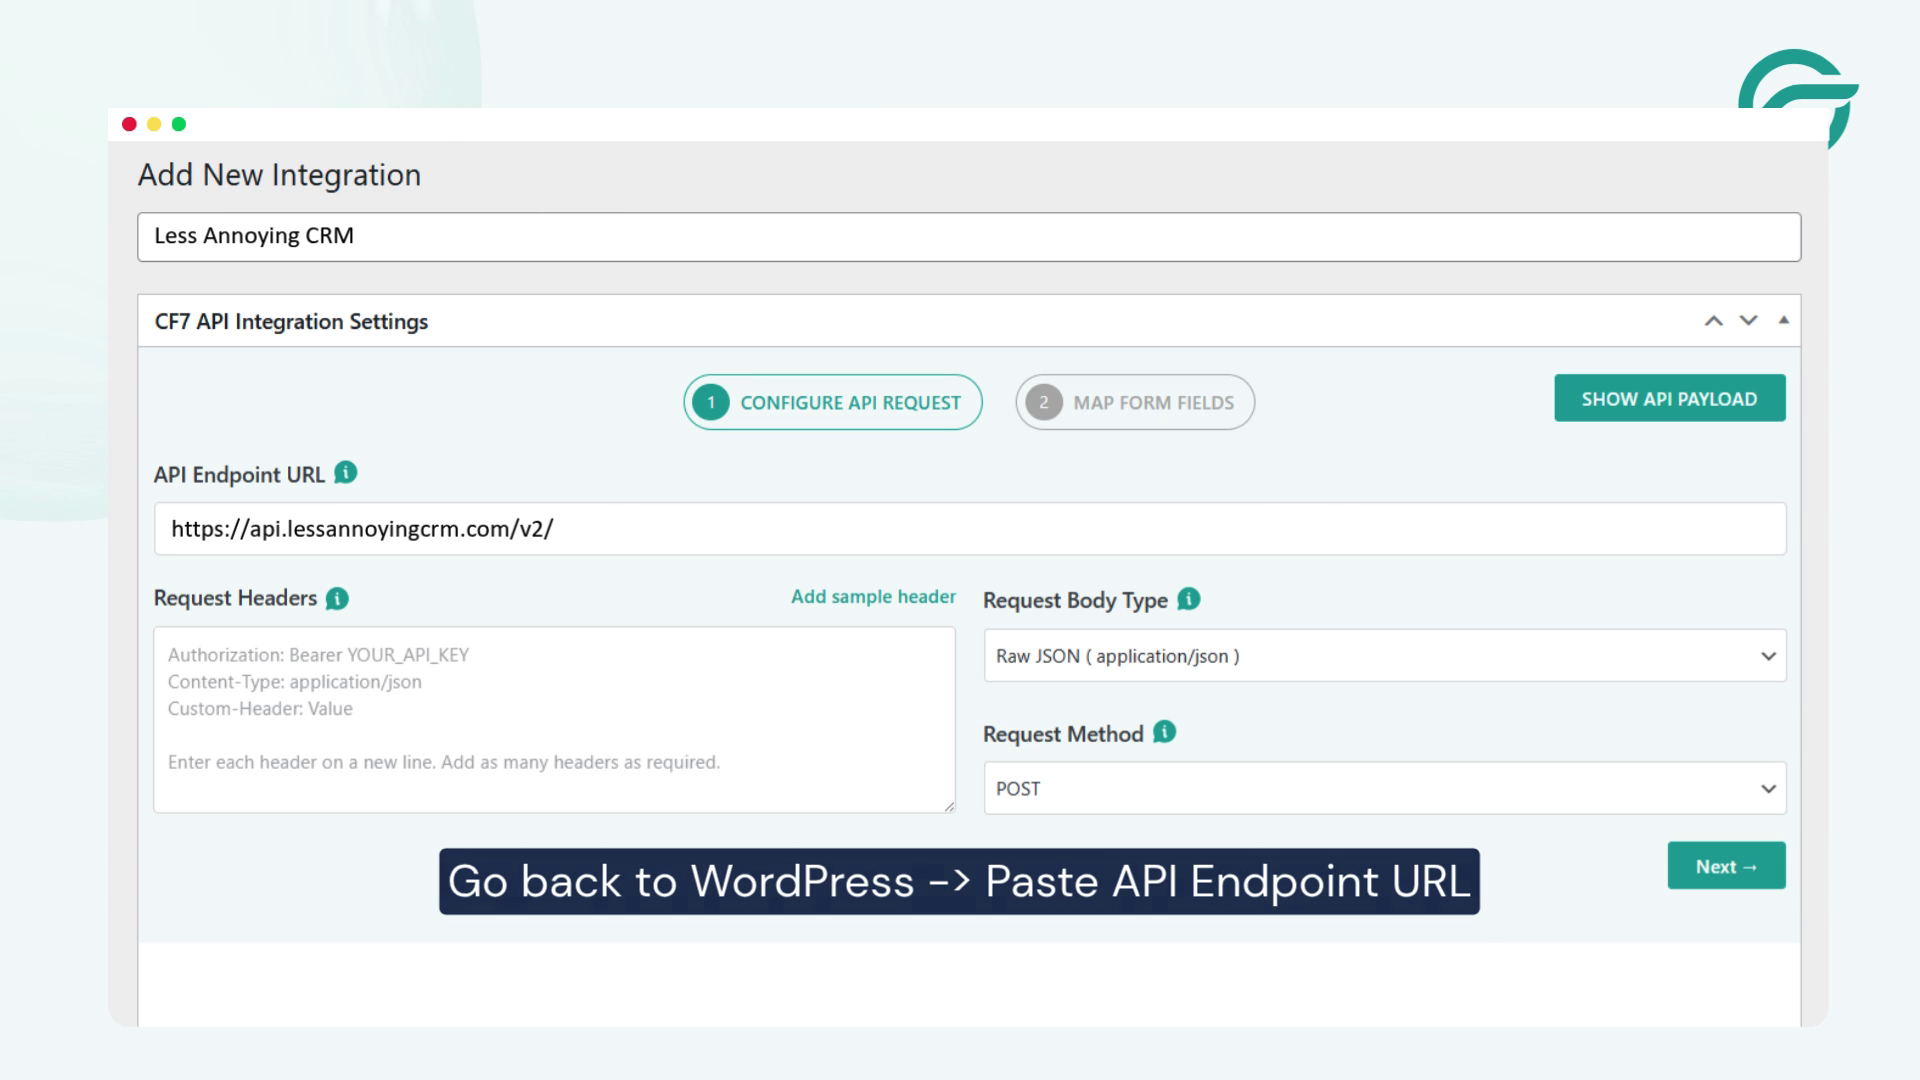
Go back to your WordPress dashboard and locate the API Endpoint URL field in the Contact Form to Any API integration settings.
Paste the Less Annoying CRM API endpoint URL:
https://api.lessannoyingcrm.com/v2/
This endpoint allows your WordPress integration to communicate with Less Annoying CRM through its API.
7. Create Your Less Annoying CRM API Key
Next, you need to create an API key to authenticate requests sent from WordPress to Less Annoying CRM.
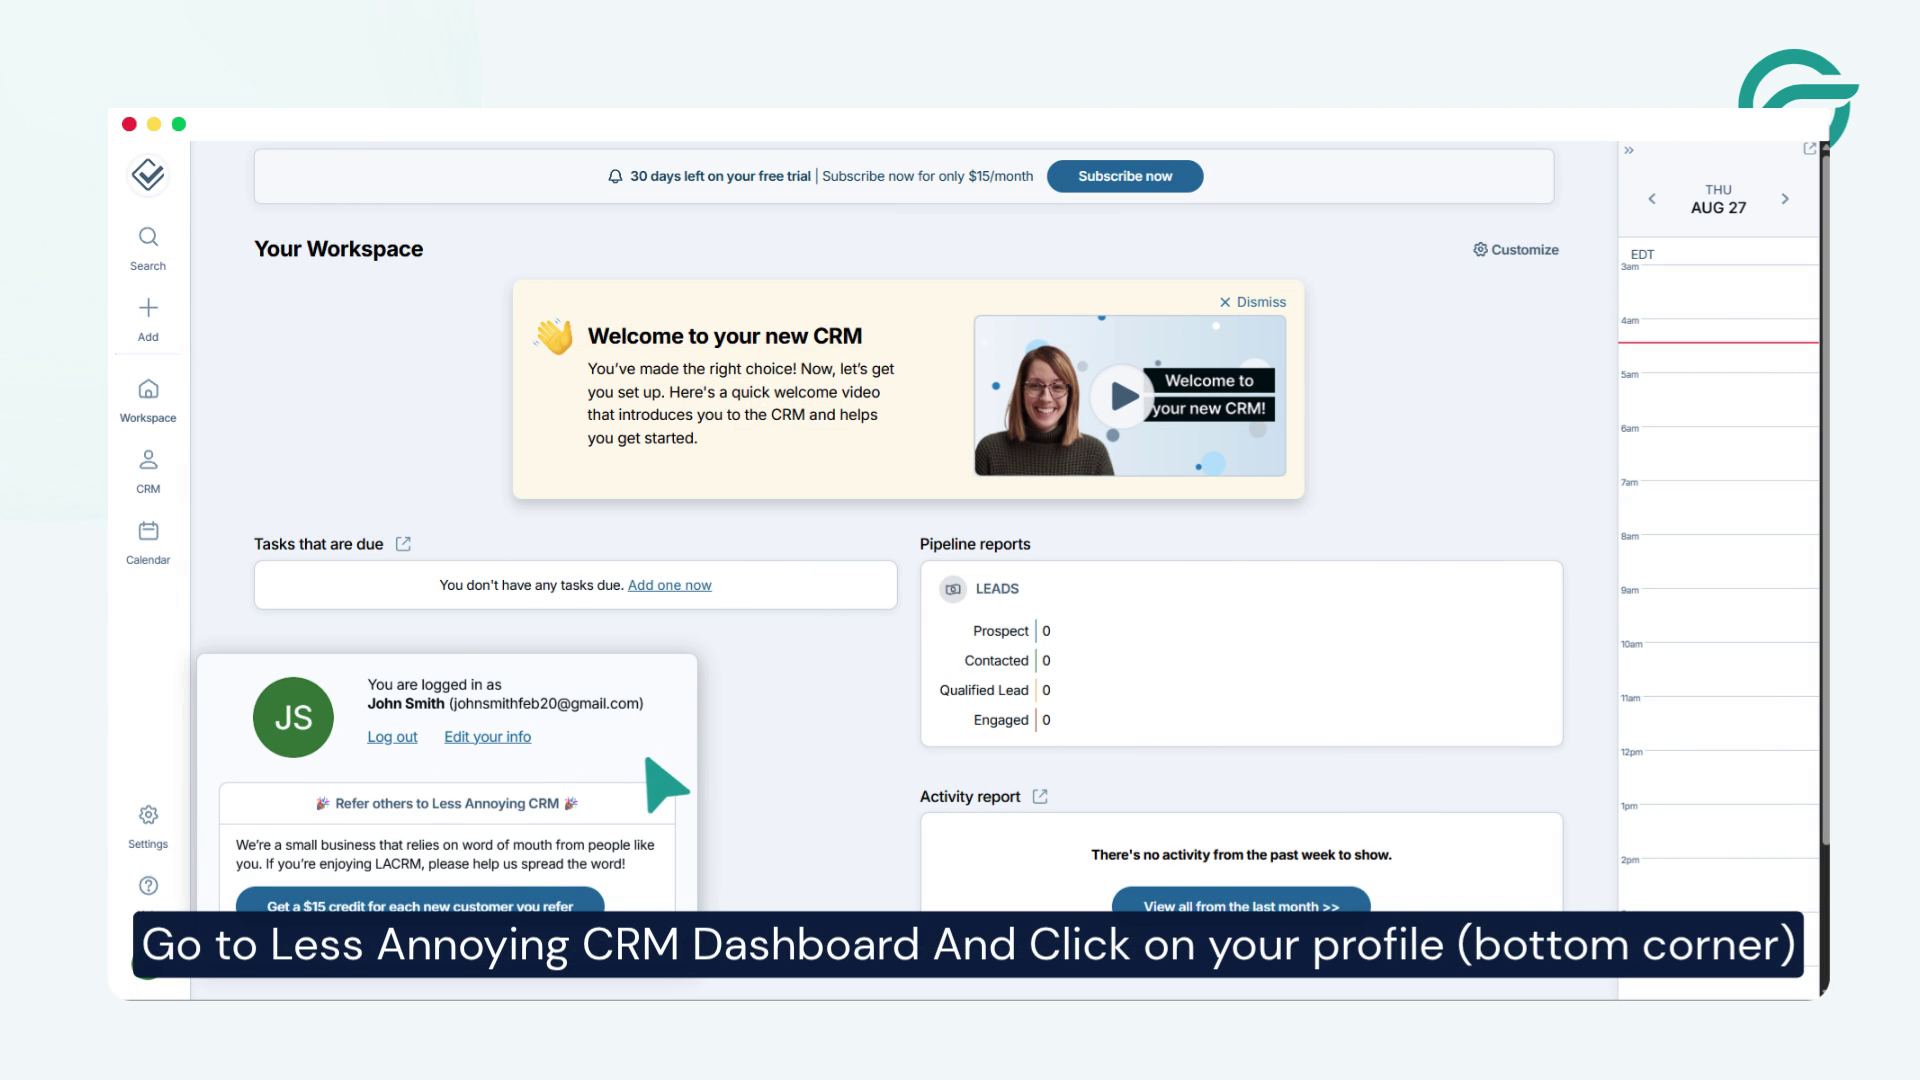
Go to your Less Annoying CRM Dashboard and click on your profile in the bottom corner.
Then:
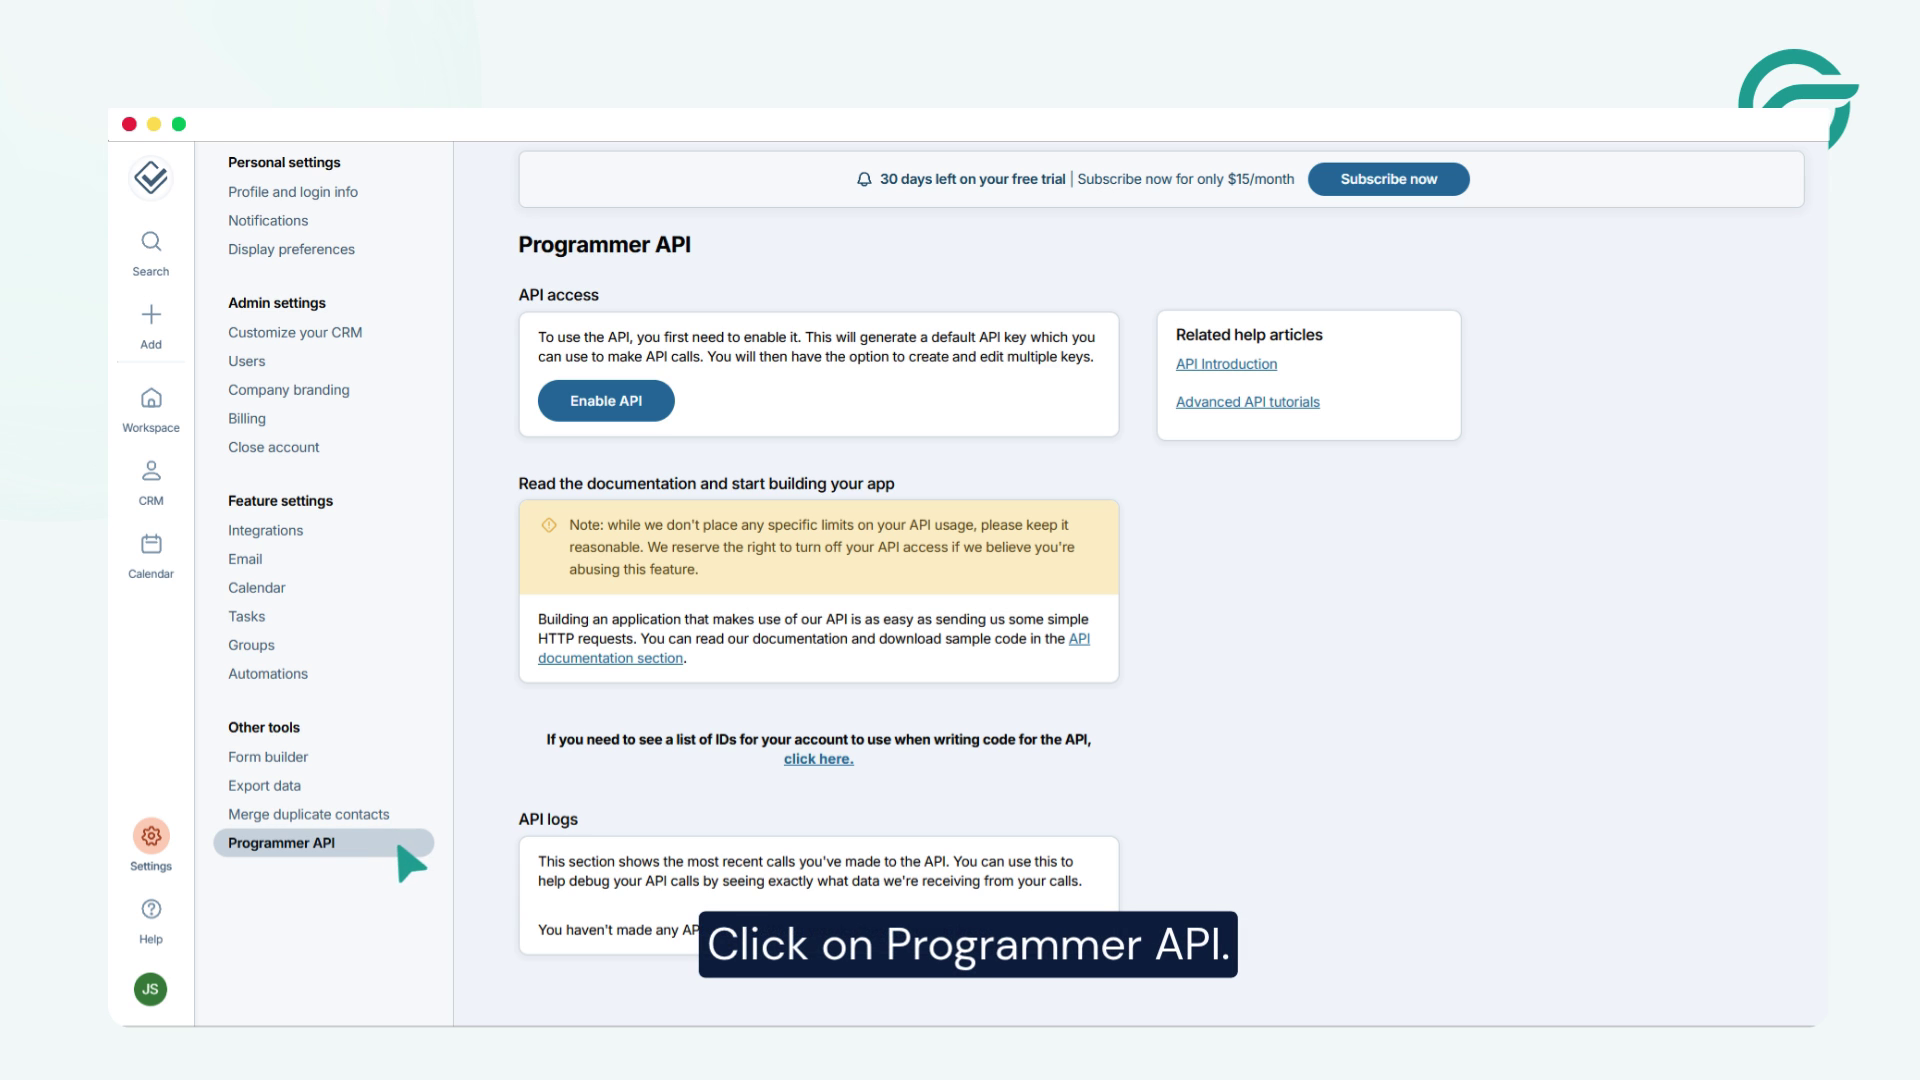
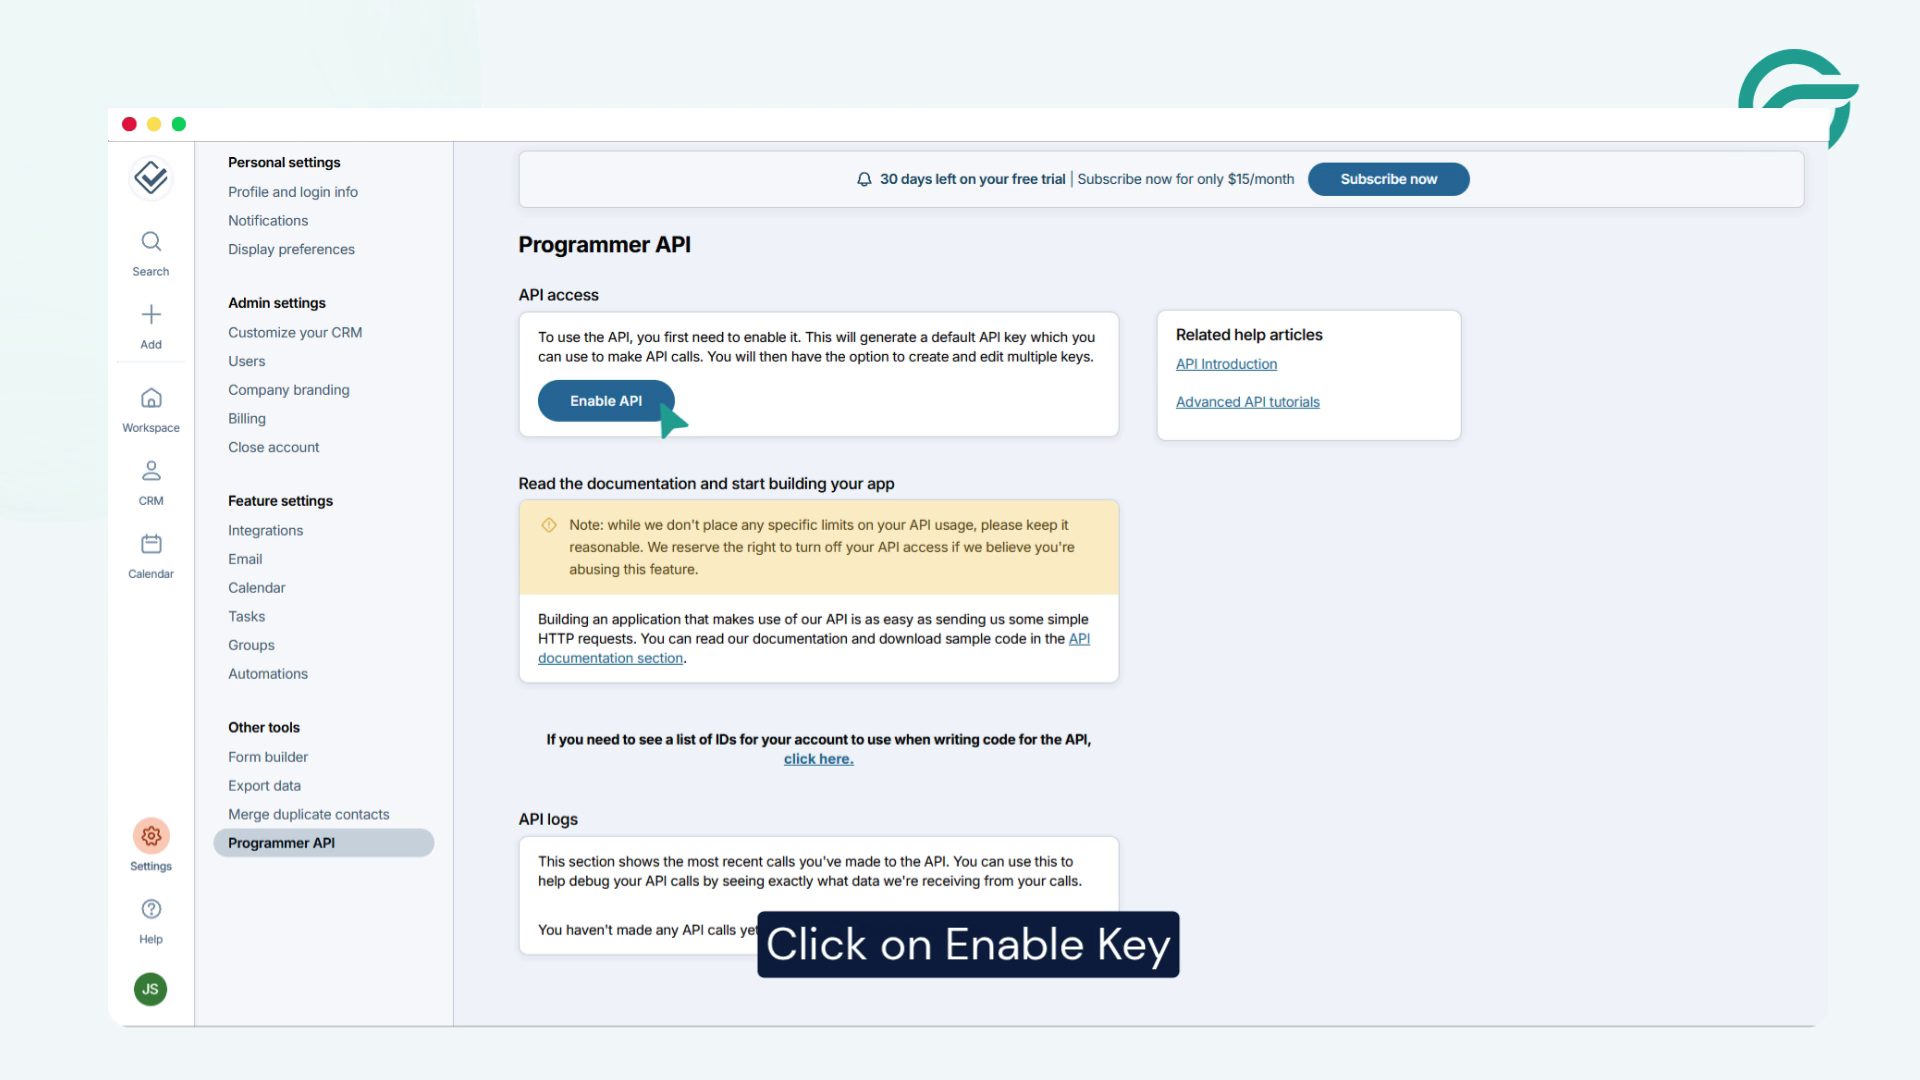
Settings → Programmer API → Enable Key
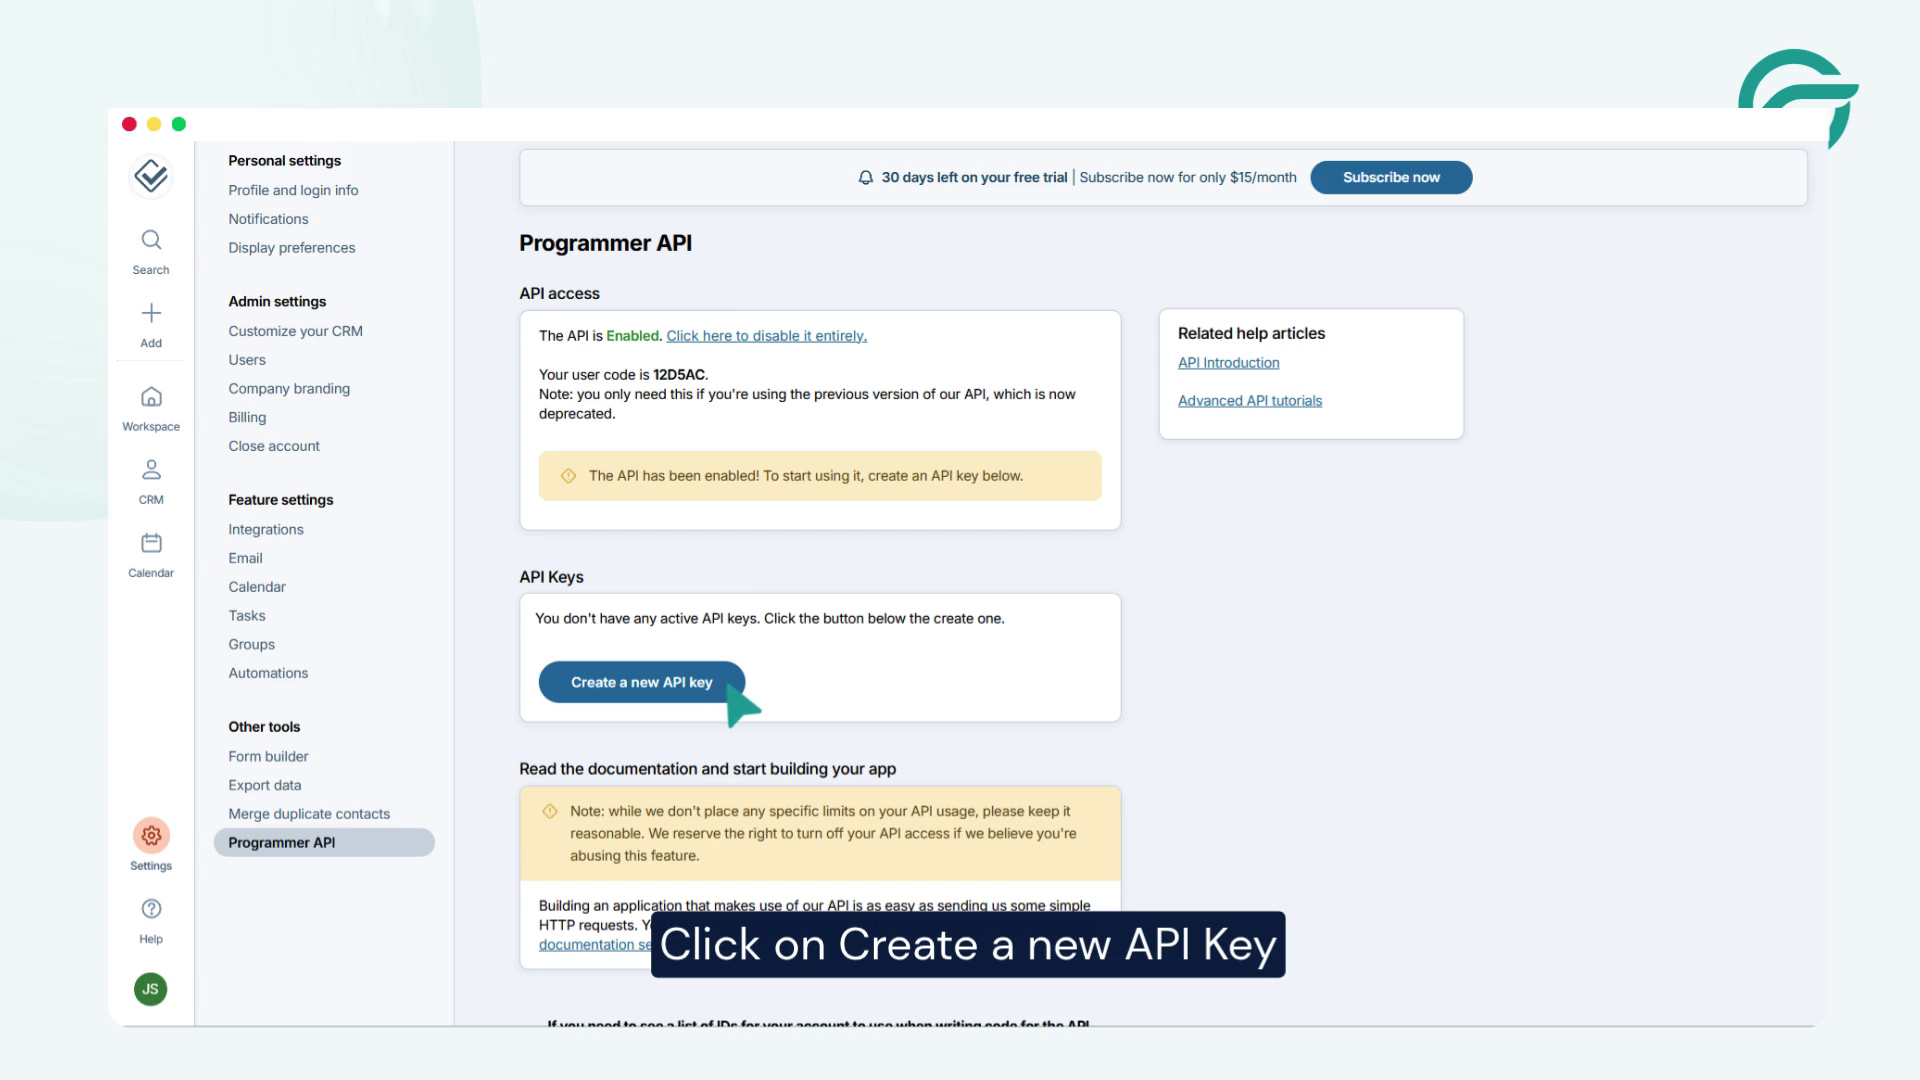
Click Create a New API Key.
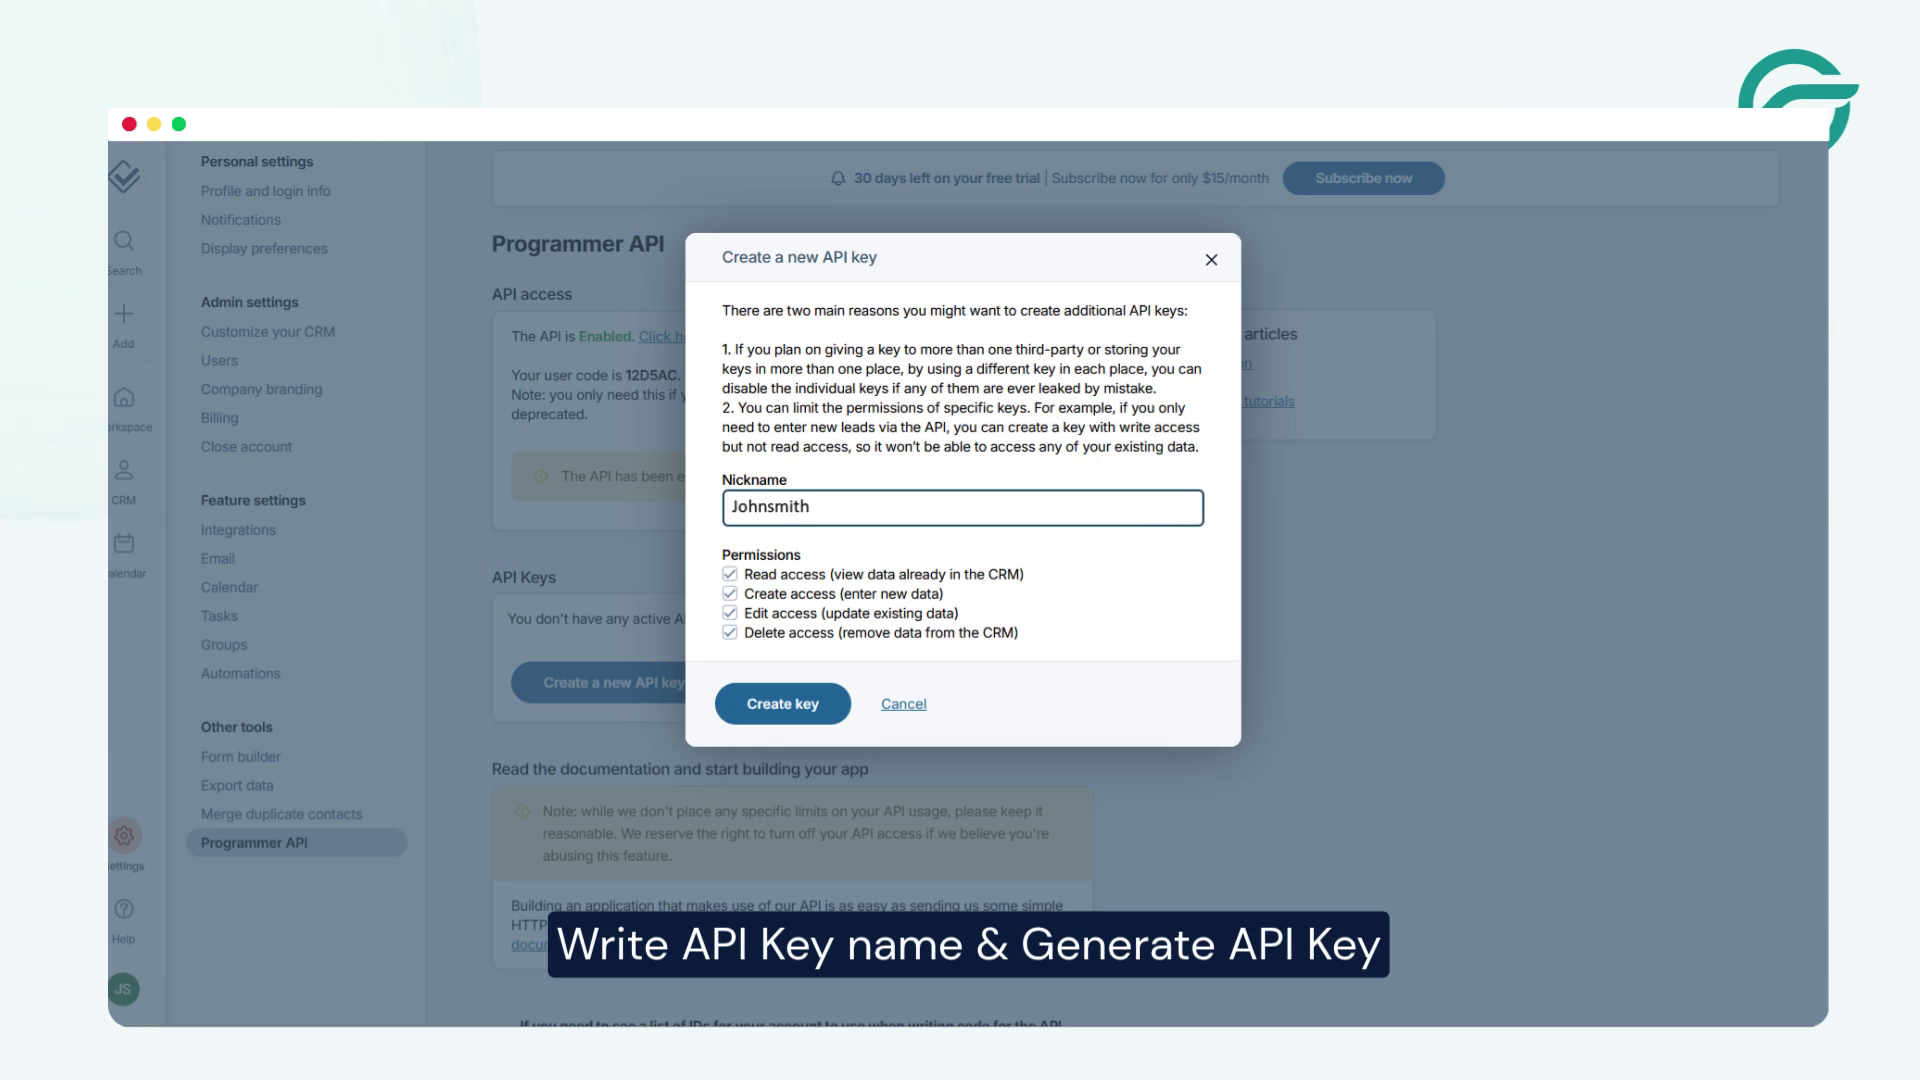
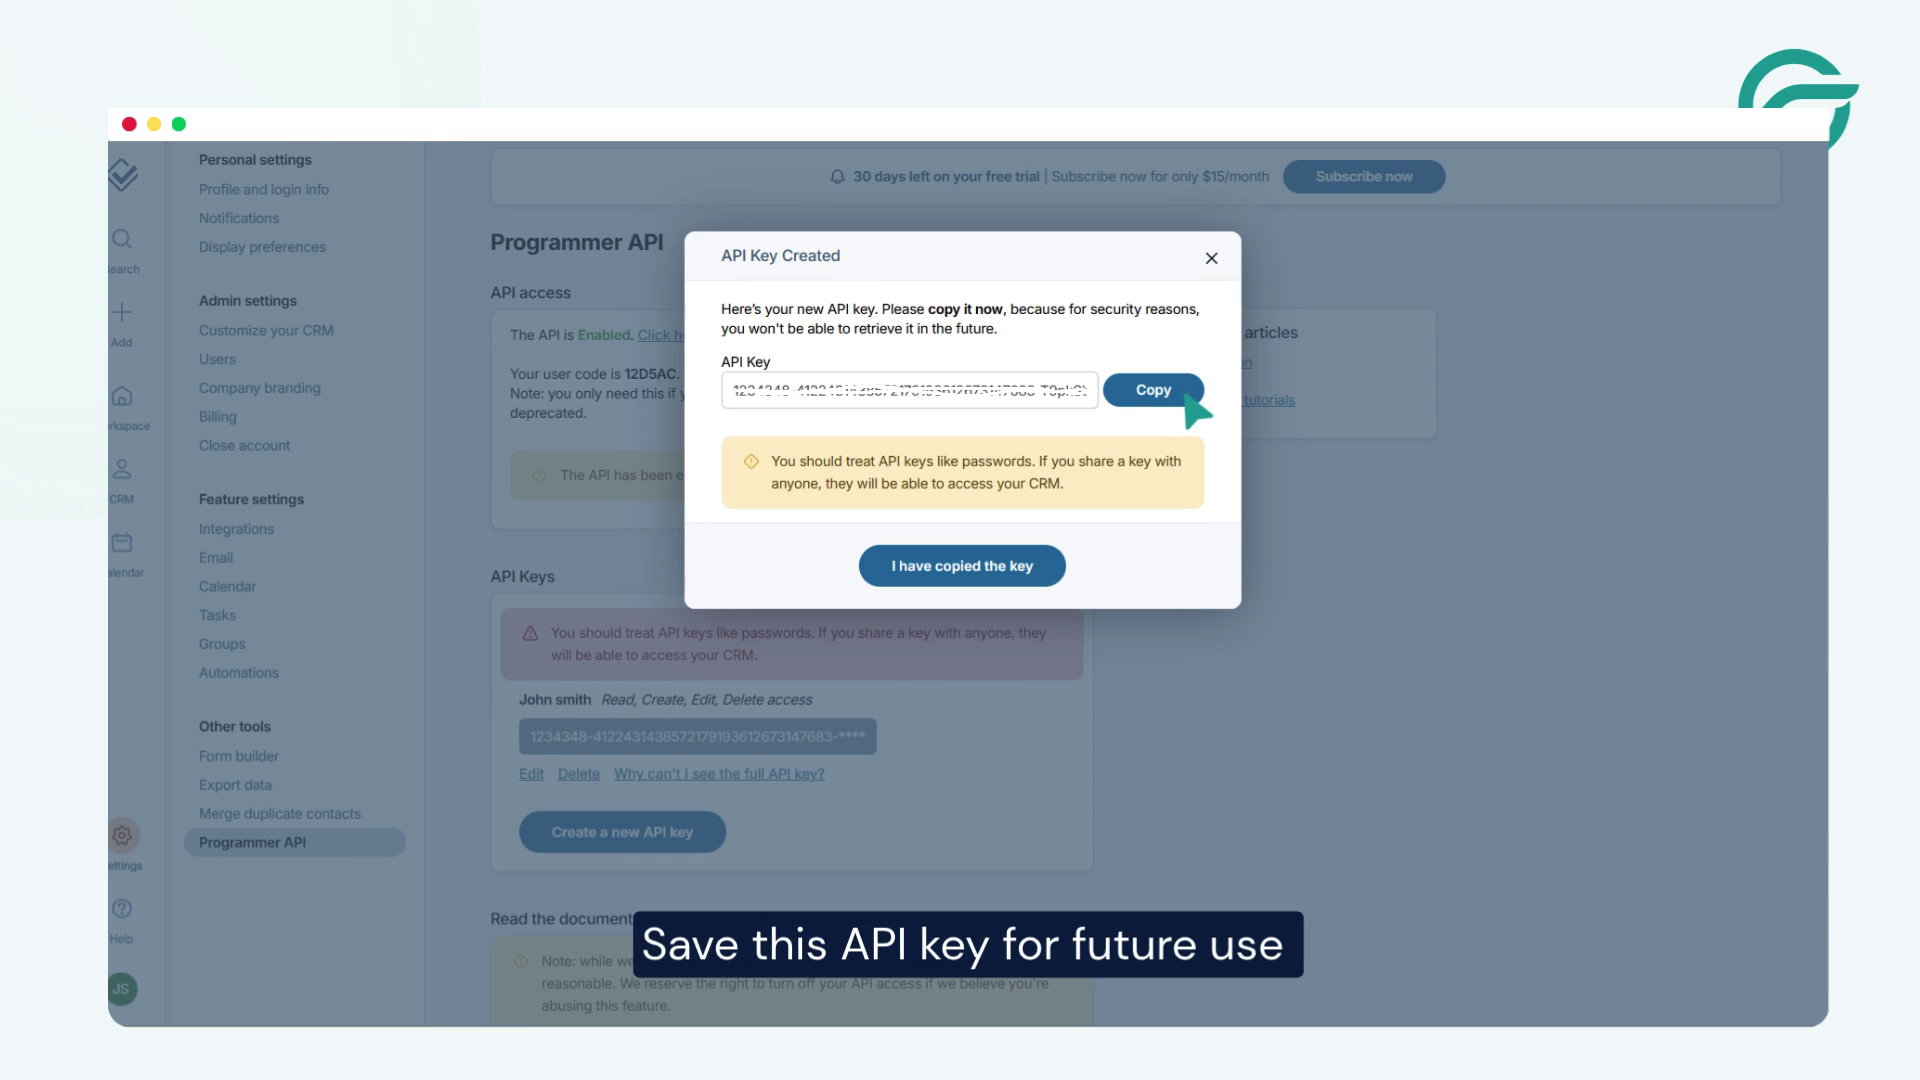
Enter an API key name and click Generate API Key.
Make sure you save the generated API key securely. You will need this key when configuring the request headers in WordPress.
8. Add the Request Header in WordPress
Go back to your WordPress dashboard and open the Request Header section in your Contact Form to Any API integration.
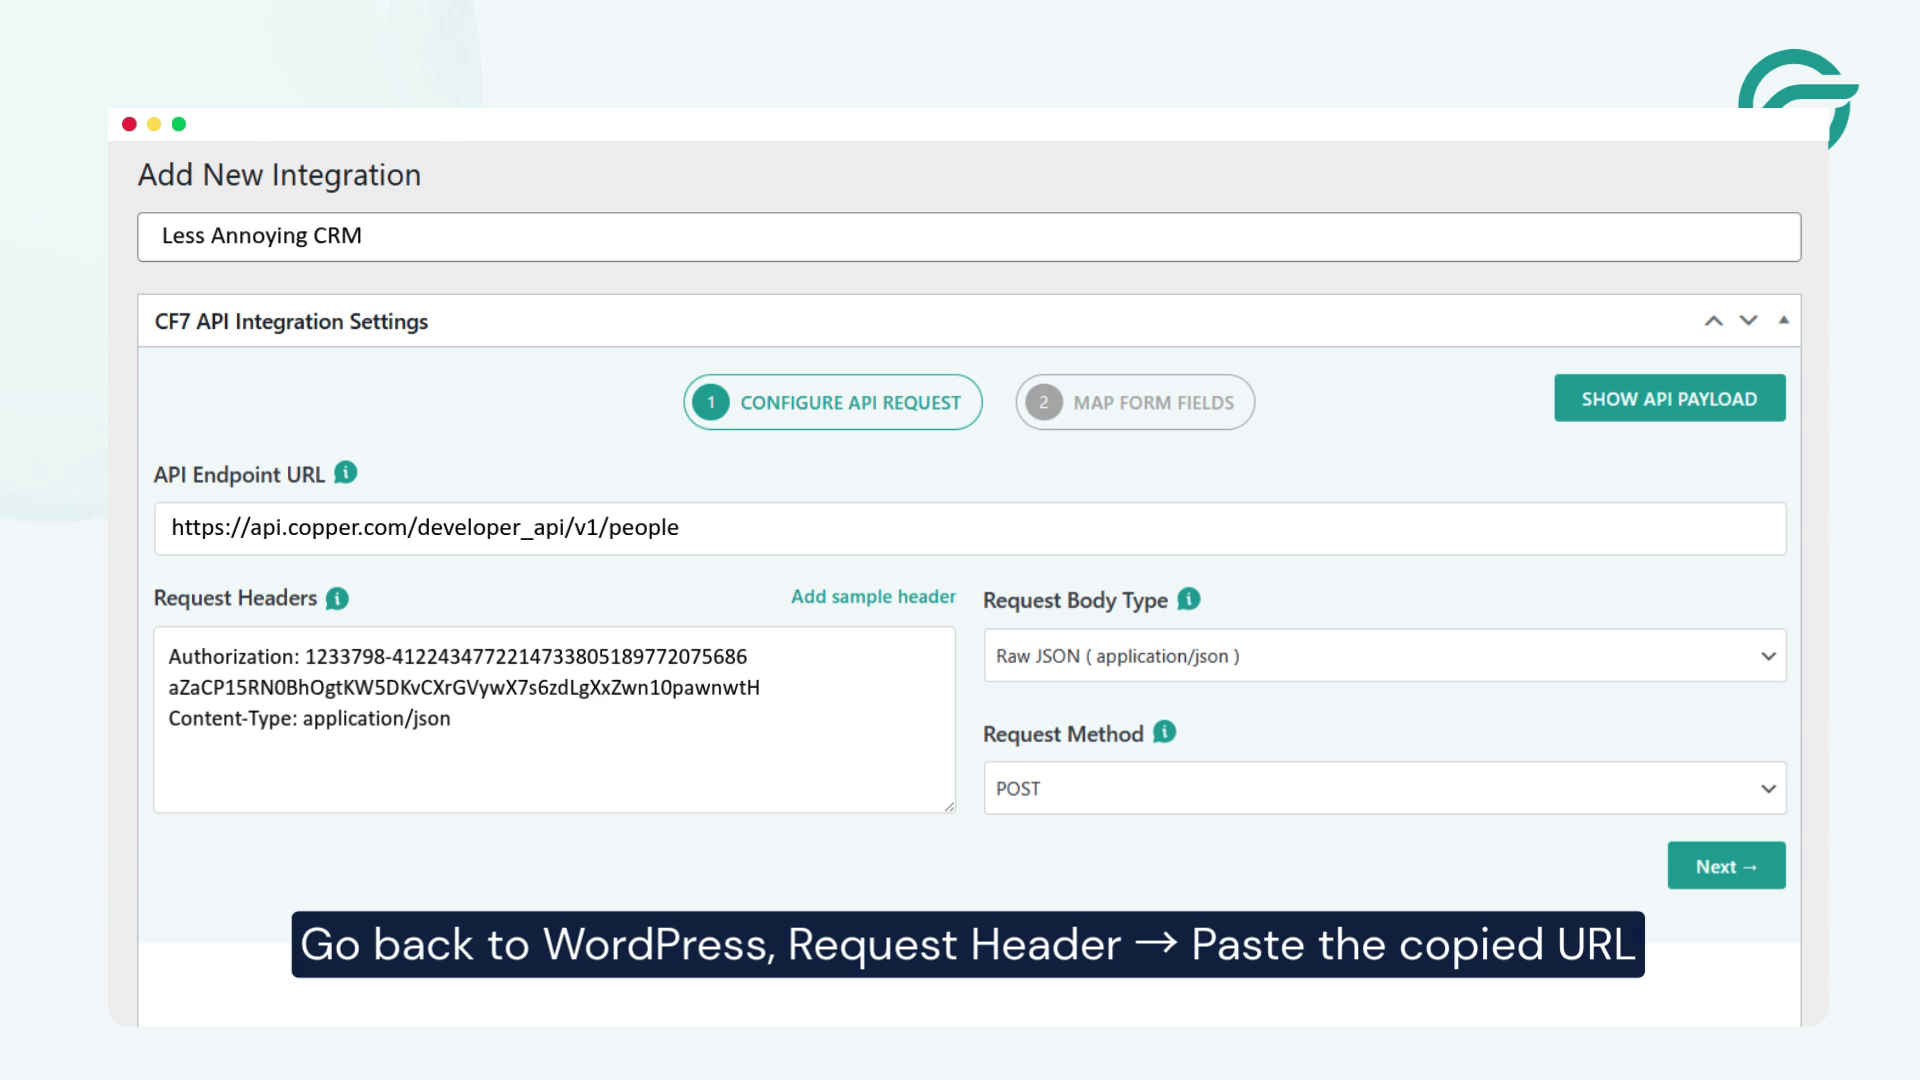
Add the required Less Annoying CRM authentication details using the API key you generated in the previous step.
Once the request header has been configured, click the Next button to continue with the integration setup.
9. Choose Contact Form 7 as the Contact Form
Next, select the Contact Form 7 form that you want to connect with Less Annoying CRM.
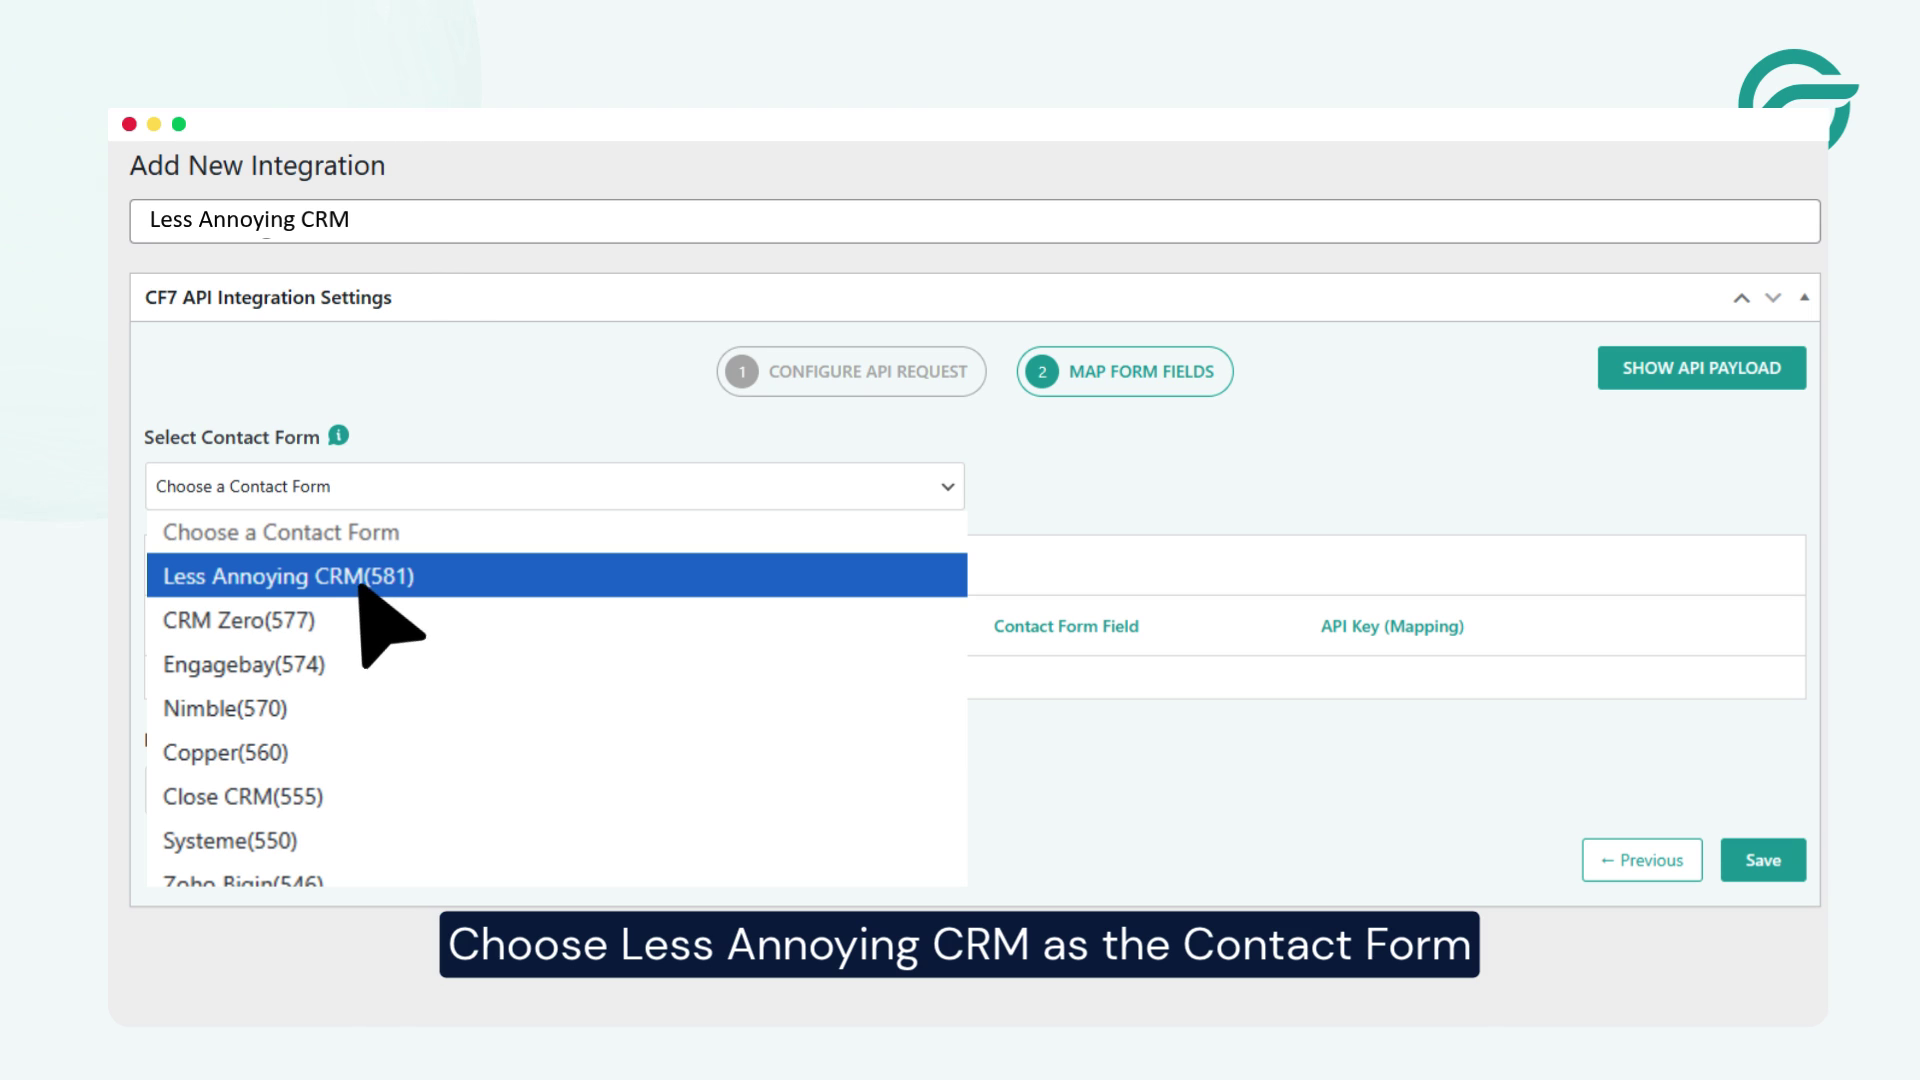
Choose the appropriate form from the available Contact Form 7 forms.
This allows the plugin to capture submissions from the selected form and send the data to Less Annoying CRM.
10. Map Your Contact Form 7 Fields to Less Annoying CRM Fields
Under JSON Payload, map your Contact Form 7 fields to the corresponding Less Annoying CRM fields.
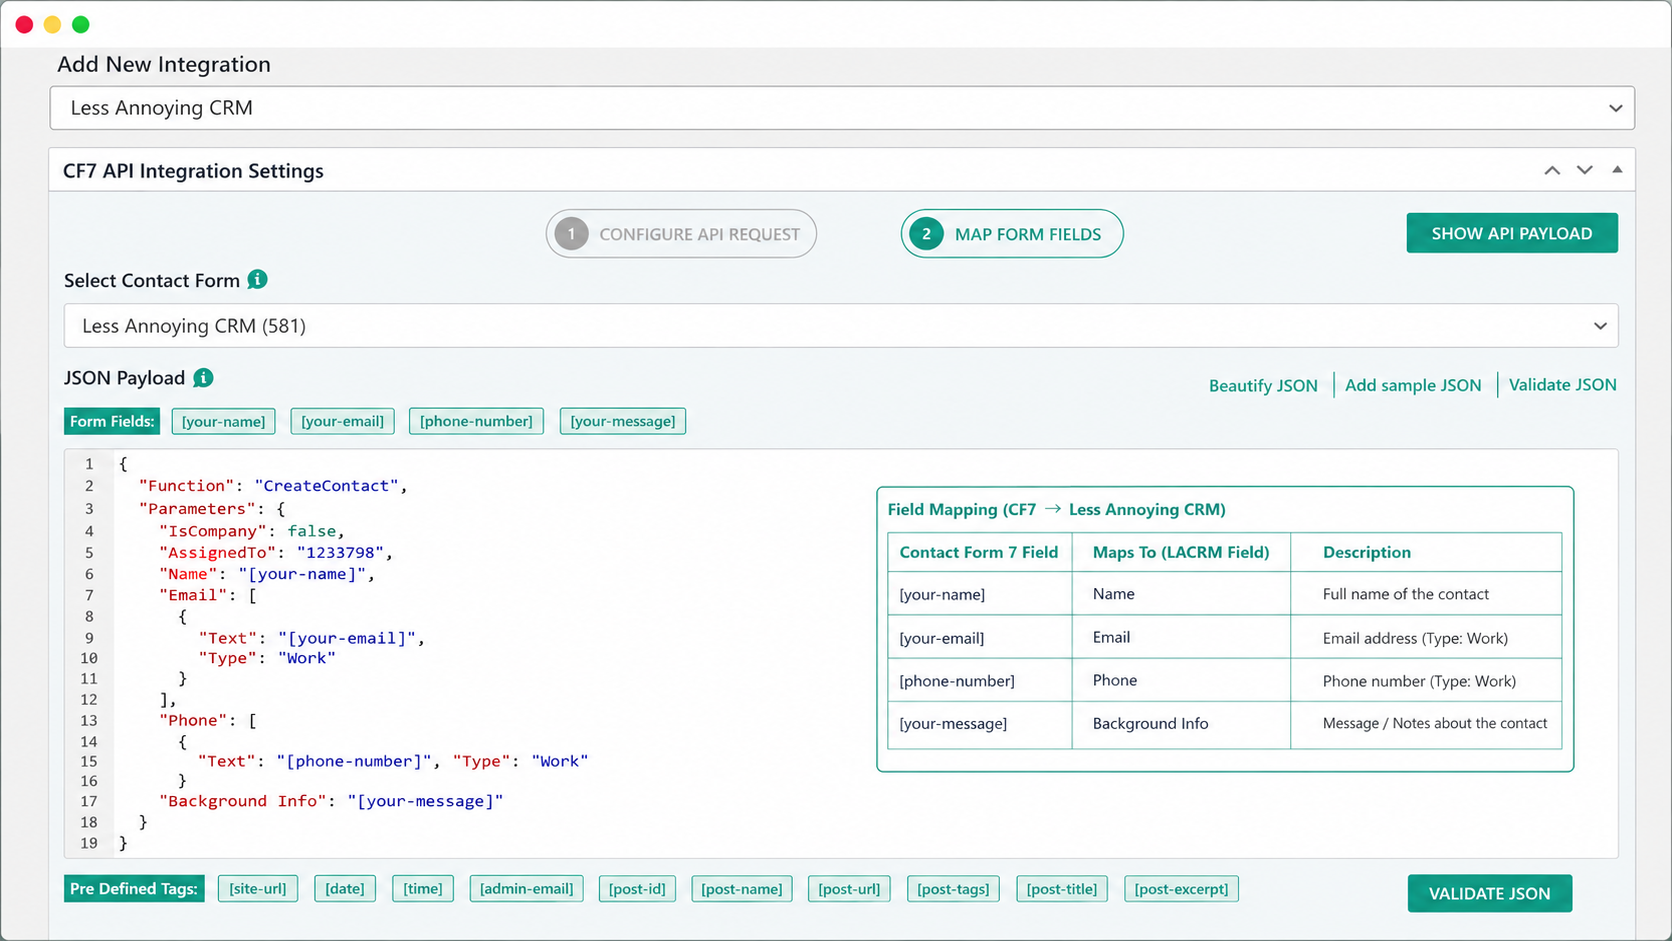
Make sure your JSON payload is correctly structured and that each Contact Form 7 field is mapped to the appropriate Less Annoying CRM field.
11. Submit a Test Entry
Once the field mapping is complete, submit a test entry through your Contact Form 7 form.
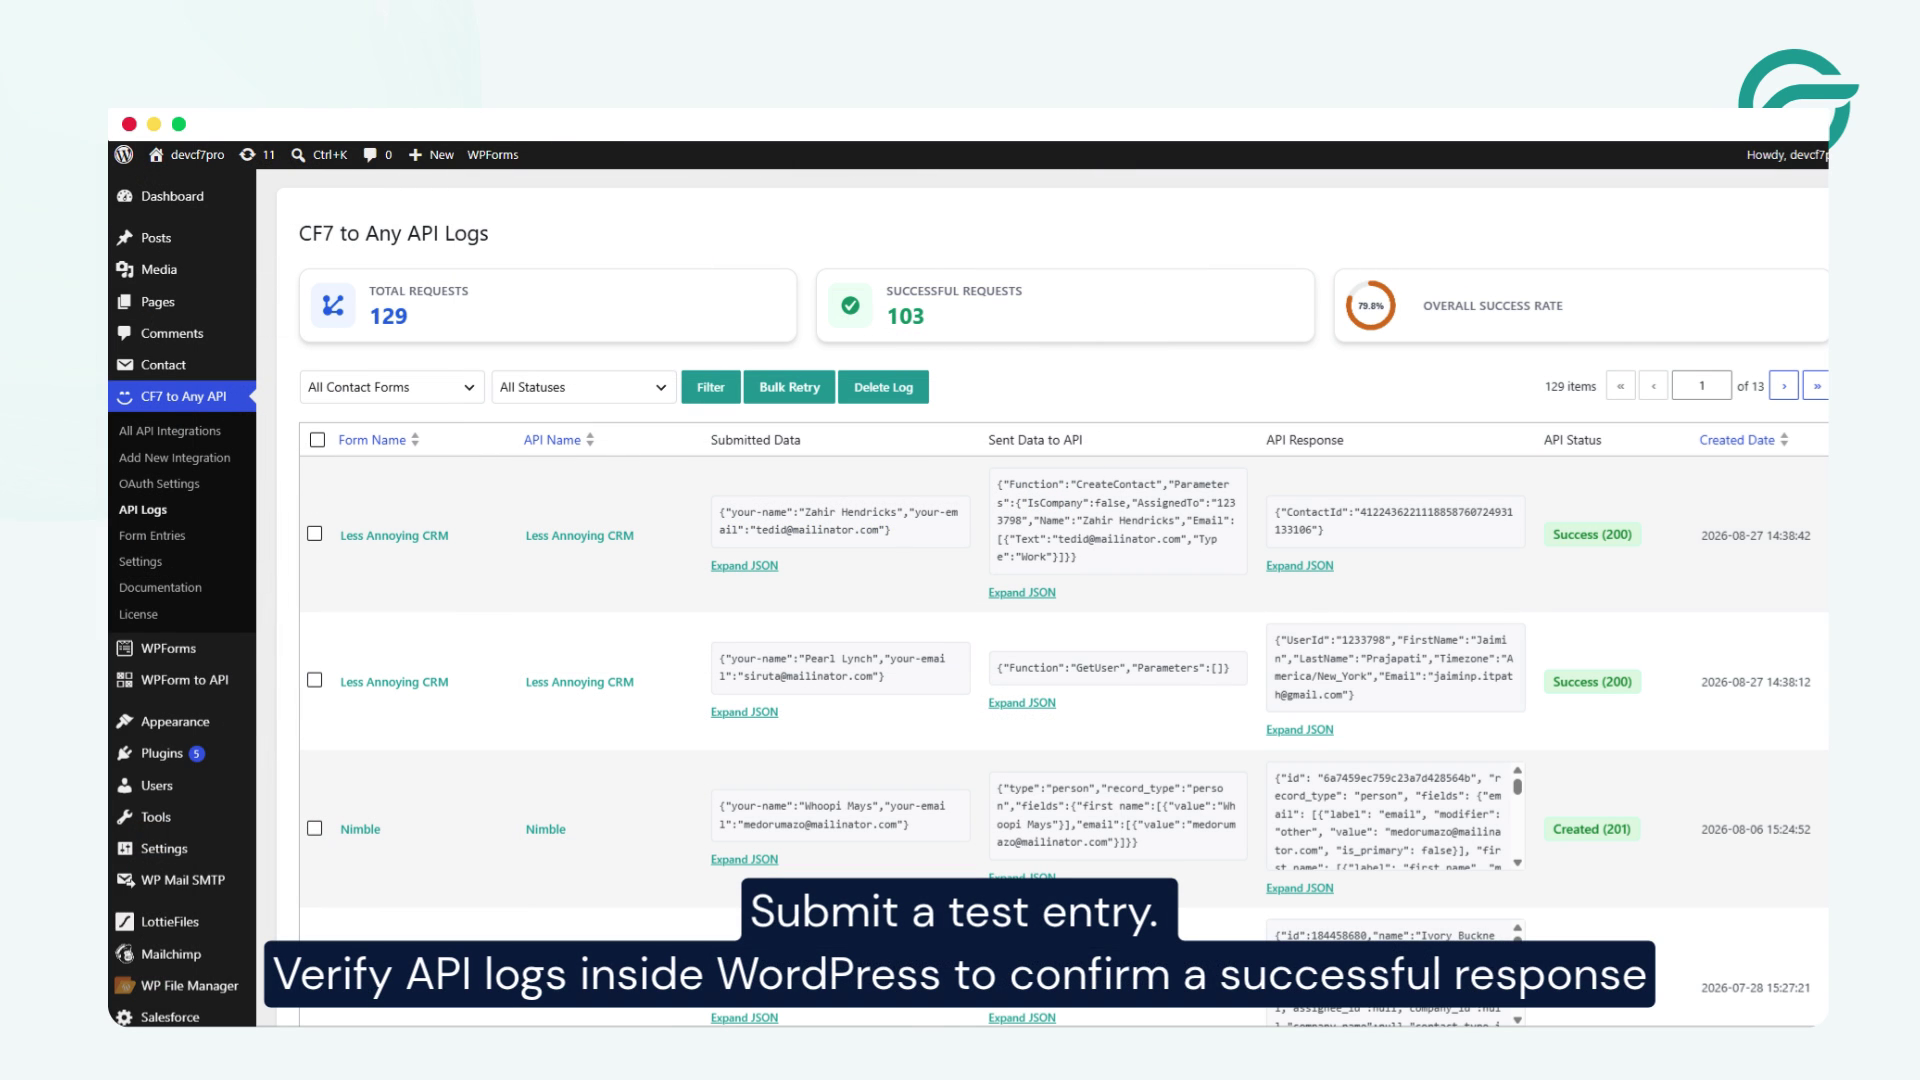
After submitting the form, check the API logs inside WordPress to confirm that the request was successfully sent and that Less Annoying CRM returned a successful response.
Testing the integration with a sample submission can help you identify authentication, endpoint, or field-mapping issues before you start receiving real leads.
Conclusion
Connecting Contact Form 7 with Less Annoying CRM can help streamline contact management and reduce manual data entry. Using the Contact Form to Any API plugin, you can configure the Less Annoying CRM API endpoint, authentication details, and JSON field mapping directly from your WordPress dashboard.
Once the integration is configured, submit a test entry through your Contact Form 7 form and check the API logs to confirm that the data is being successfully sent to Less Annoying CRM.
By automating this process, you can make it easier to transfer contact information from your WordPress forms into your CRM and keep your lead management workflow organized.


