



Connecting Contact Form 7 with Attio CRM allows you to automatically send form submissions from your WordPress website to your Attio CRM account. Instead of manually transferring contact details from WordPress to your CRM, you can use an API integration to streamline the process and keep your contact records organized.
In this guide, we’ll walk you through how to connect Contact Form 7 with Attio CRM using the Contact Form to Any API plugin. You’ll learn how to configure the Attio API endpoint, create an access token, map Contact Form 7 fields to Attio CRM fields, and test the integration.
Watch the Video Tutorial: CF7 with Attio CRM Integration (Step-by-Step)
Before following the written steps, you can watch the complete integration setup in this quick video tutorial.
Follow the steps below to configure the integration.
Step 1: Sign In to Your Attio CRM Account
First, sign in to your Attio CRM account. Keep your Attio account open because you’ll need to access the API documentation and developer settings during the integration process.
Step 2: Open Your WordPress Dashboard
Log in to your WordPress website and open the WordPress admin dashboard.
Step 3: Create a New API Integration
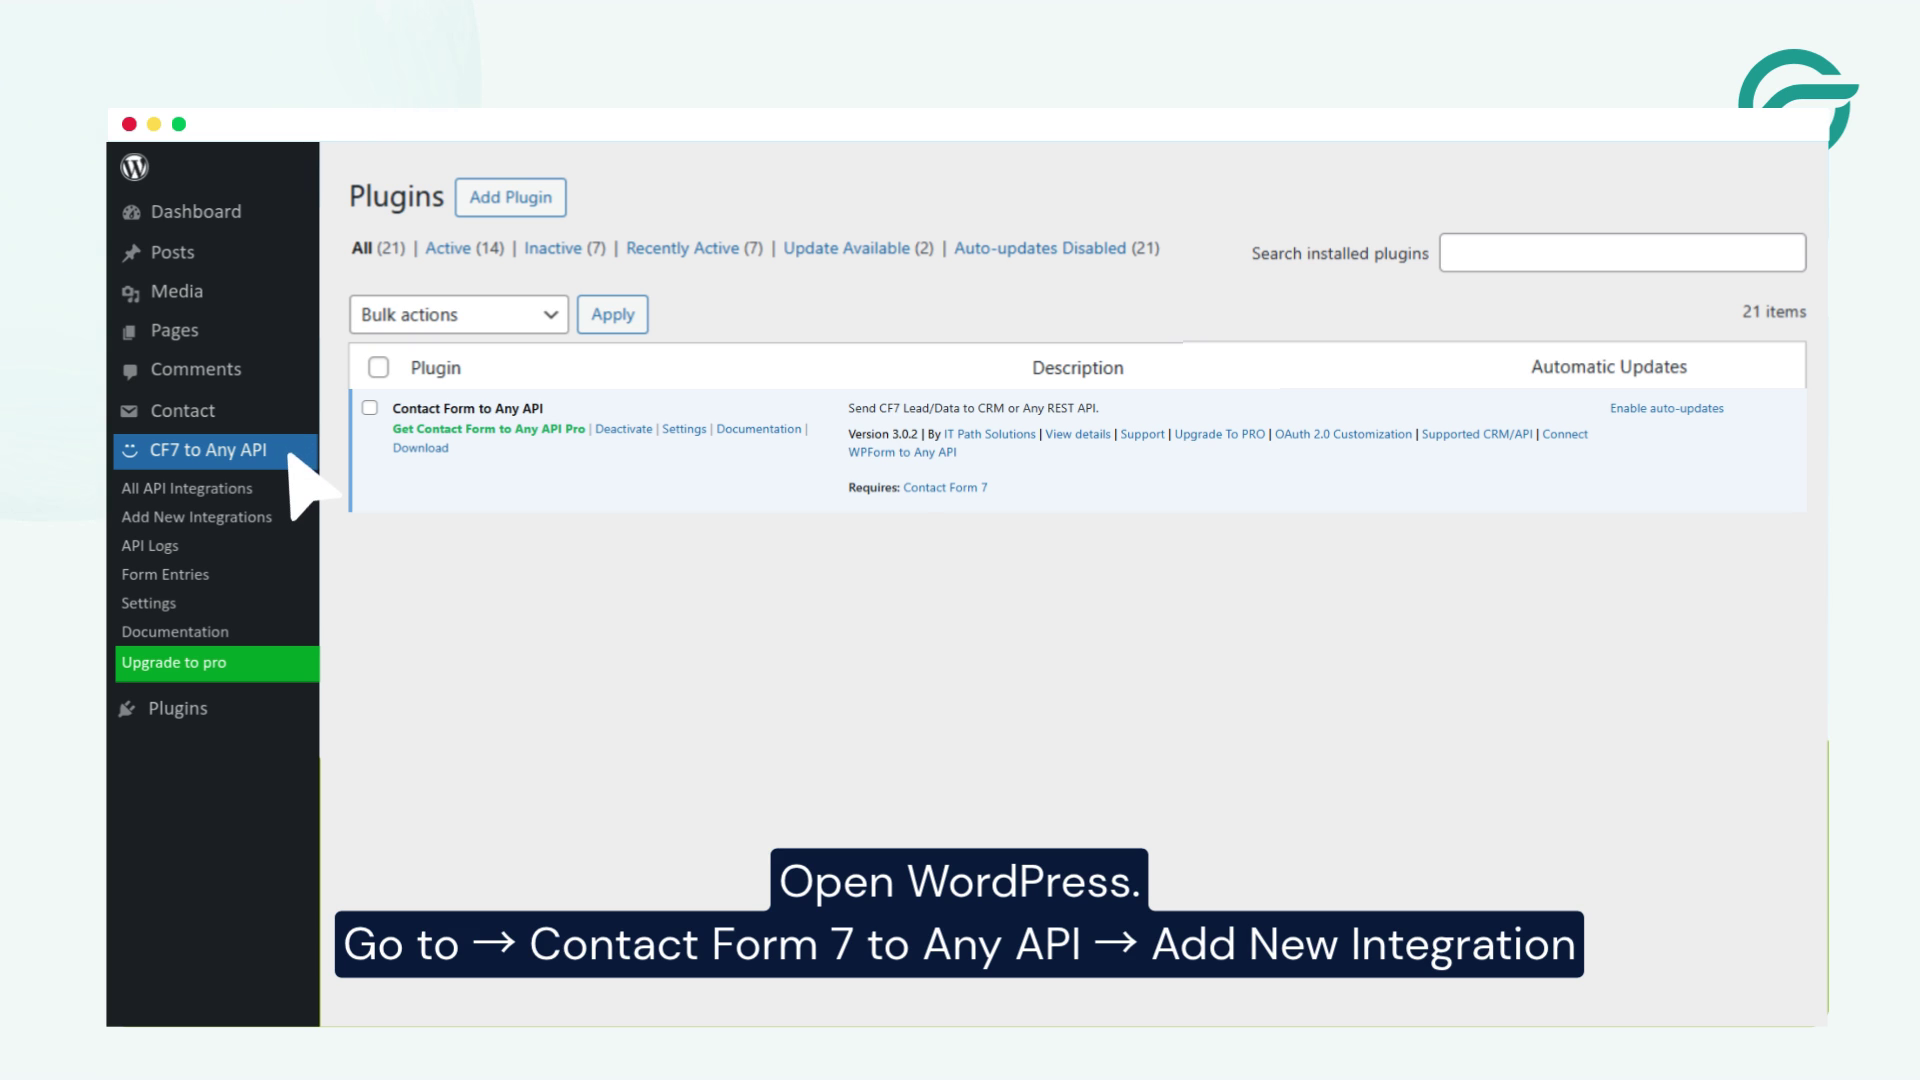
From your WordPress dashboard, navigate to:
Contact Form to Any API → Add New Integration
This will open the integration settings where you can configure the connection between Contact Form 7 and Attio CRM.
Step 4: Add an Integration Title
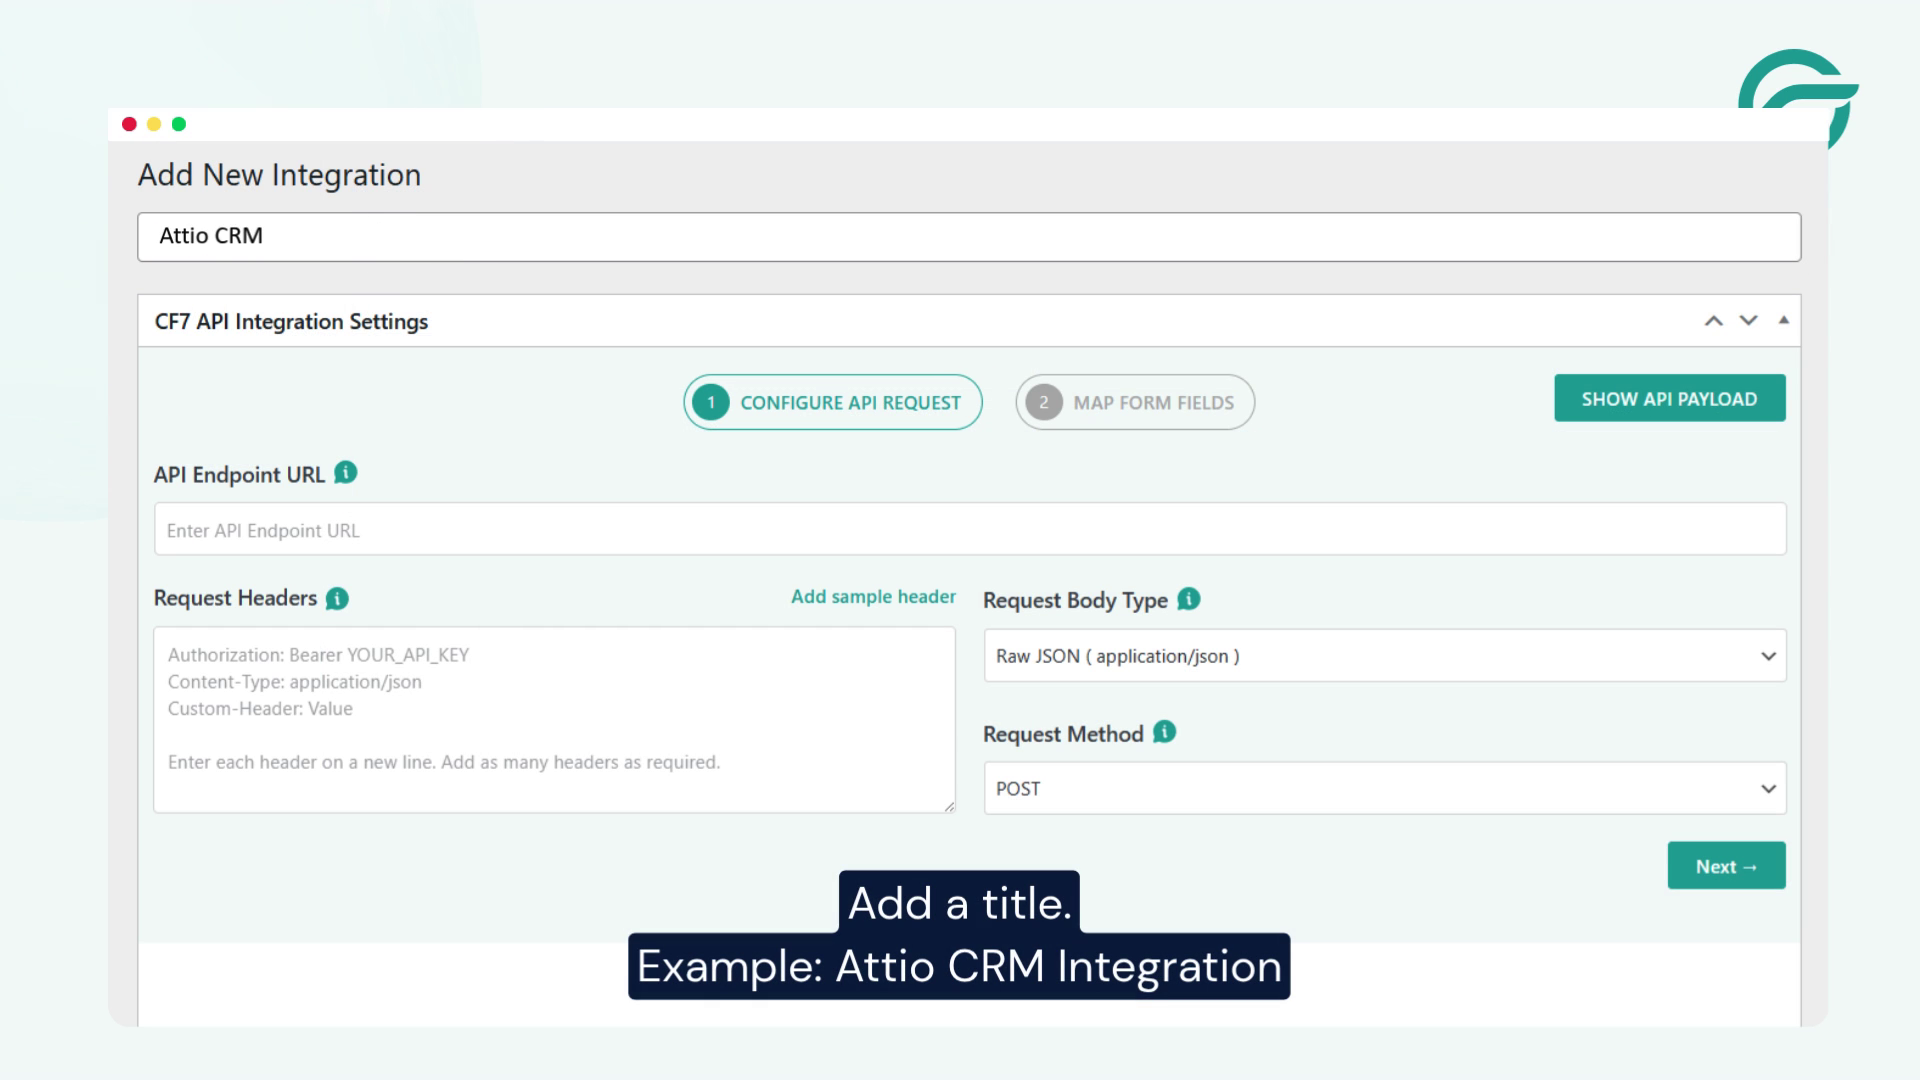
Enter a descriptive name for your integration so you can easily identify it later.
For example:
Attio CRM Integration
Step 5: Get the Attio CRM API Endpoint
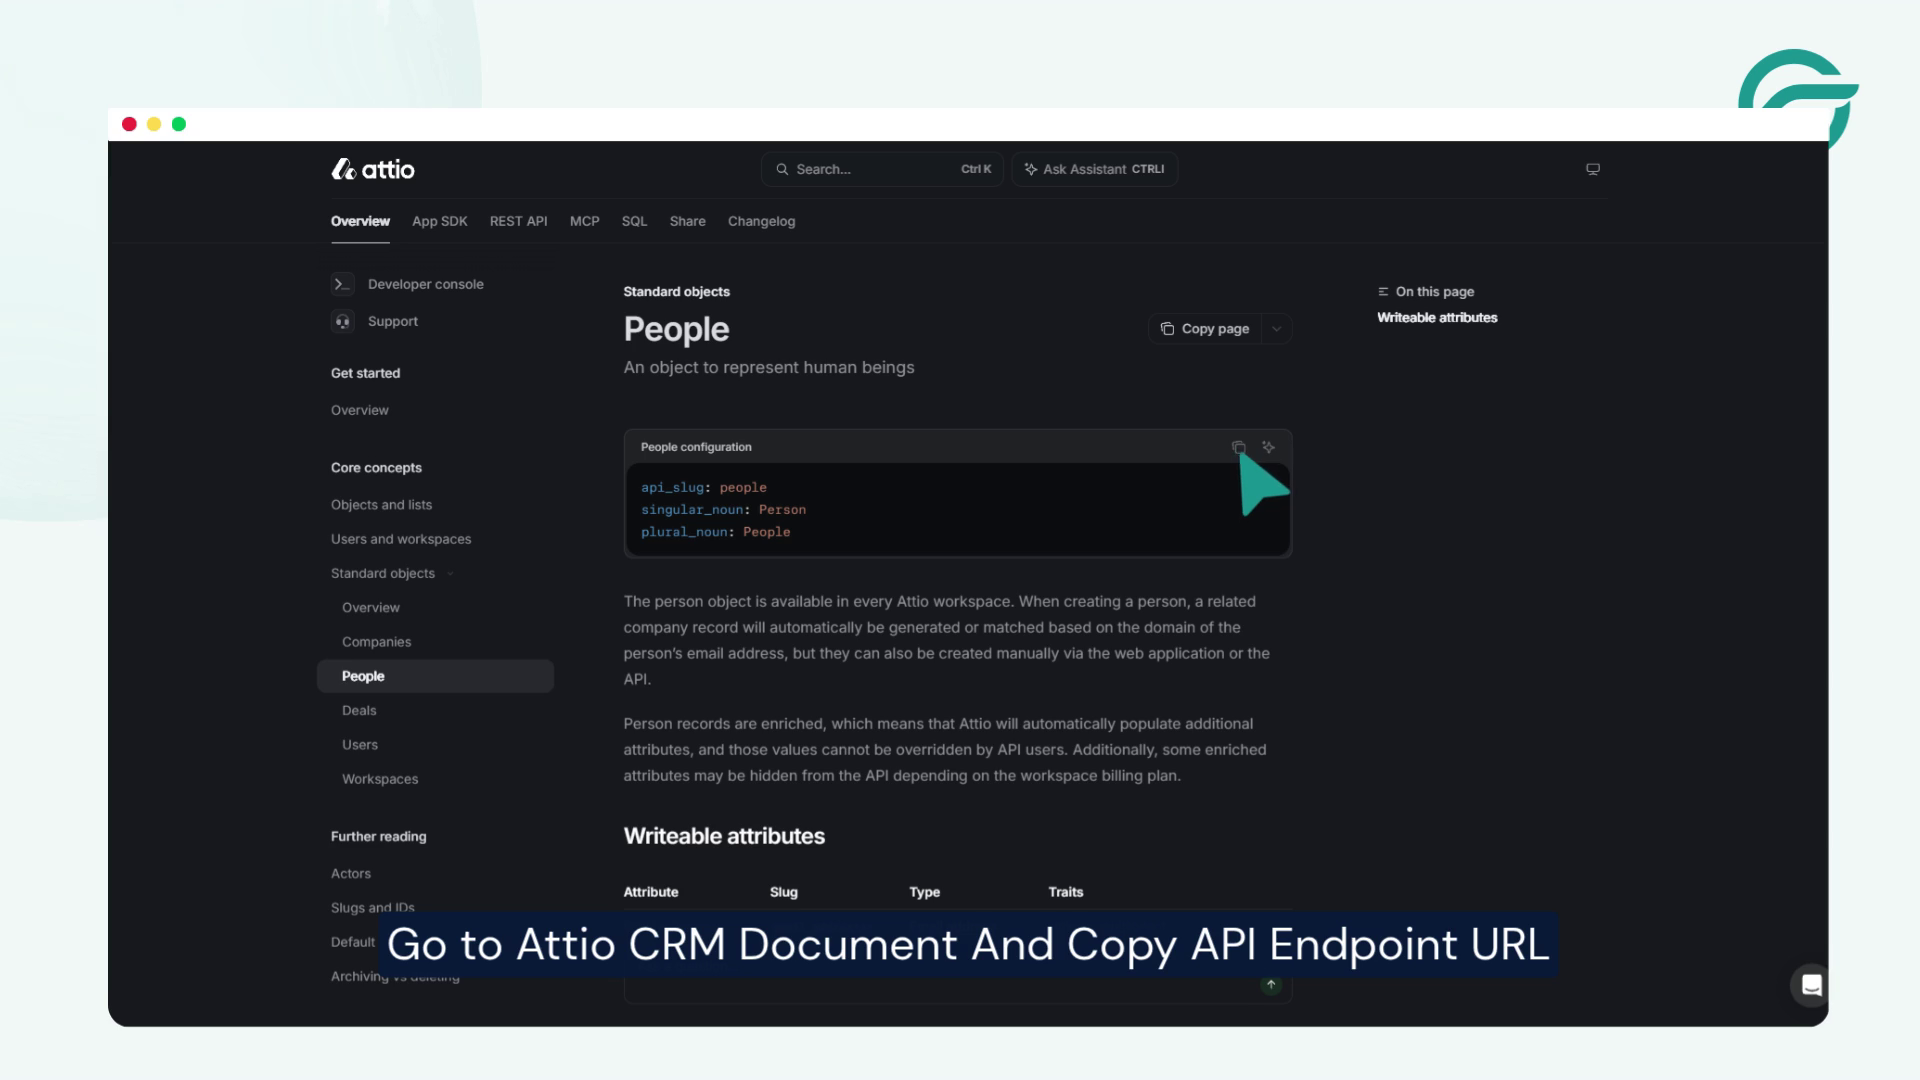
Go To Attio CRM Document And Copy API Endpoint URL
Step 6: Add the API Endpoint to WordPress
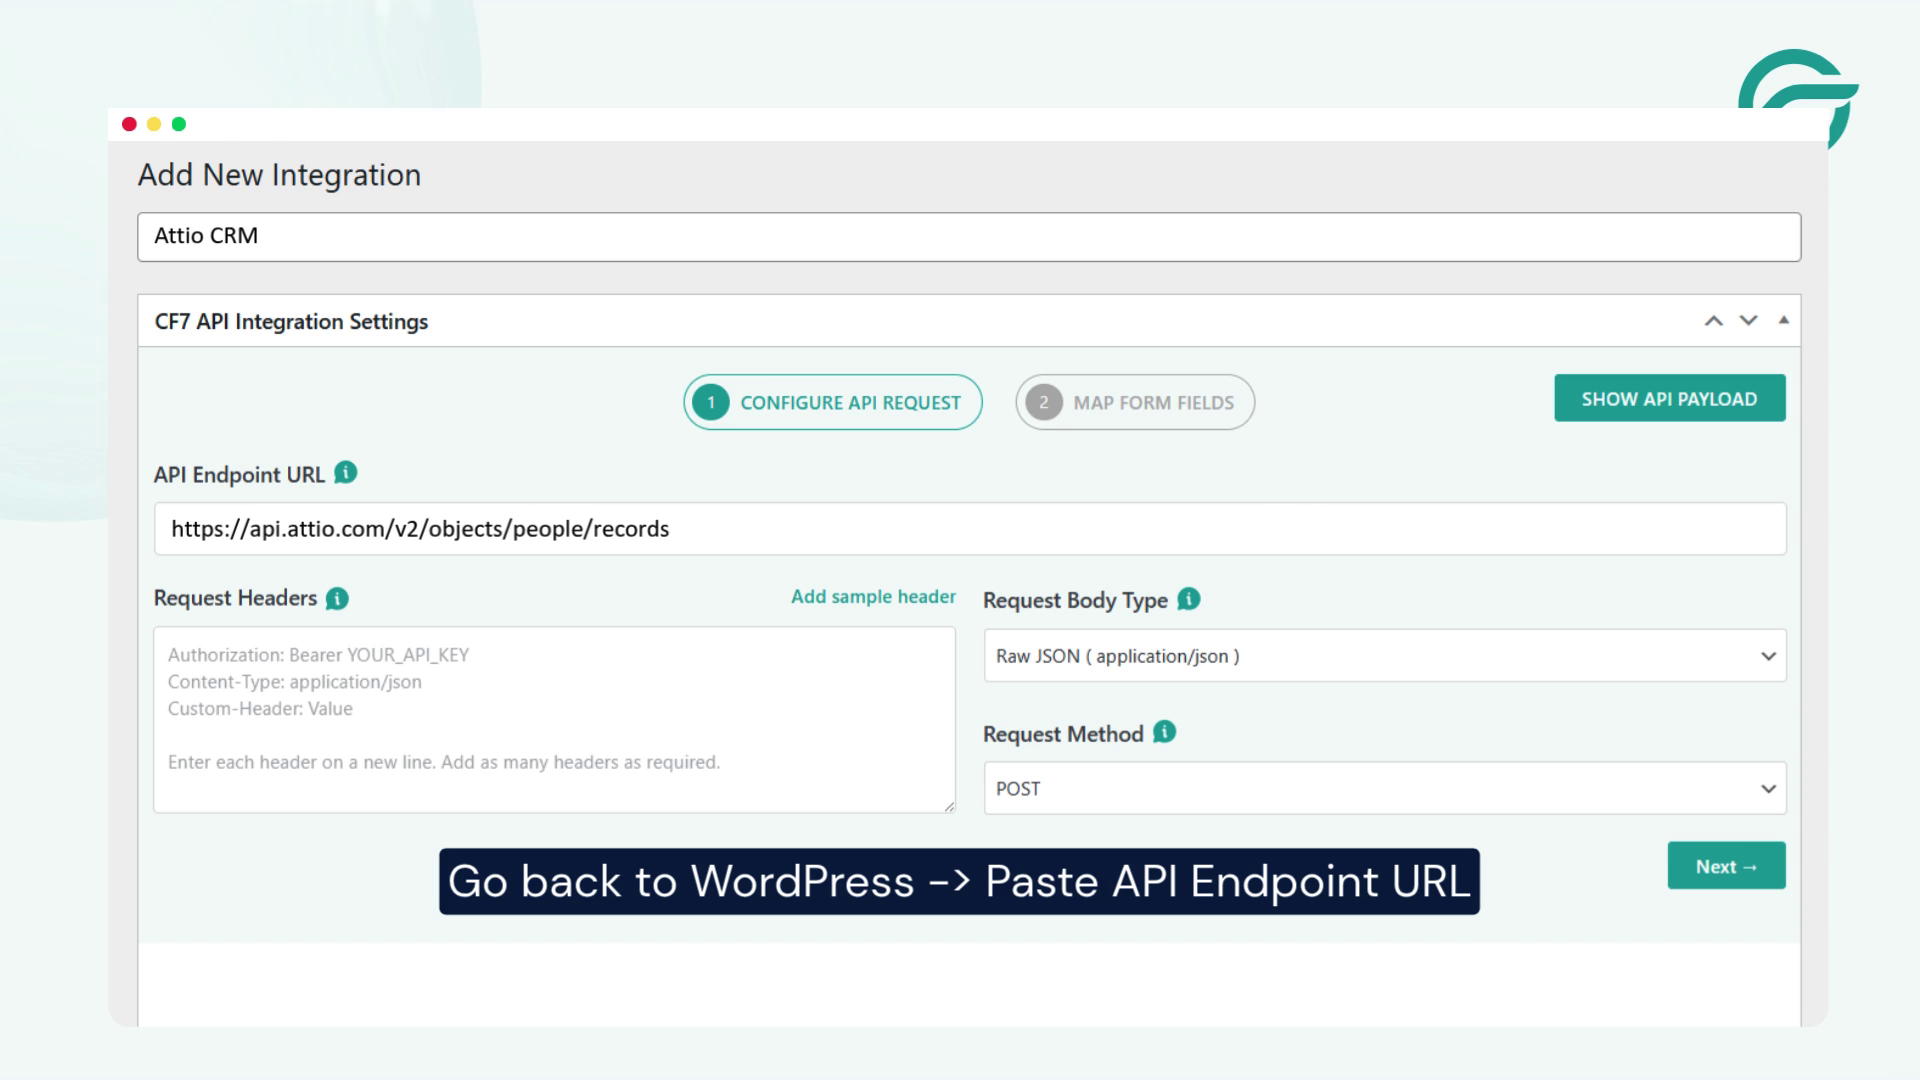
Go back to WordPress -> API Endpoint URL
Paste the copied URL: https://api.attio.com/v2/objects/people/records
This tells the plugin where Contact Form 7 data should be sent.
Step 7: Create an Attio API Access Token
For Request Header
Go to Attio CRM Home Page
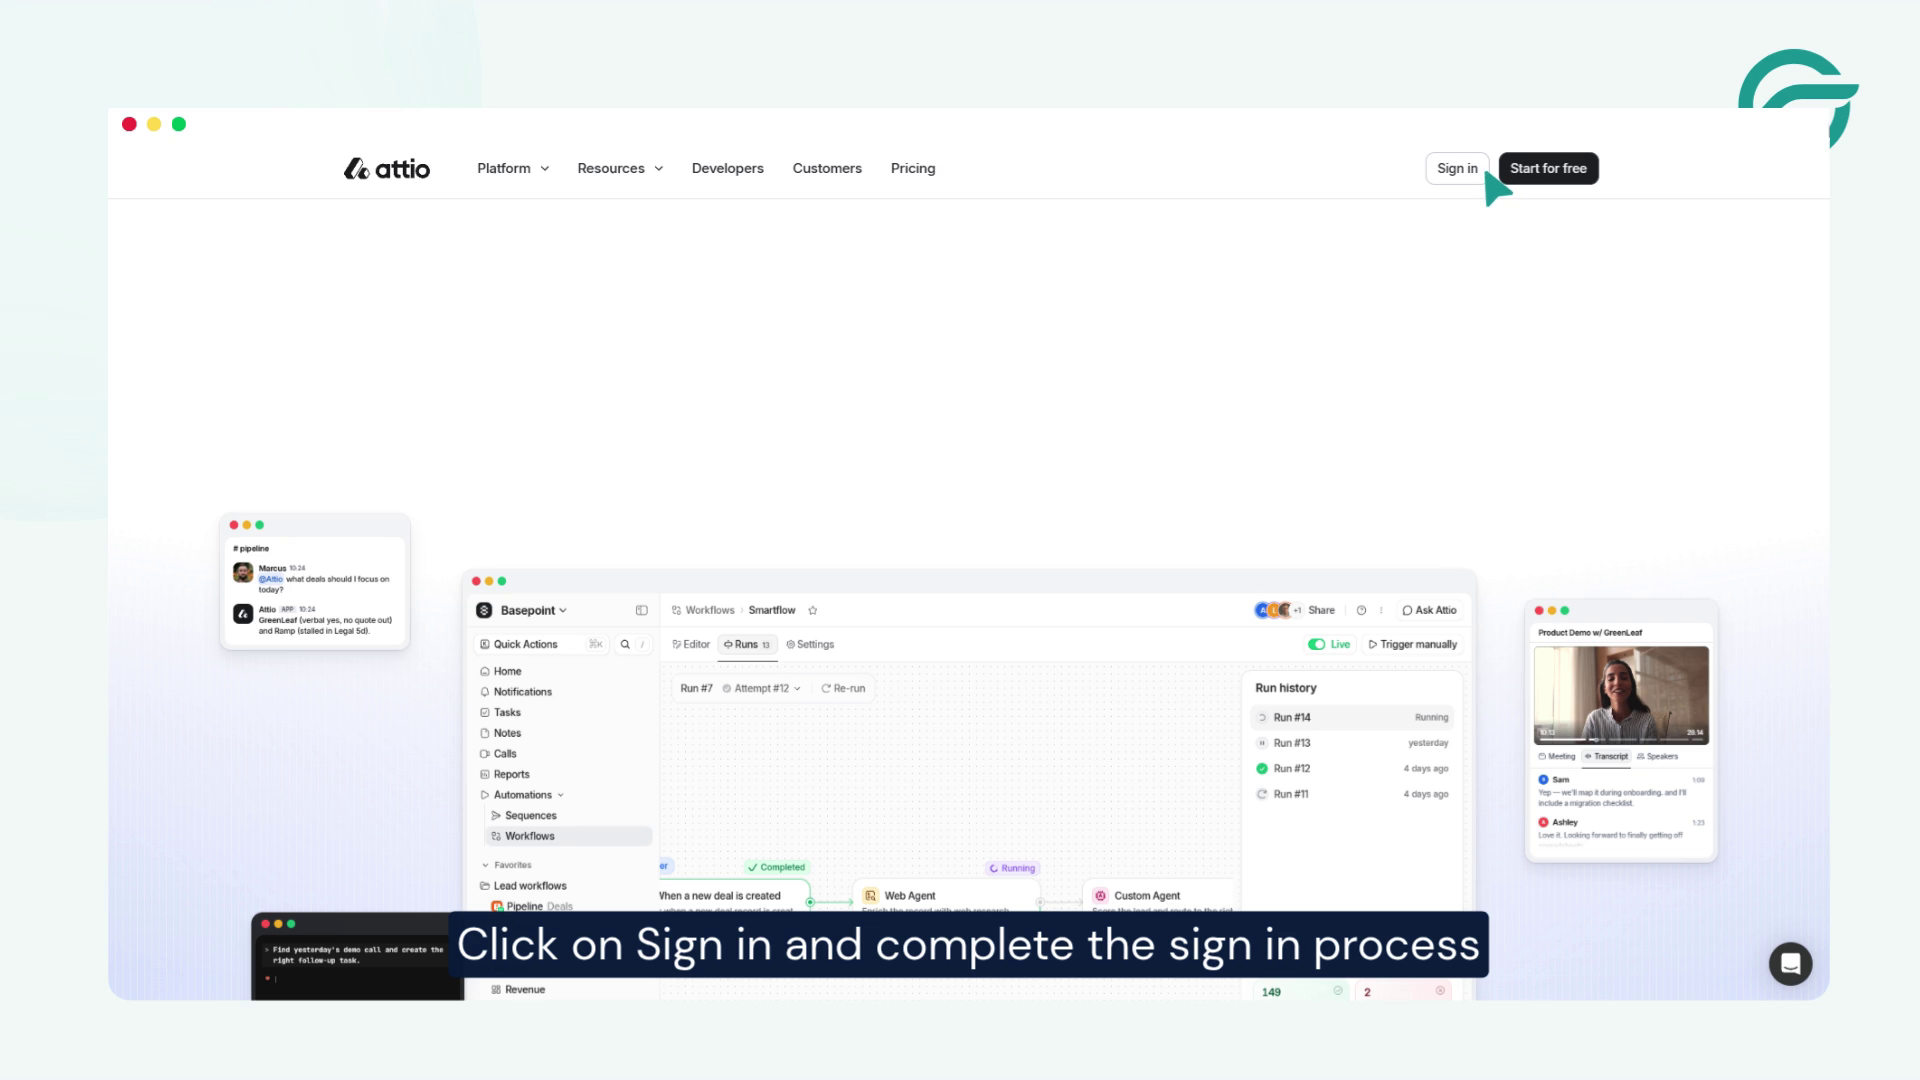
Click on Sign in and complete the sign in process
Attio Dashboard & Click on your Profile bar
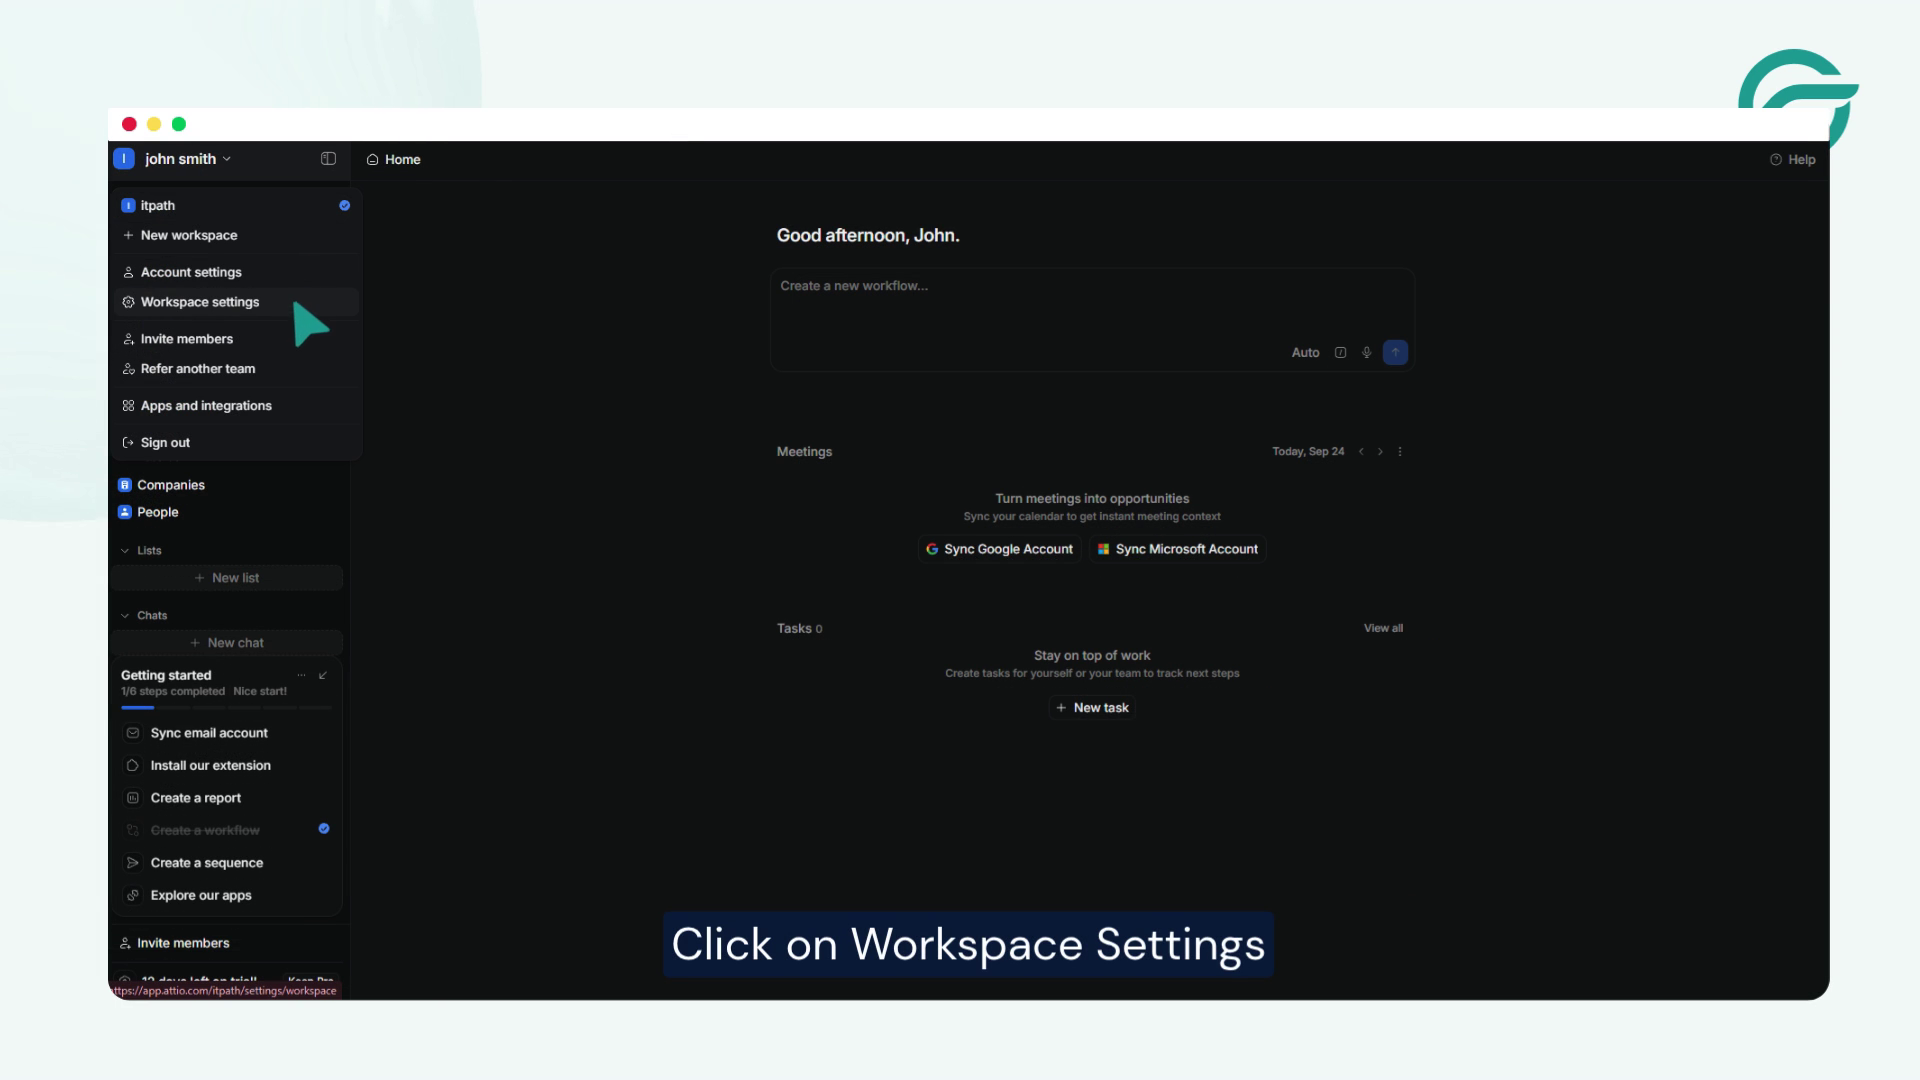
Click on Wordspace Settings – > Click on Developers
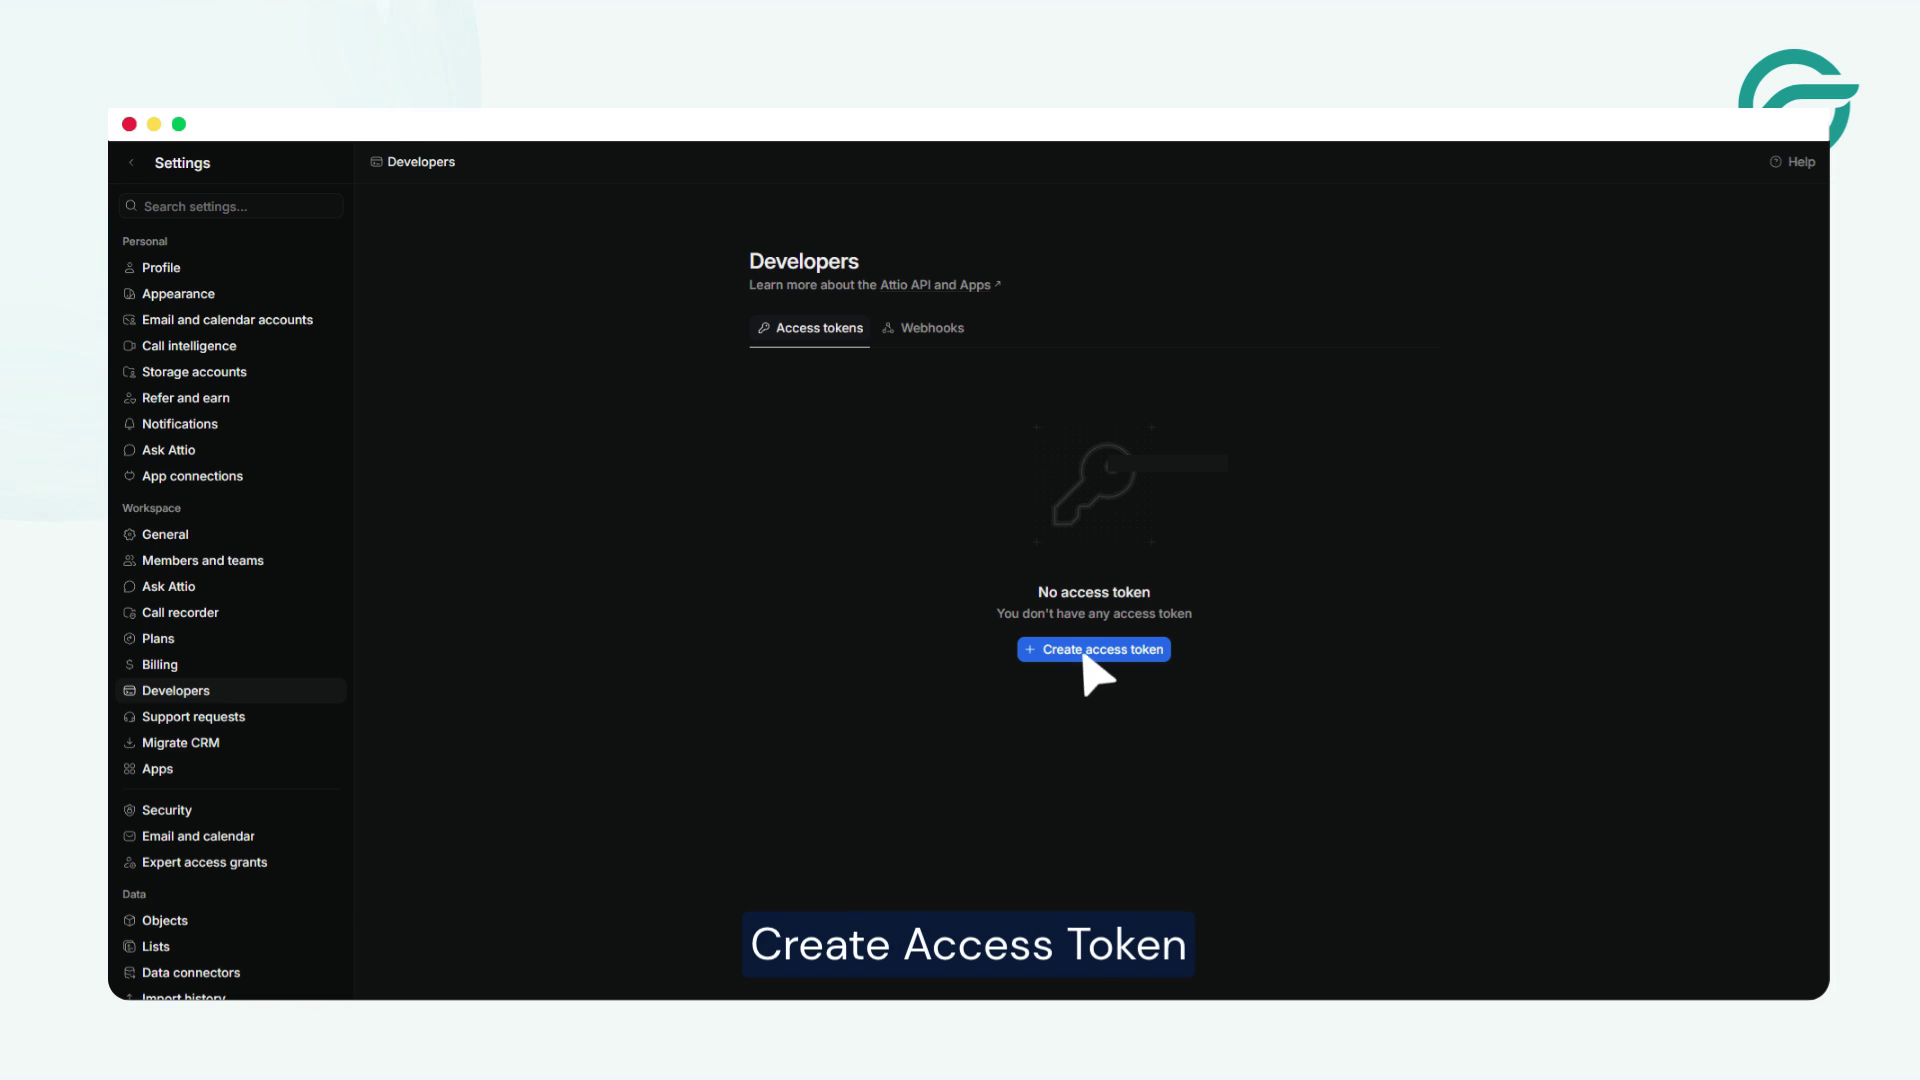
Create Access Token
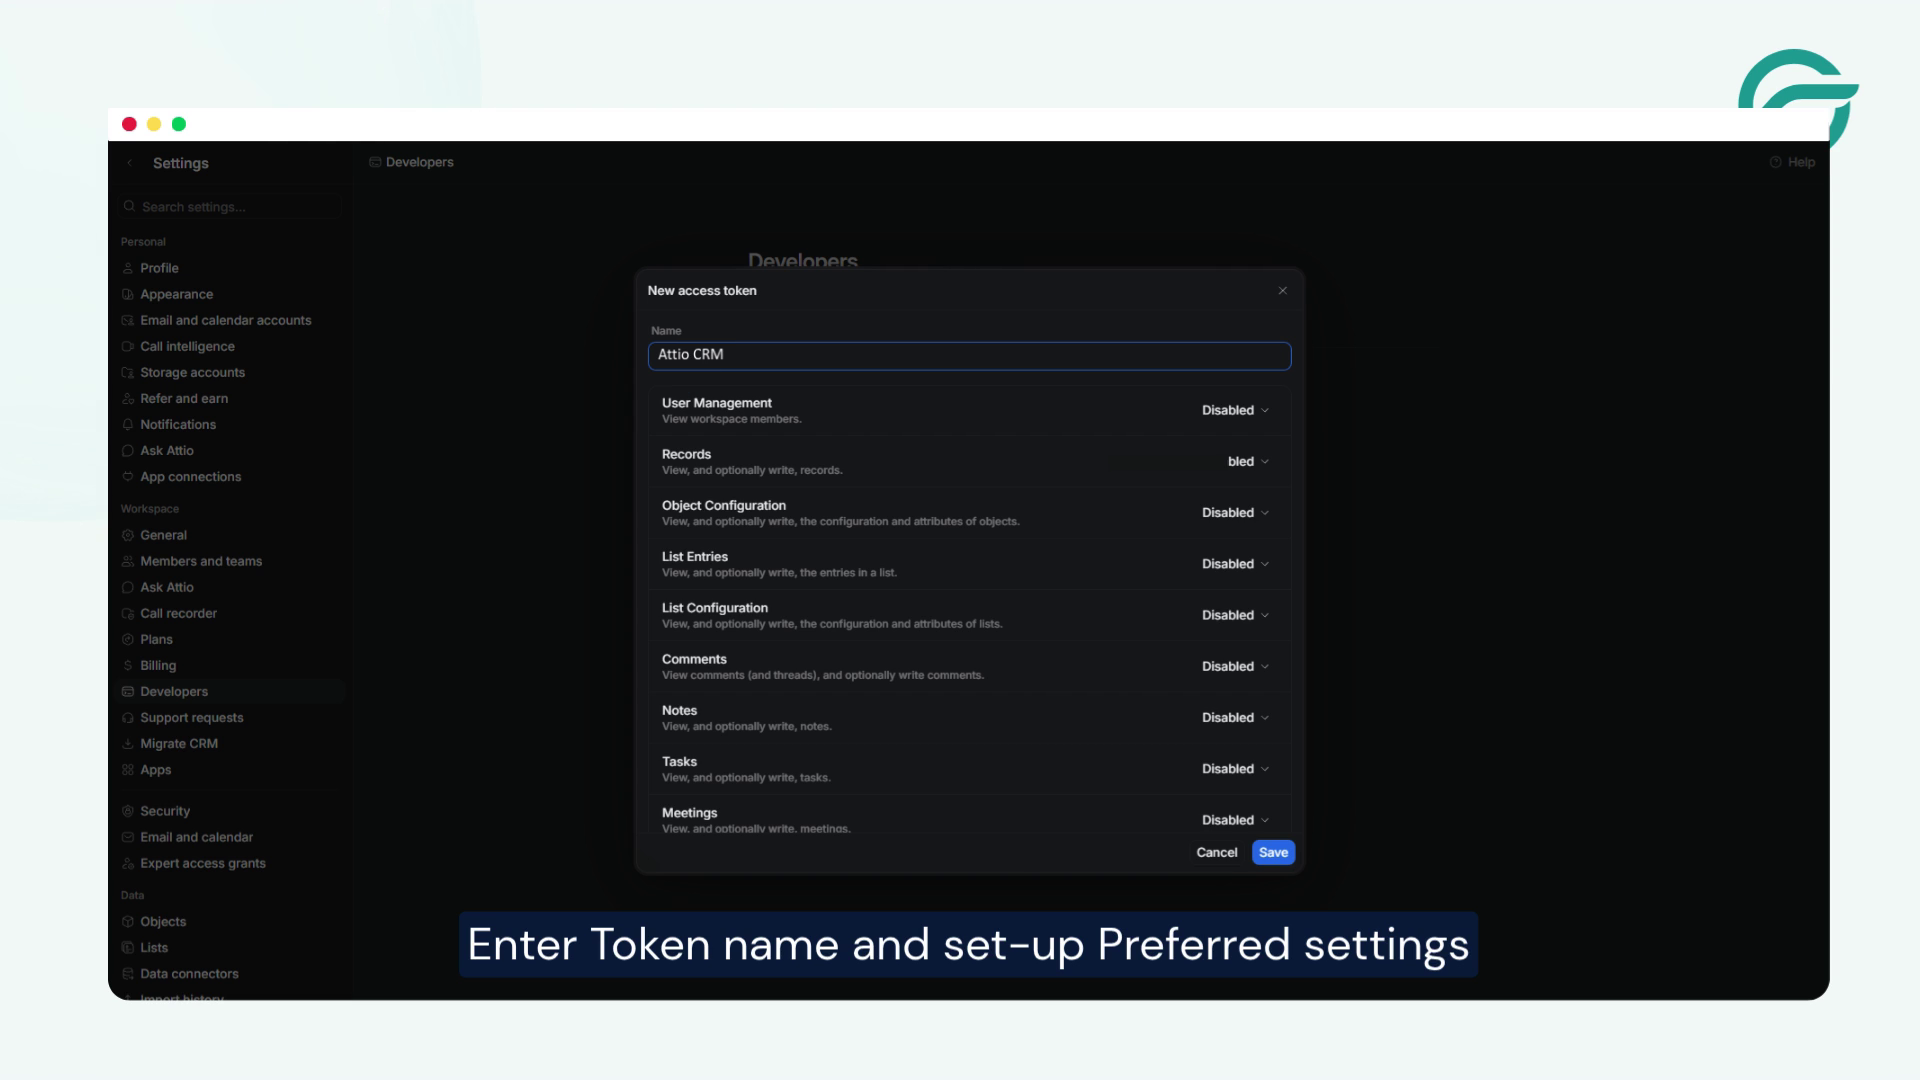
Enter Token name and set-up Preferred settings – > Click on Save
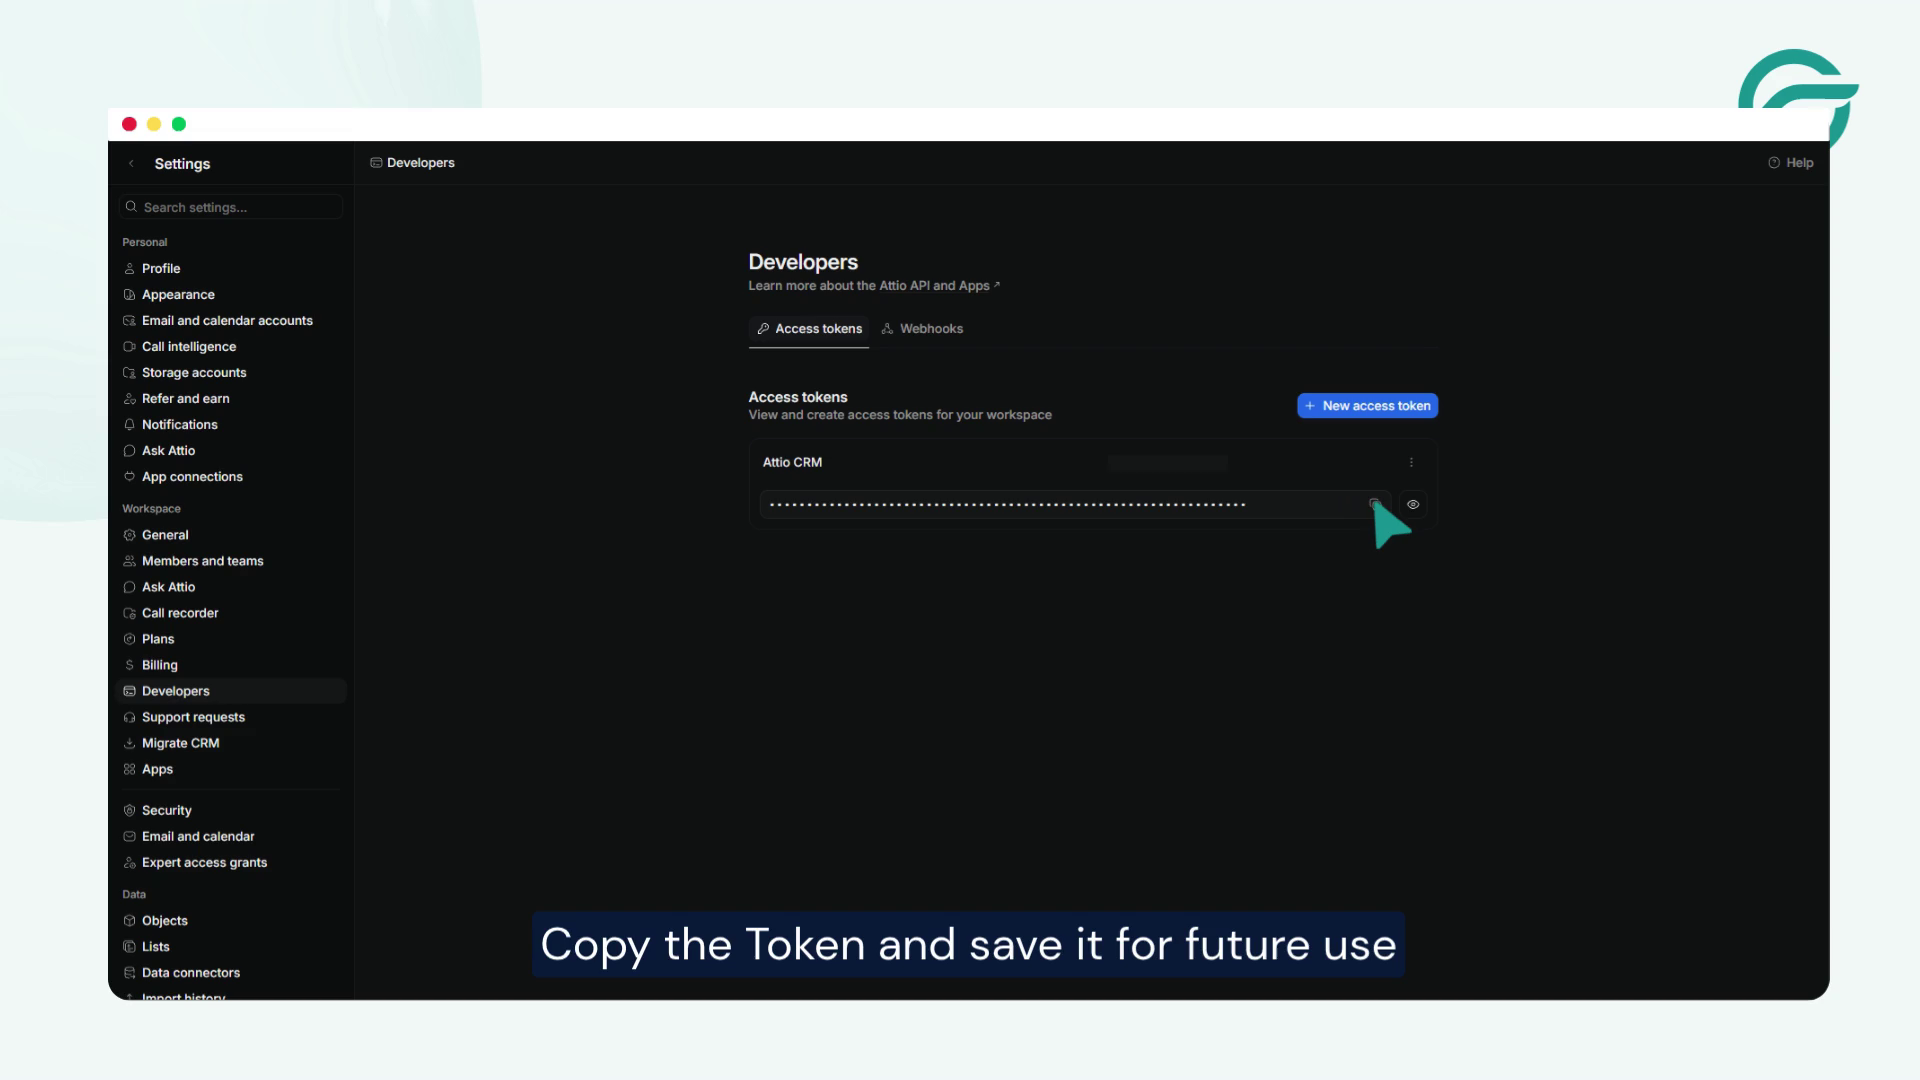
Copy Token & Save it for Future use!
Step 8: Add the Authentication Header in WordPress
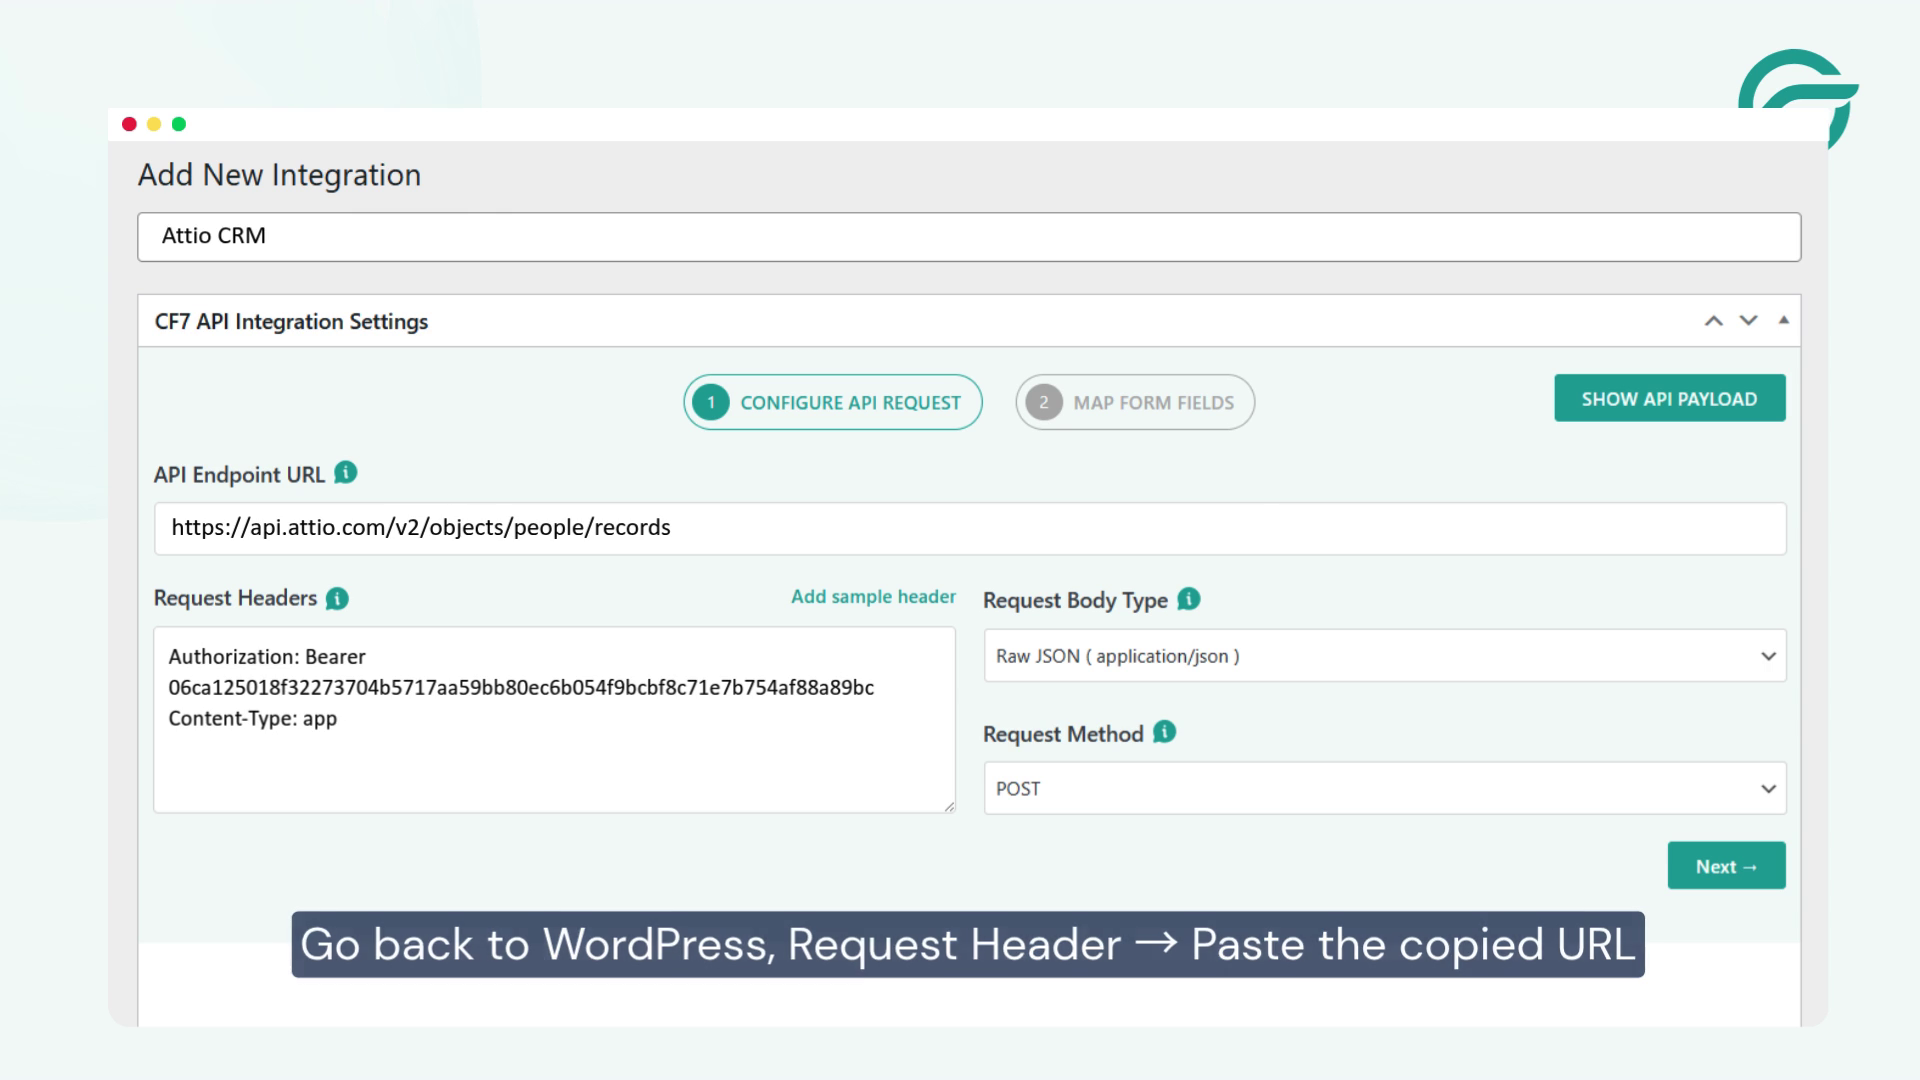
Go back to WordPress, Request Header -> Paste the copied URL in the “Request Headers” field
Click on Next Button
Step 9: Select Your Contact Form
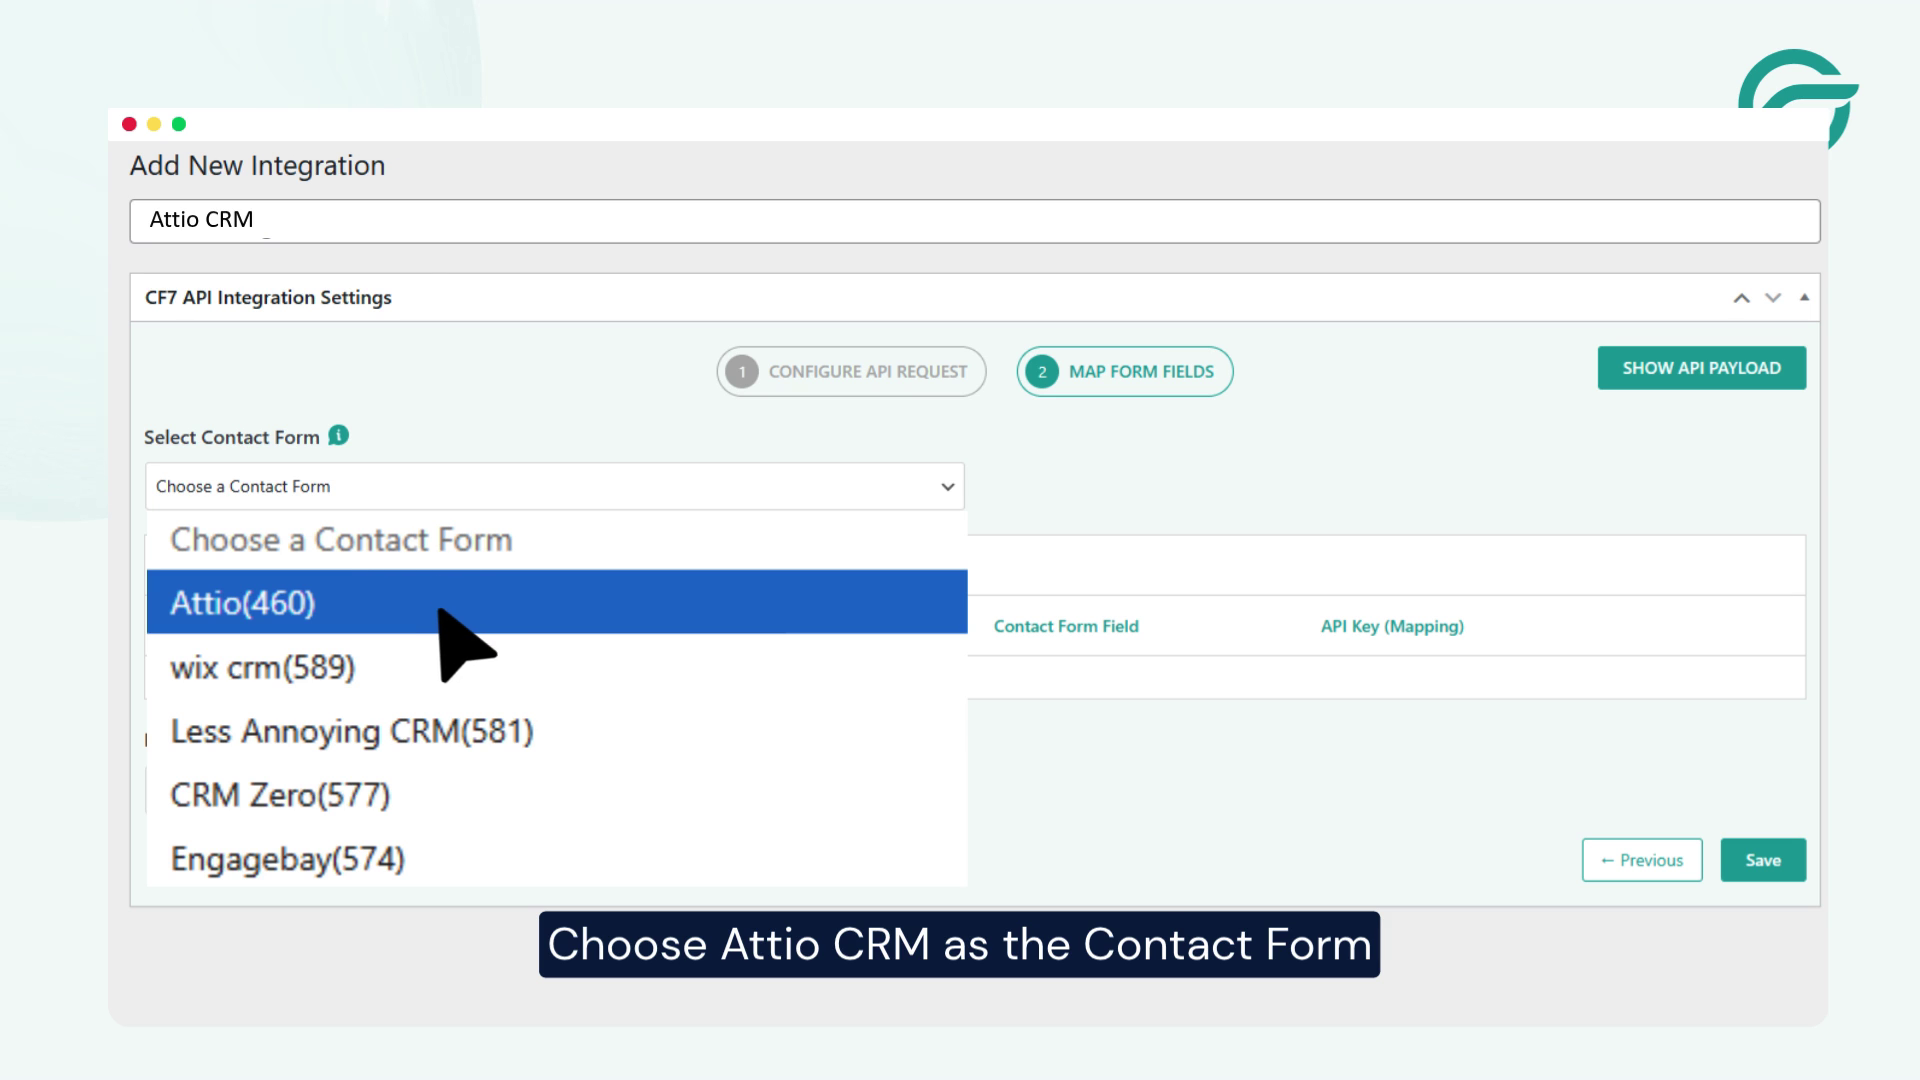
Choose Attio CRM as the Contact Form
Click on Save Button
Step 10: Map Contact Form 7 Fields to Attio CRM
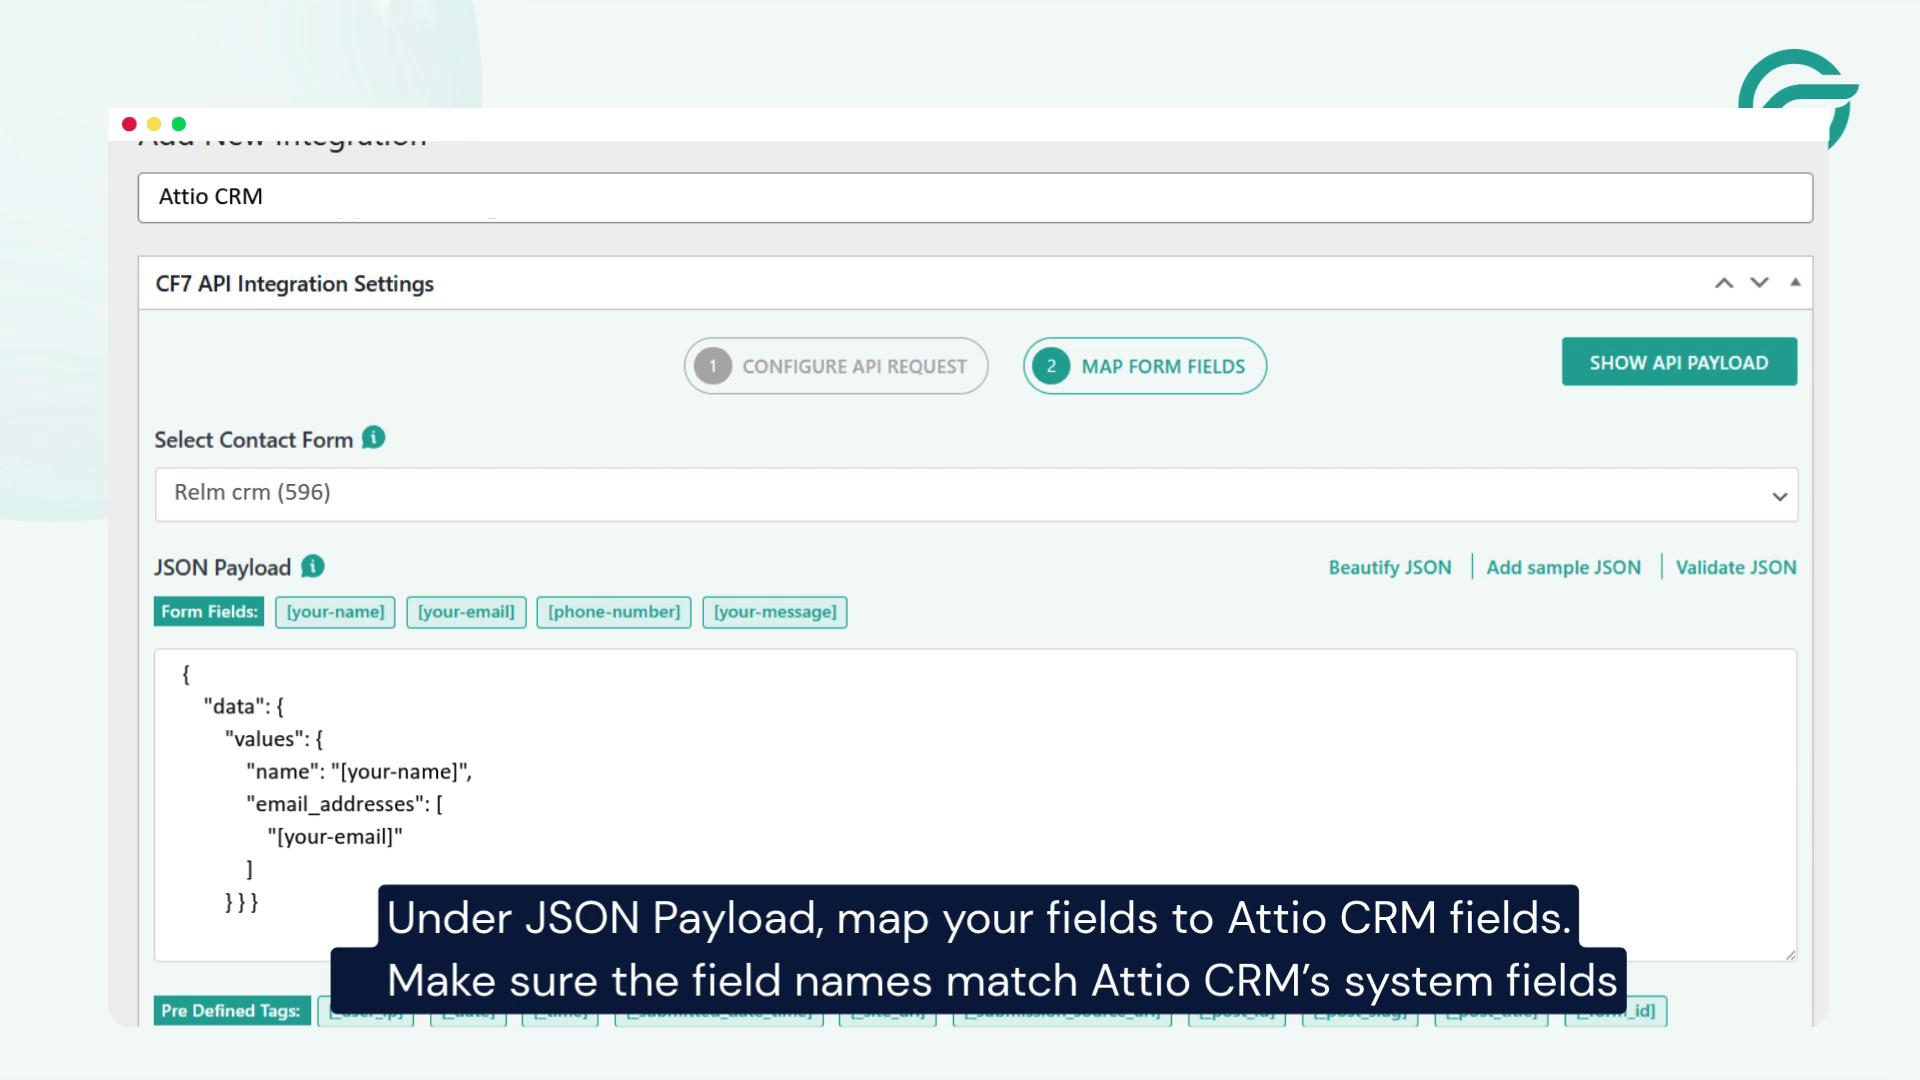
Under JSON Payload, map the Contact Form 7 fields to the corresponding Attio CRM fields.
For example, if your Contact Form 7 form contains:
- Name
- Phone Number
you need to map these values to the appropriate Attio CRM fields in the JSON payload.
Make sure the field names and data structure match the fields expected by Attio’s API. Incorrect field names or JSON formatting can cause the API request to fail.
Step 11: Submit a Test Entry
After completing the configuration, submit a test entry through your Contact Form 7 form.
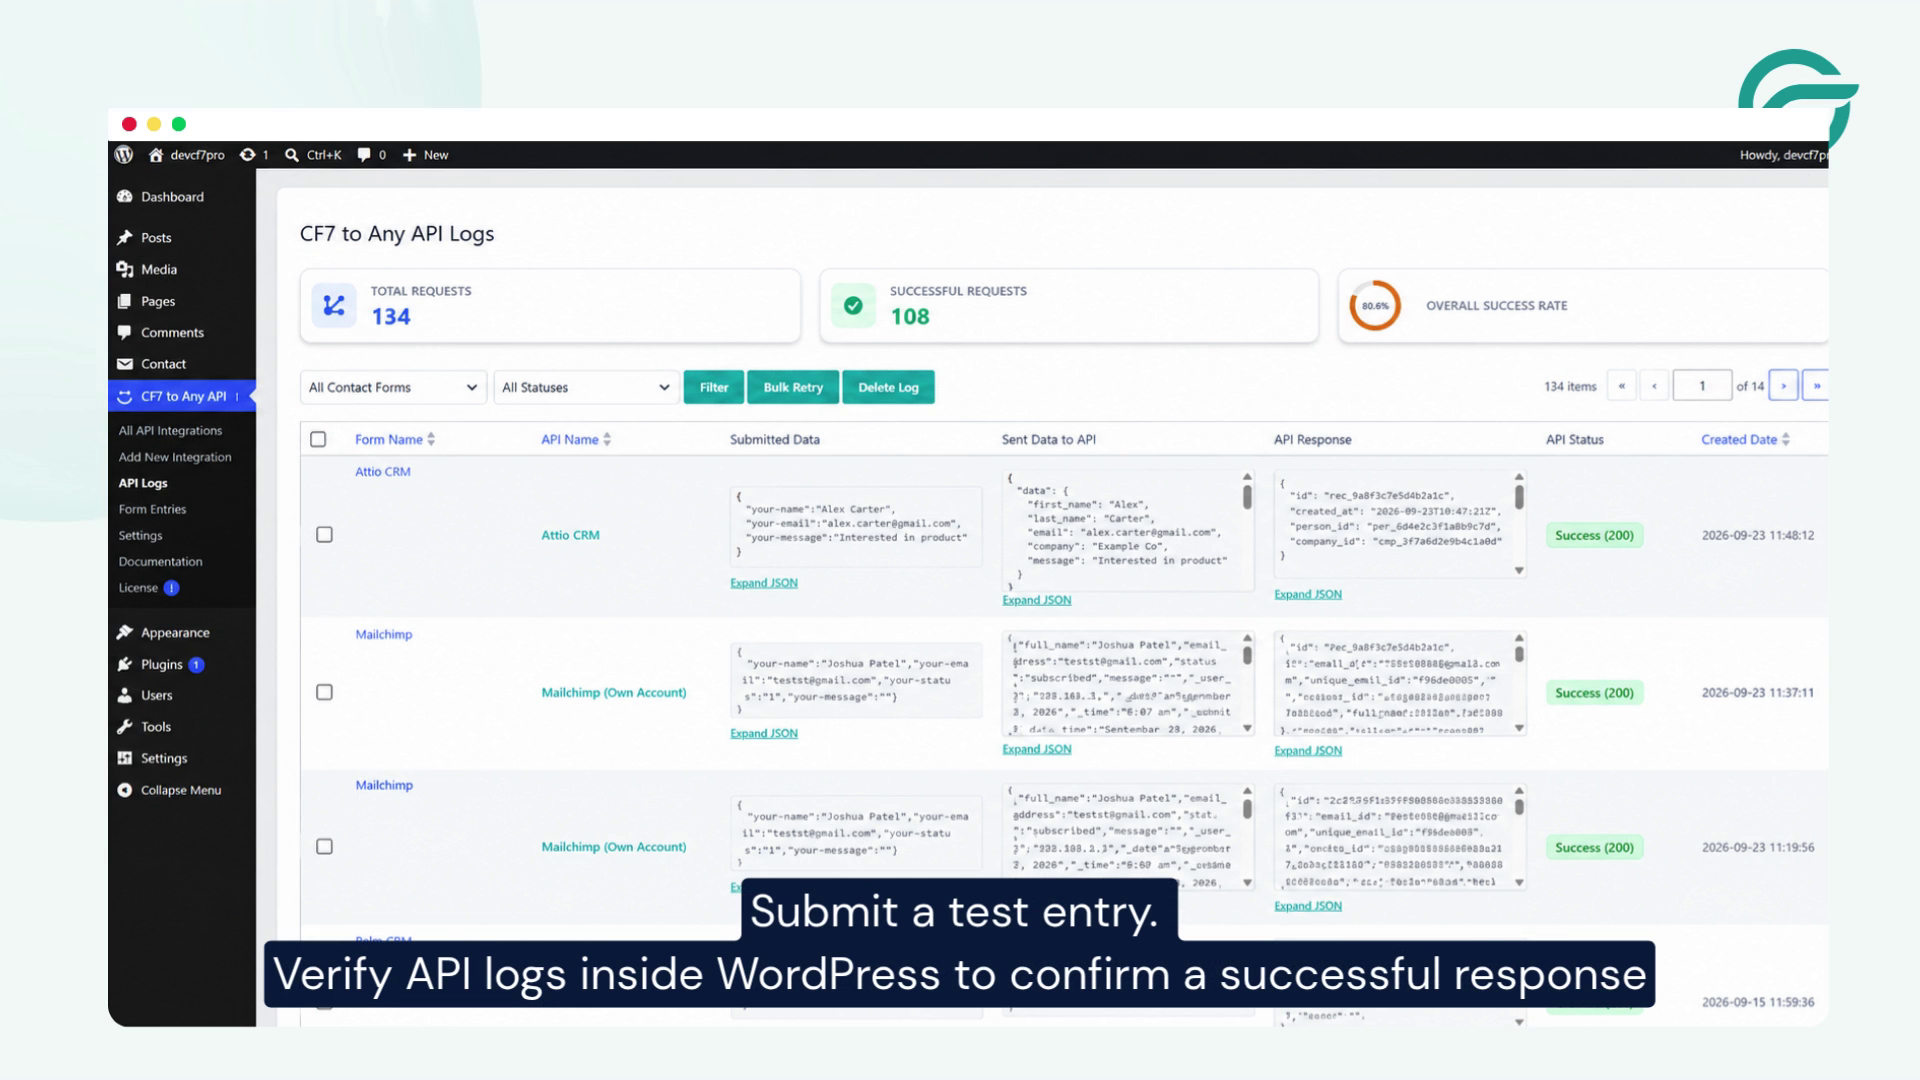
Then check the API logs provided by the Contact Form to Any API plugin to verify the request and response.
A successful API response confirms that the form data has been successfully sent to Attio CRM.
Conclusion
Integrating Contact Form 7 with Attio CRM can help automate the process of transferring website leads and contact information into your CRM. By connecting your WordPress form directly to Attio’s API, you can reduce manual data entry, improve lead management, and ensure new submissions are captured in your CRM more efficiently.
Using the Contact Form to Any API plugin makes the setup straightforward: configure the Attio API endpoint, authenticate the connection with an access token, map your Contact Form 7 fields, and test the API request. Once the integration is working correctly, new form submissions can be sent directly to Attio CRM as part of your lead management workflow.
Frequently Asked Questions
1. What are the benefits of integrating Contact Form 7 with Attio CRM?
Integrating Contact Form 7 with Attio CRM can automate the transfer of website form submissions, reduce manual data entry, keep contact information organized, and make it easier for teams to manage and follow up with leads.
2. Can Contact Form 7 submissions be automatically added to Attio CRM?
Yes. Once the API integration is configured correctly, Contact Form 7 submissions can be automatically sent to Attio CRM when a visitor submits a form.
3. What are some real-world use cases for Contact Form 7 and Attio CRM integration?
Businesses can use this integration for contact inquiries, quote requests, consultation forms, demo requests, service inquiries, and other lead-generation forms. Submitted information can be sent directly to Attio CRM for follow-up.
4. How does the integration help with lead management?
The integration centralizes website-generated contacts in Attio CRM, allowing sales and marketing teams to manage incoming leads from the CRM instead of manually transferring information from WordPress.
5. Does Contact Form 7 and Attio CRM integration reduce manual data entry?
Yes. The integration can automatically transfer form data to Attio CRM, reducing repetitive copy-and-paste tasks and helping minimize errors associated with manual data entry.
6. Can multiple Contact Form 7 forms be connected to Attio CRM?
Yes. Multiple Contact Form 7 forms can be configured to send data to Attio CRM. For example, separate forms can be used for contact inquiries, service requests, demo requests, and quote requests.
7. Can this integration help businesses respond to new leads faster?
It can help reduce delays caused by manually transferring form submissions because new contact information can be sent to Attio CRM automatically. Teams can then access the information in their existing CRM workflow for follow-up.


