



Integrating Contact Form 7 with Espo CRM allows you to automatically send form submissions from your WordPress website directly into your CRM. This can help reduce manual data entry, keep contact information organised, and ensure that new leads are captured in Espo CRM as soon as they submit a form.
Managing website enquiries manually can be time-consuming and increases the risk of missing or delaying important leads. By connecting Contact Form 7 with Espo CRM, businesses can automatically send contact form submissions directly to their CRM, making it easier to capture, organise, and manage leads in one place.
In this guide, we’ll show you how to connect Contact Form 7 with Espo CRM in WordPress using the Contact Form to Any API plugin. You’ll learn how to configure the Espo CRM API endpoint, create and authenticate an API user, map Contact Form 7 fields to Espo CRM, and test the integration to make sure form submissions are transferred successfully.
Watch the Video Tutorial: CF7 with Espo CRM Integration (Step-by-Step)
Before following the written steps, you can watch the complete integration setup in this quick video tutorial.
Step 1: Sign In to Espo CRM
First, log in to your Espo CRM account. Keep your CRM dashboard open because you will need information from Espo CRM during the WordPress configuration.
Step 2: Open WordPress
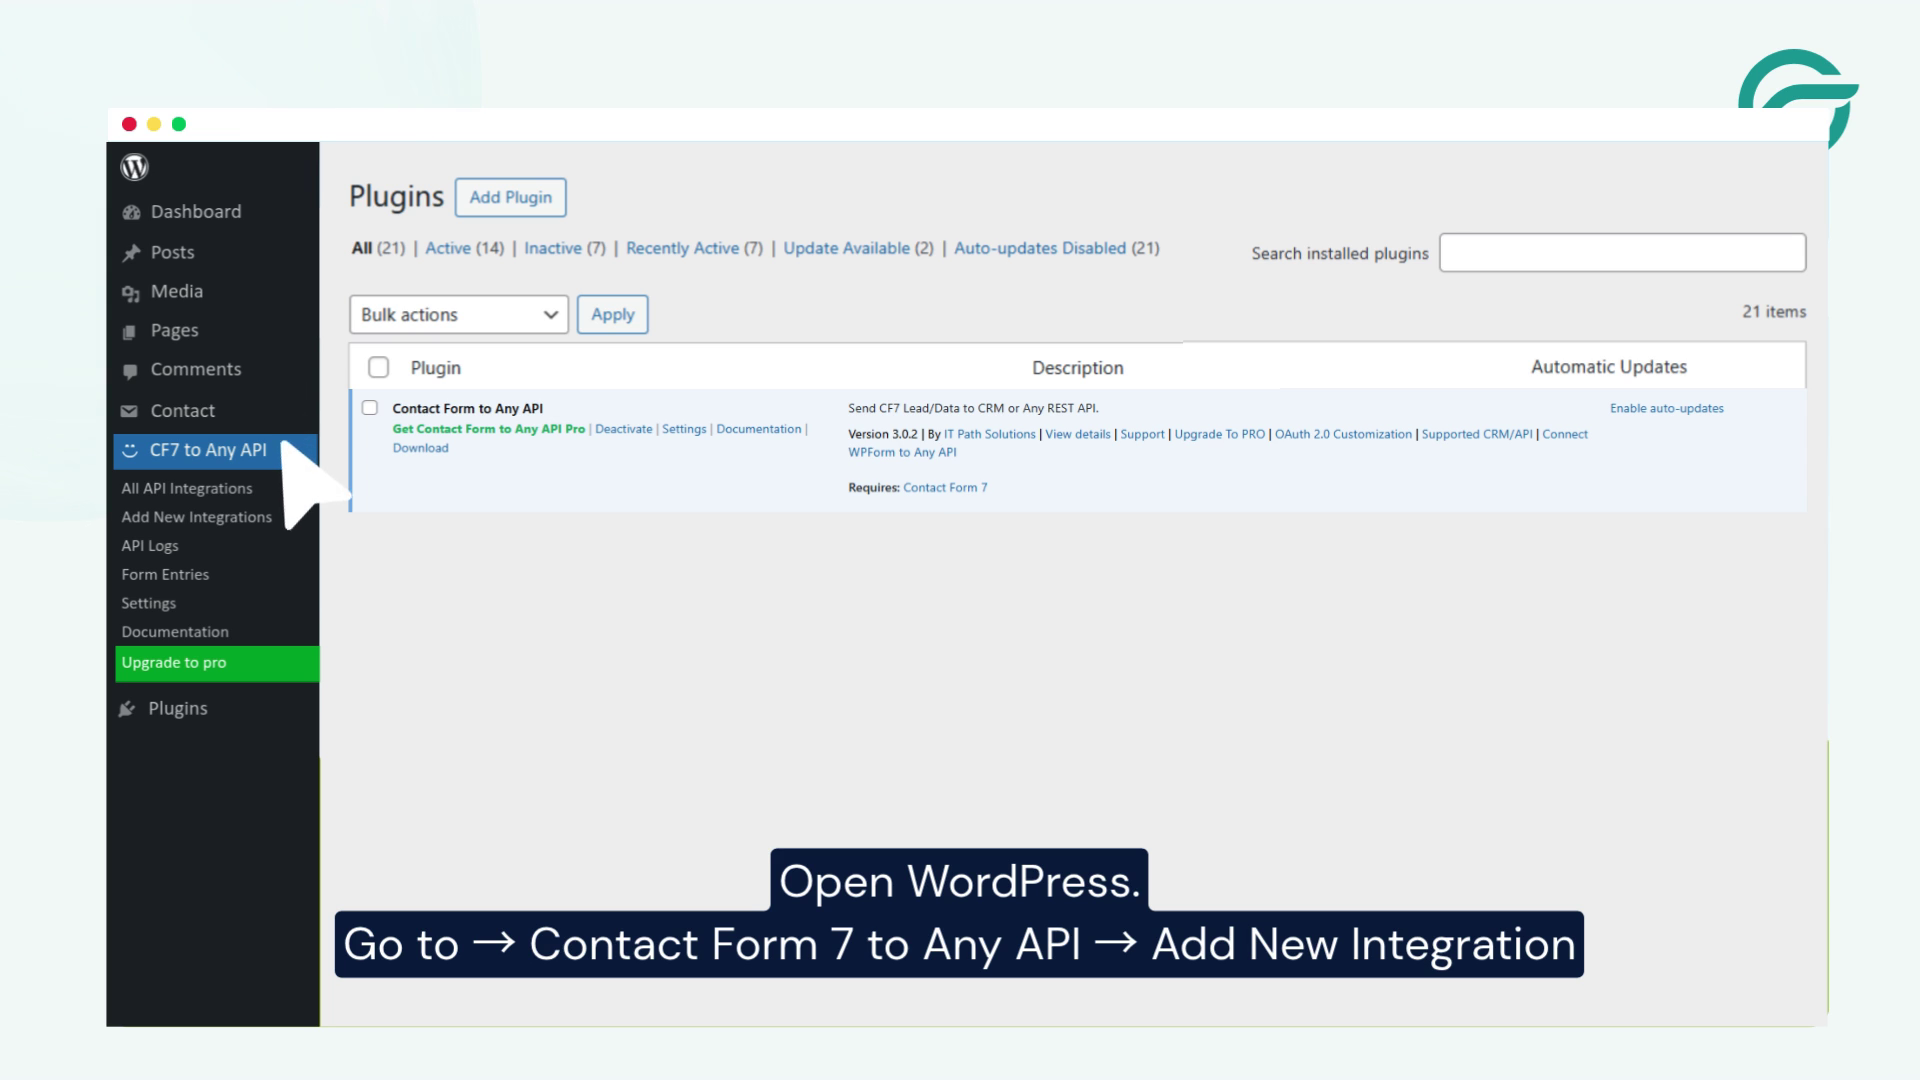
Log in to your WordPress website and access the WordPress administration dashboard.
Navigate to:
Contact Form to Any API → Add New Integration
This is where you will create the connection between your Contact Form 7 form and Espo CRM.
Step 3: Create a New Integration
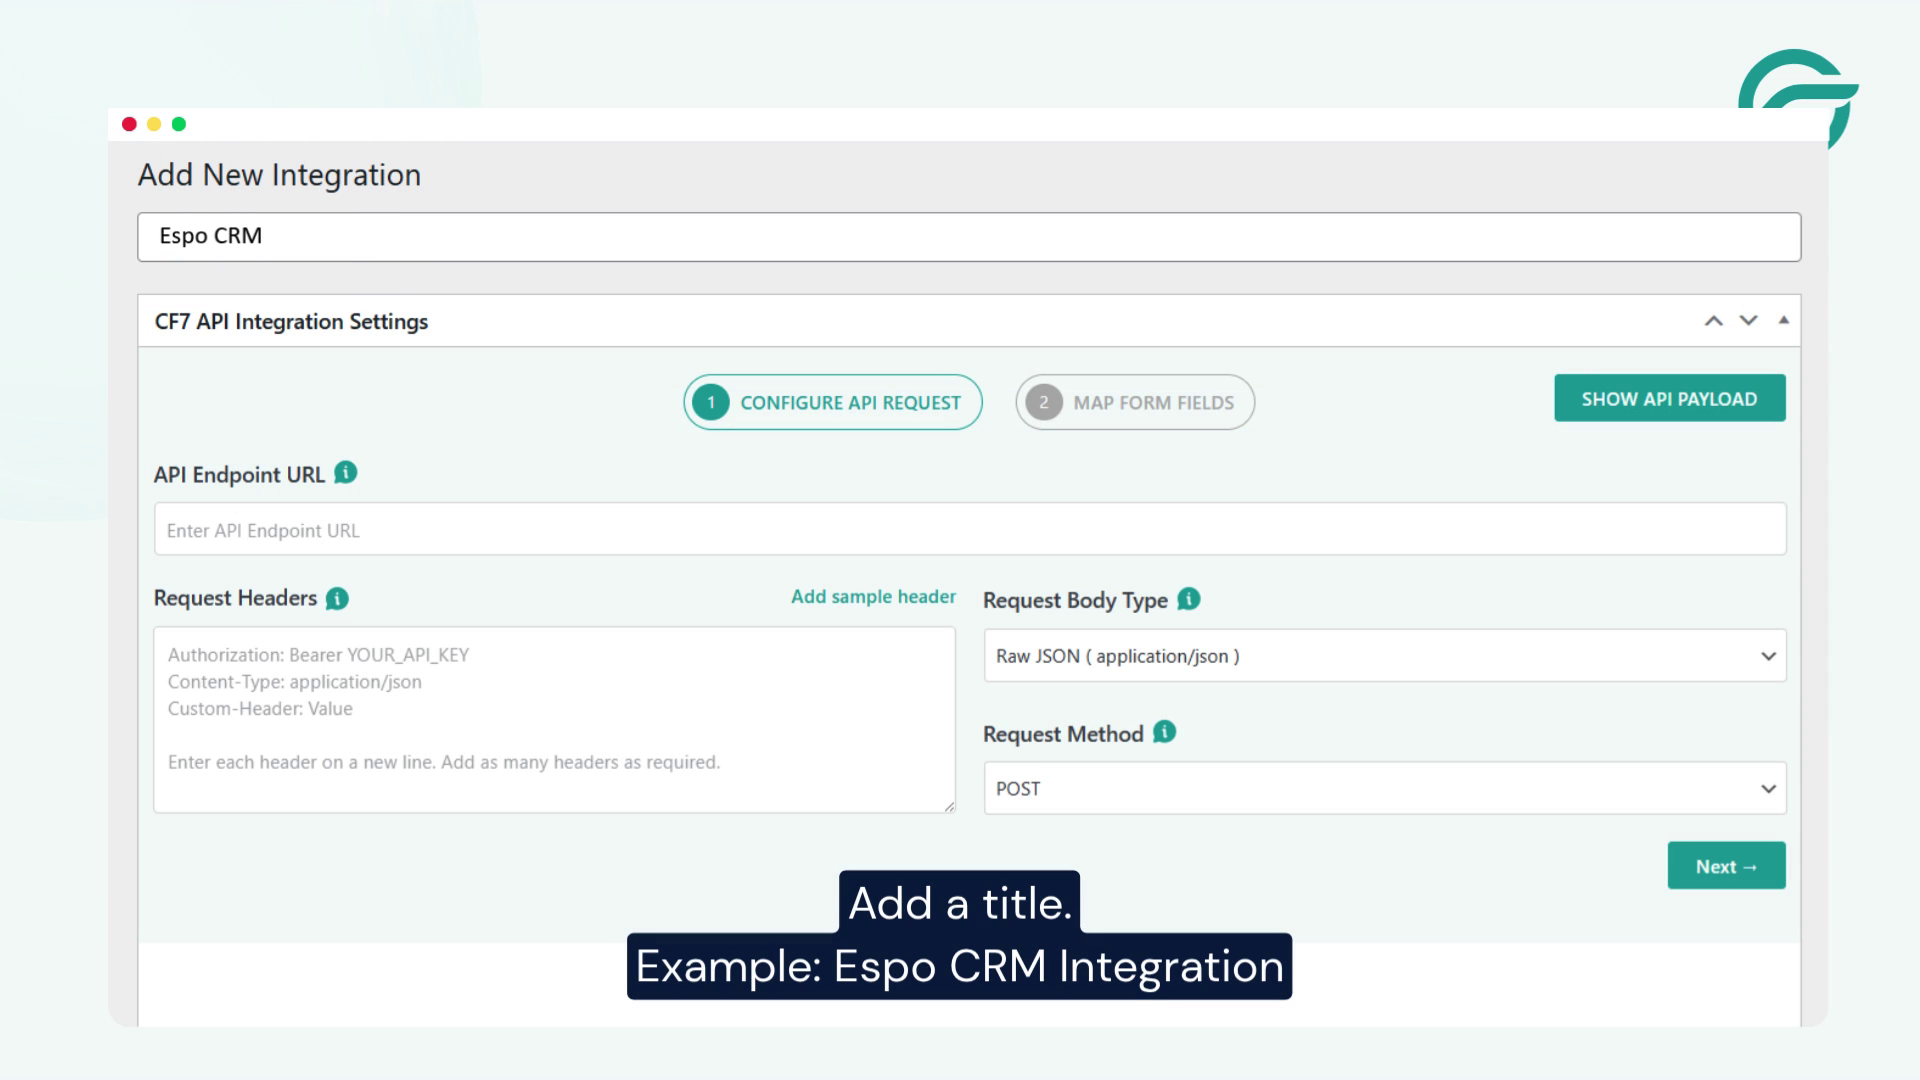
Click Add New Integration and enter an integration title.
For example:
Espo CRM Integration
Choose a name that makes the integration easy to identify, especially if you have multiple forms or API integrations on your website.
Step 4: Add the Espo CRM API Endpoint
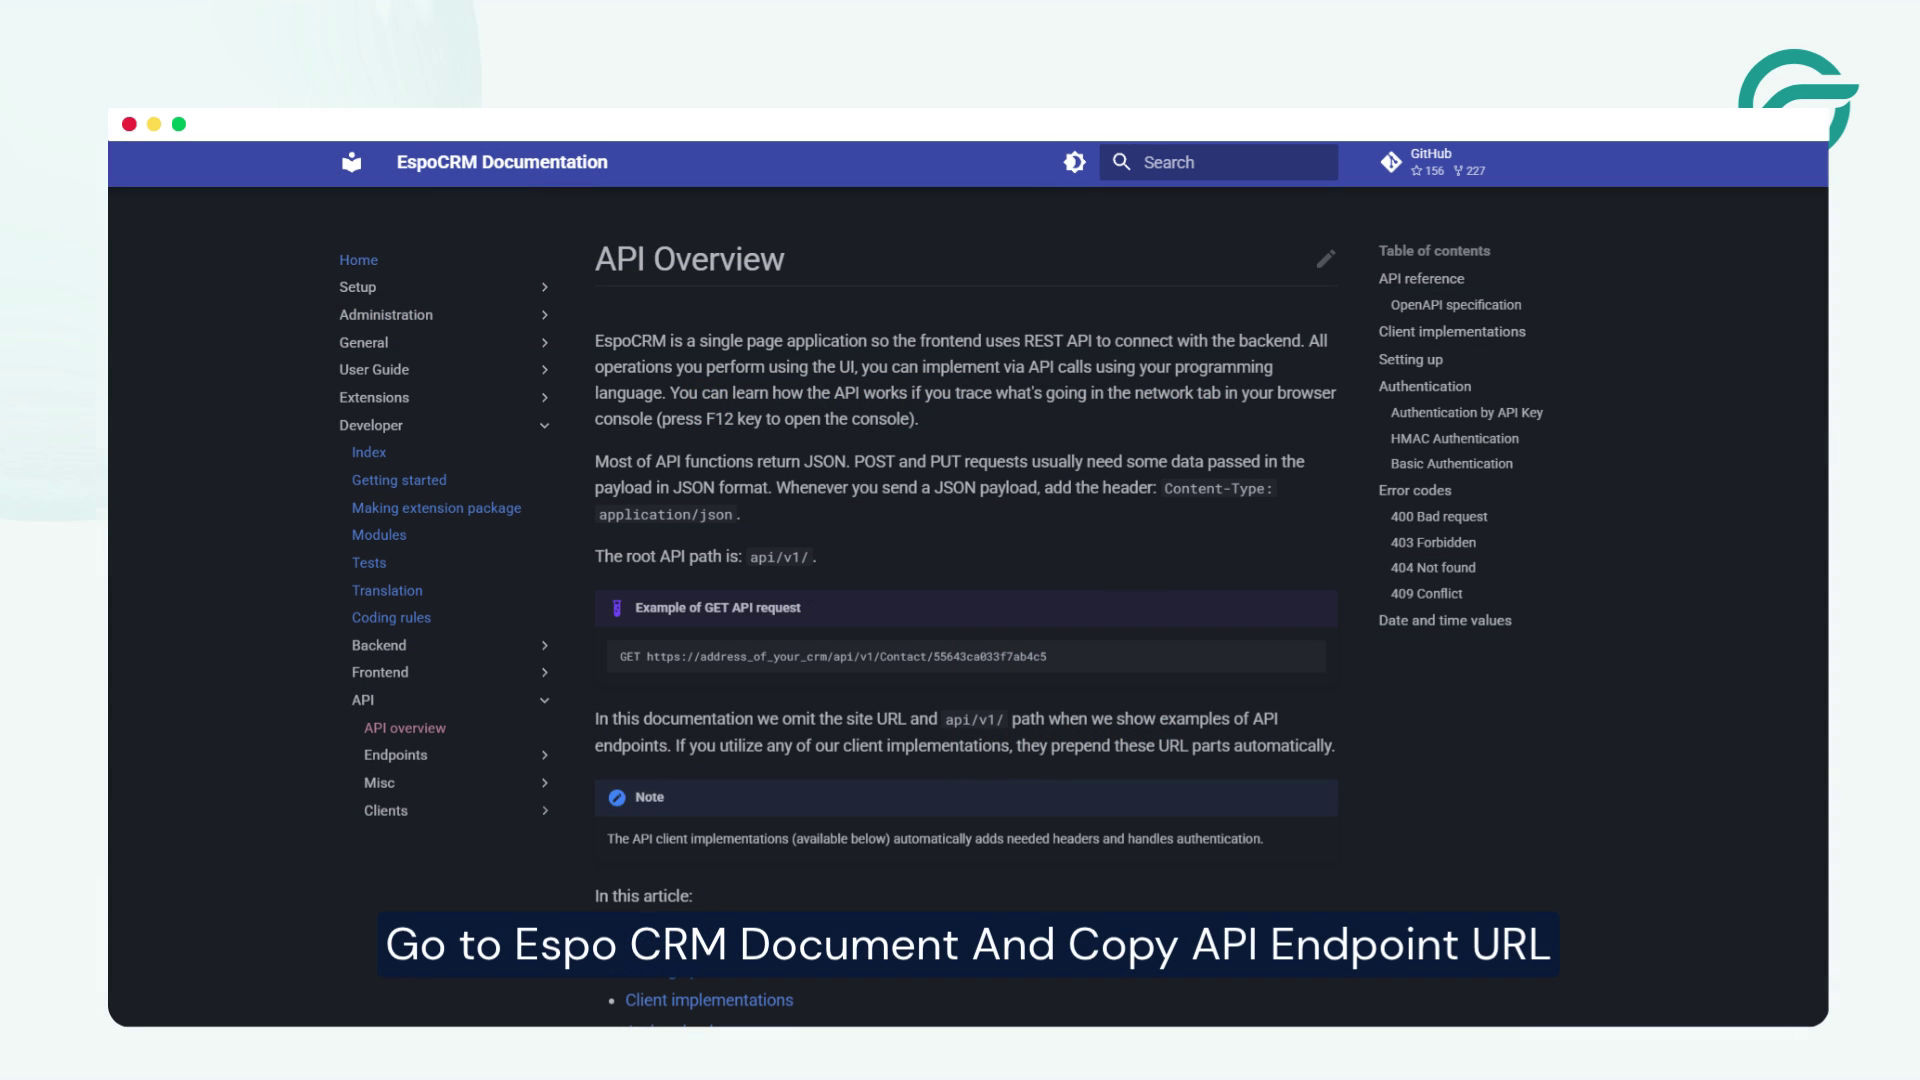
Go To Espo CRM API documentation and copy the API endpoint URL required for your integration.
Step 5: Add the API Endpoint to WordPress
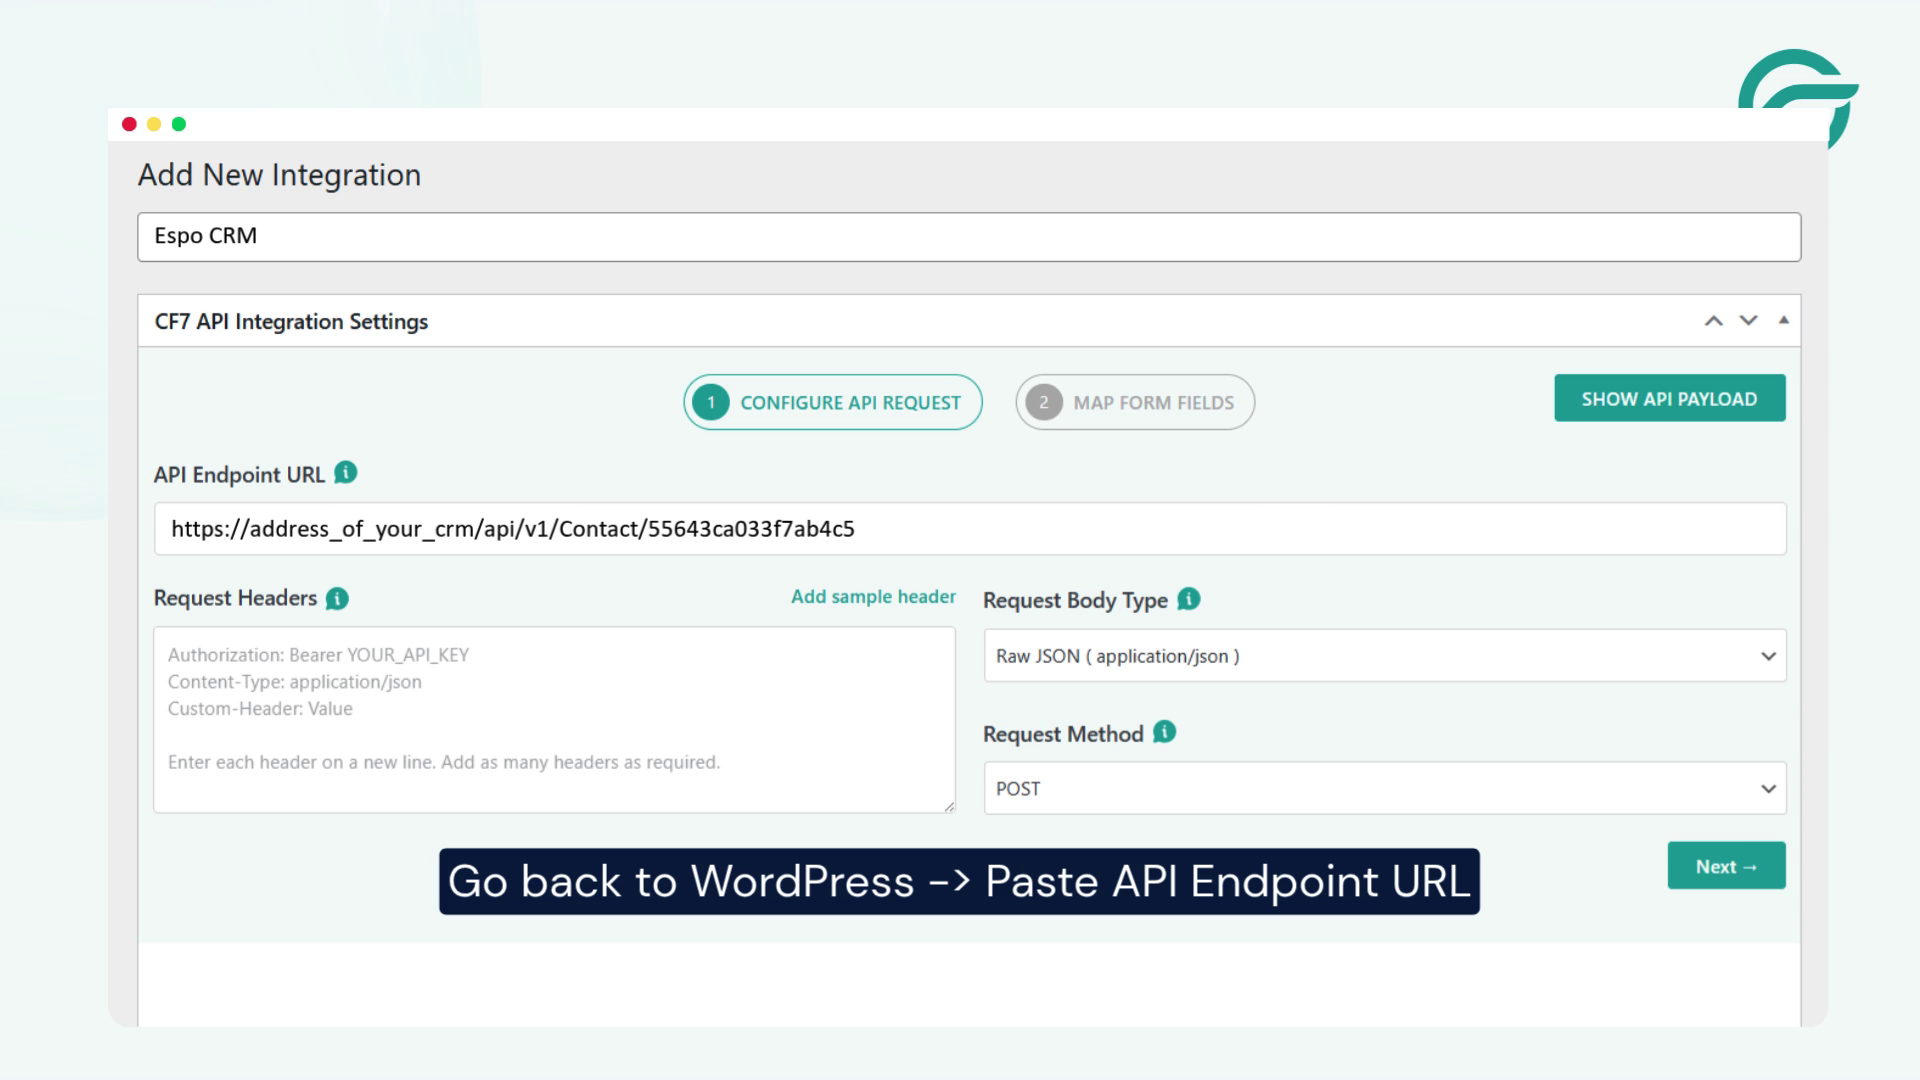
Return to WordPress and paste the endpoint into the API Endpoint URL field.
For example:
https://address_of_your_crm/api/v1/Contact/55643ca033f7ab4c5
Make sure you replace the example CRM address and record information with the endpoint appropriate for your own Espo CRM setup.
Step 6: Create an API User in Espo CRM
In Espo CRM:
- Log in to your account.
- Click your profile menu in the top-right corner.
- Select Administration.
- Search for API Users.
- Open API Users.
- Click Create API User.
- Enter the required name and settings.
- Click Save.
- Copy and securely store the generated API Key.
The API key will be used to authenticate requests sent from WordPress to EspoCRM.
Step 7: Create and Assign an API Role
The API user needs the appropriate permissions to interact with EspoCRM.
From the Espo CRM administration area:
- Search for Roles.
- Open the roles section.
- Click Create Role.
- Add a name for the role.
- Configure the permissions according to your integration requirements.
- Click Save.
Once the role has been created, assign it to your API user.
Go to:
Administration → API Users
Select the API user you created and click Edit.
Open the Roles section and select the appropriate role.
Click Save.
Make sure the API user has at least one role assigned, otherwise the API requests may not have the required permissions.
Step 8: Add the Request Header in WordPress
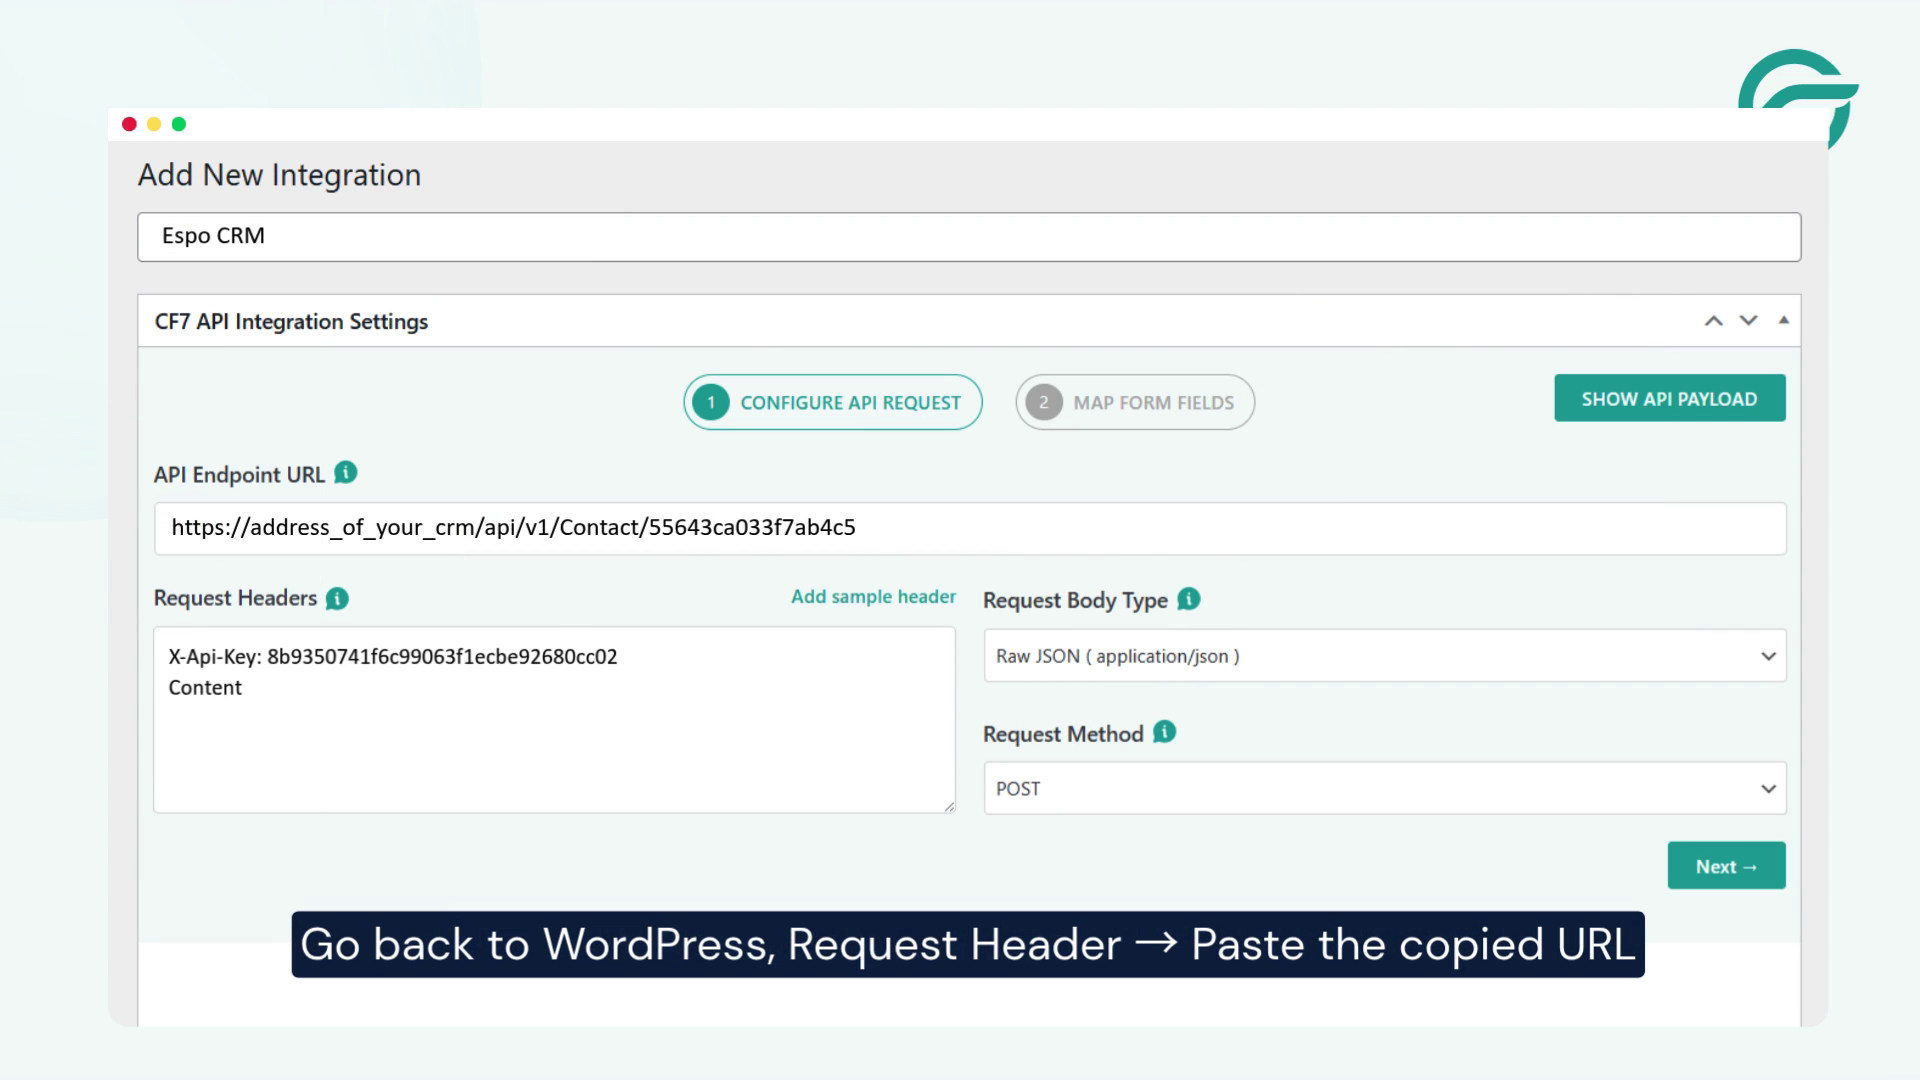
Go back to WordPress, Request Header -> Paste the copied URL in the “Request Headers” field
Click Next to continue.
Step 9: Select Contact Form 7
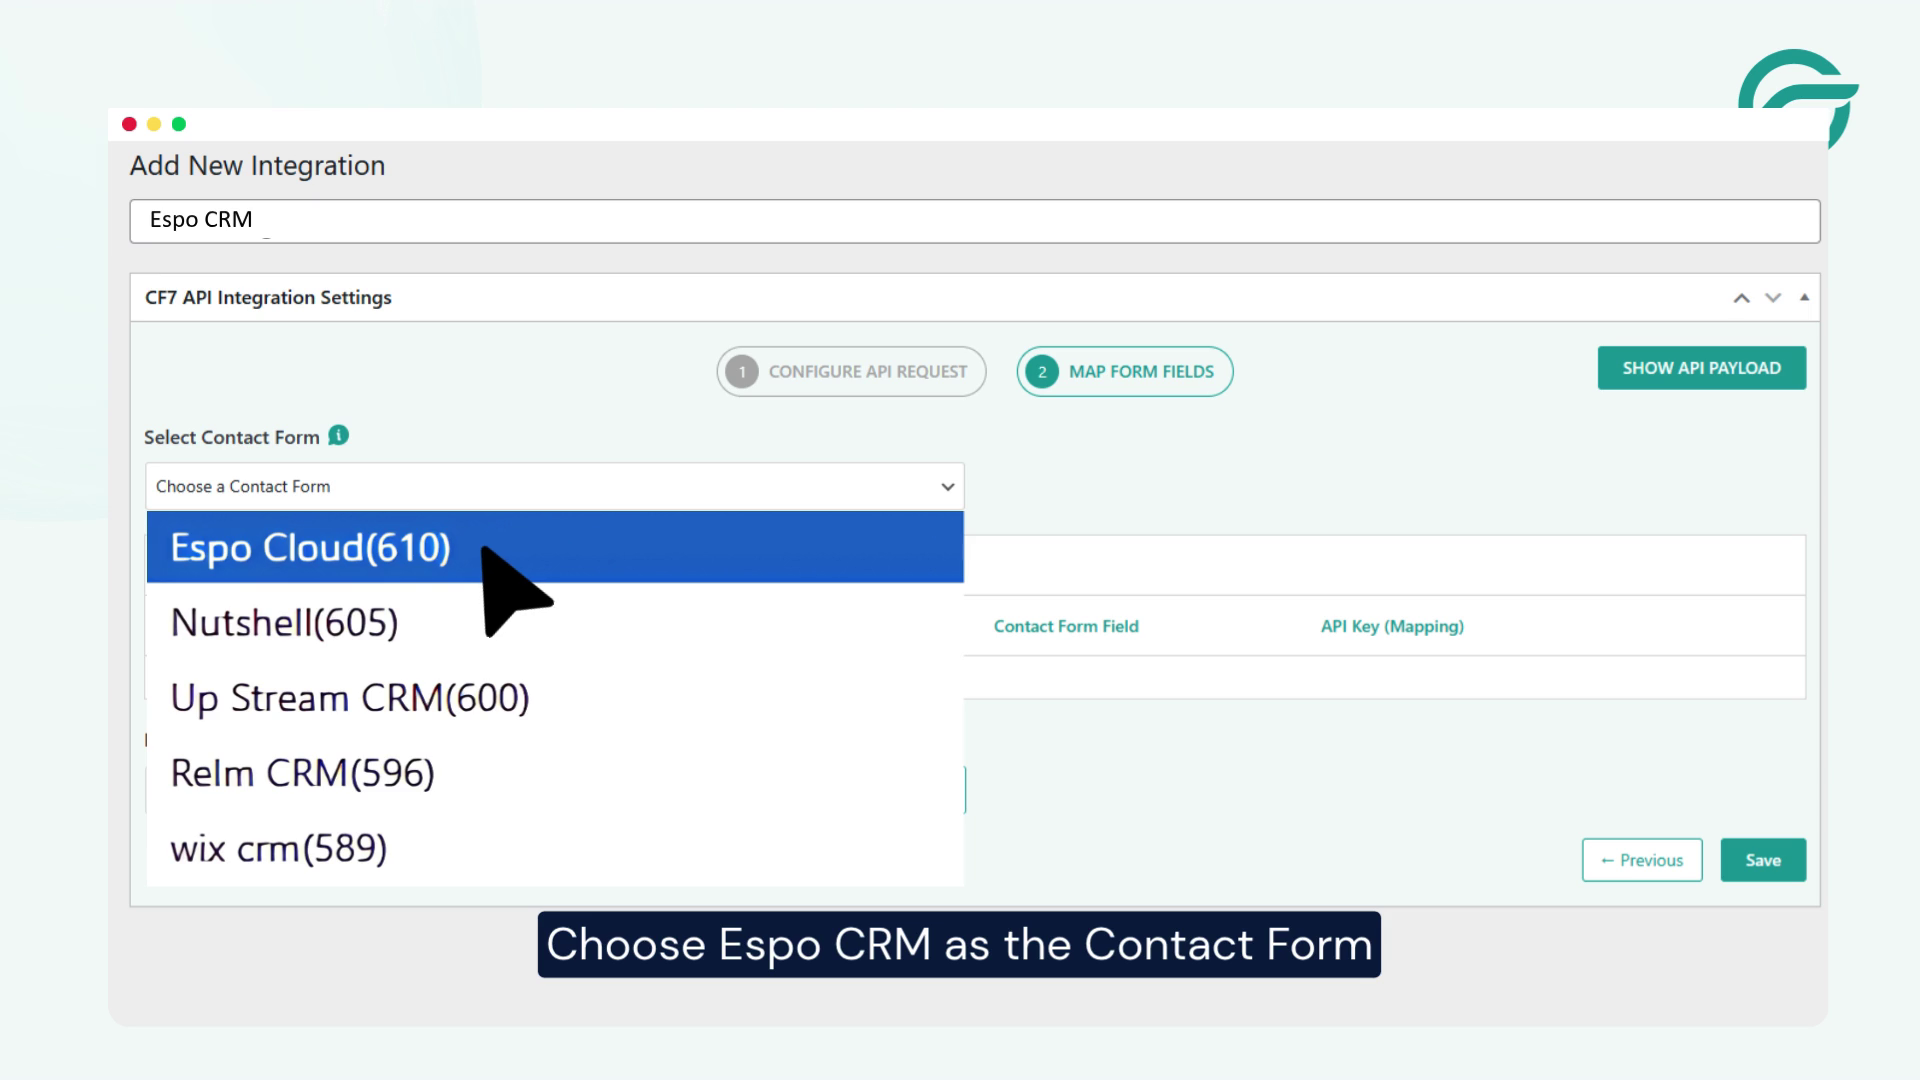
Choose Espo CRM as the Contact Form
Click Next
Step 10: Map Contact Form 7 Fields to Espo CRM
Under JSON Payload, map your fields to Espo CRM fields. Make sure the field names match Espo CRM’s Systeme fields
For example, your Contact Form 7 form may contain:
- Name
- Phone
- Message
These should be mapped to the corresponding fields in EspoCRM.
Important: Check Field Names Carefully
Make sure the Espo CRM field names match the fields expected by the API.
Incorrect field names, missing required fields, or incorrect JSON formatting can cause the API request to fail.
It is recommended to check your Espo CRM entity and API documentation before completing the mapping.
Step 11: Submit a Test Entry
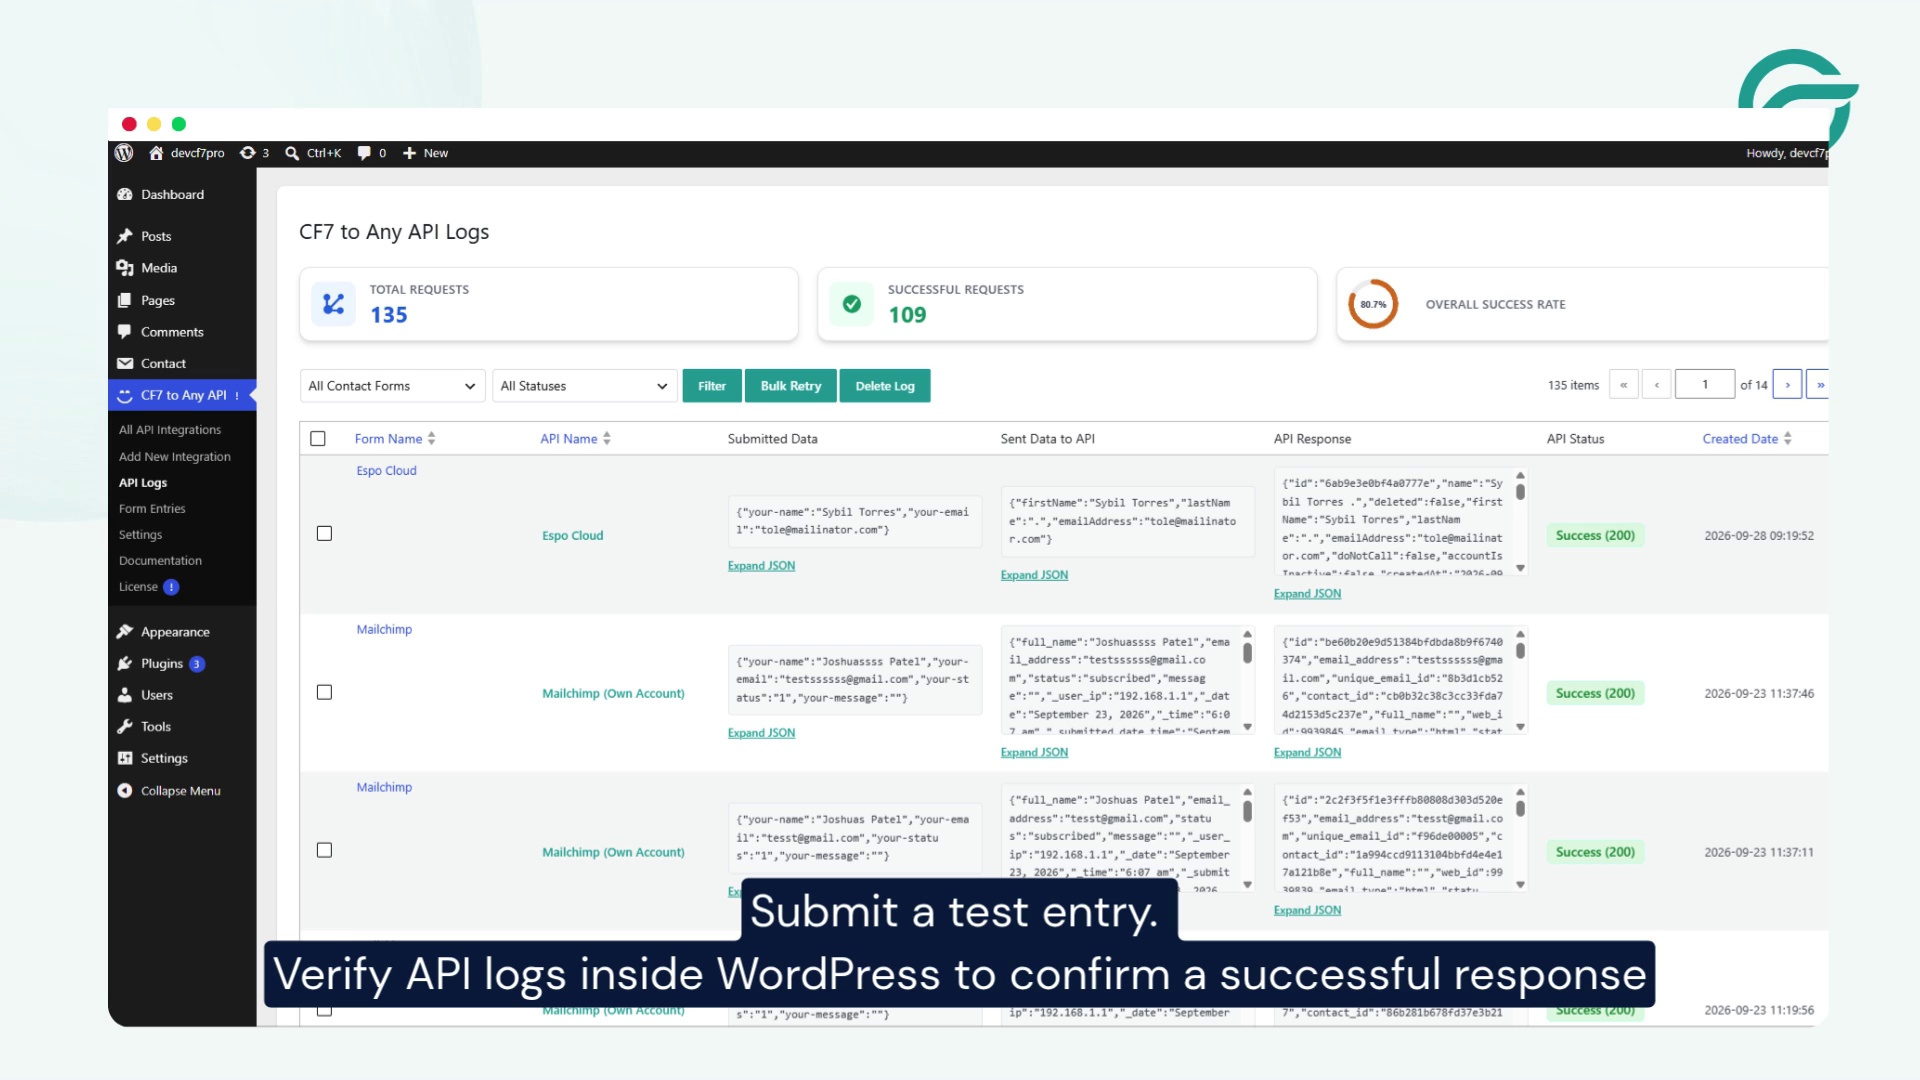
Submit a test entry. Verify API logs inside WordPress to confirm a successful response.
Conclusion
Connecting Contact Form 7 with Espo CRM in WordPress can automate the process of transferring website enquiries and lead information into your CRM.
Using the Contact Form to Any API plugin, you can configure the API endpoint, authenticate the connection with an Espo CRM API user, map Contact Form 7 fields to Espo CRM fields, and test the integration.
Once the integration is working correctly, every new Contact Form 7 submission can be sent directly to Espo CRM, helping your team manage website leads more efficiently and reduce manual data entry.


