


Managing leads manually can slow down your sales process and increase the chances of missing valuable customer inquiries. If you’re using Contact Form 7 on your WordPress website and Insightly CRM to manage contacts, you can automate the entire workflow.
Using Contact Form to Any API, every Contact Form 7 submission can be sent directly to Insightly CRM without writing custom code. This saves time, reduces manual data entry, and ensures your CRM always contains the latest customer information.
Watch the Video Tutorial: CF7 with Insightly CRM Integration (Step-by-Step)
Before following the written steps, you can watch the complete integration setup in this quick video tutorial.
In this guide, you’ll learn how to connect Contact Form 7 with Insightly CRM in just a few simple steps.
Step 1: Sign in to Your Insightly CRM Account
Log in to your Insightly CRM account using your administrator credentials.
You’ll need access to your API settings to obtain the endpoint URL and API key required for the integration.
Step 2: Open Your WordPress Dashboard
Log in to your WordPress admin area.
This is where you’ll configure the Contact Form to Any API integration.
Step 3: Create a New API Integration
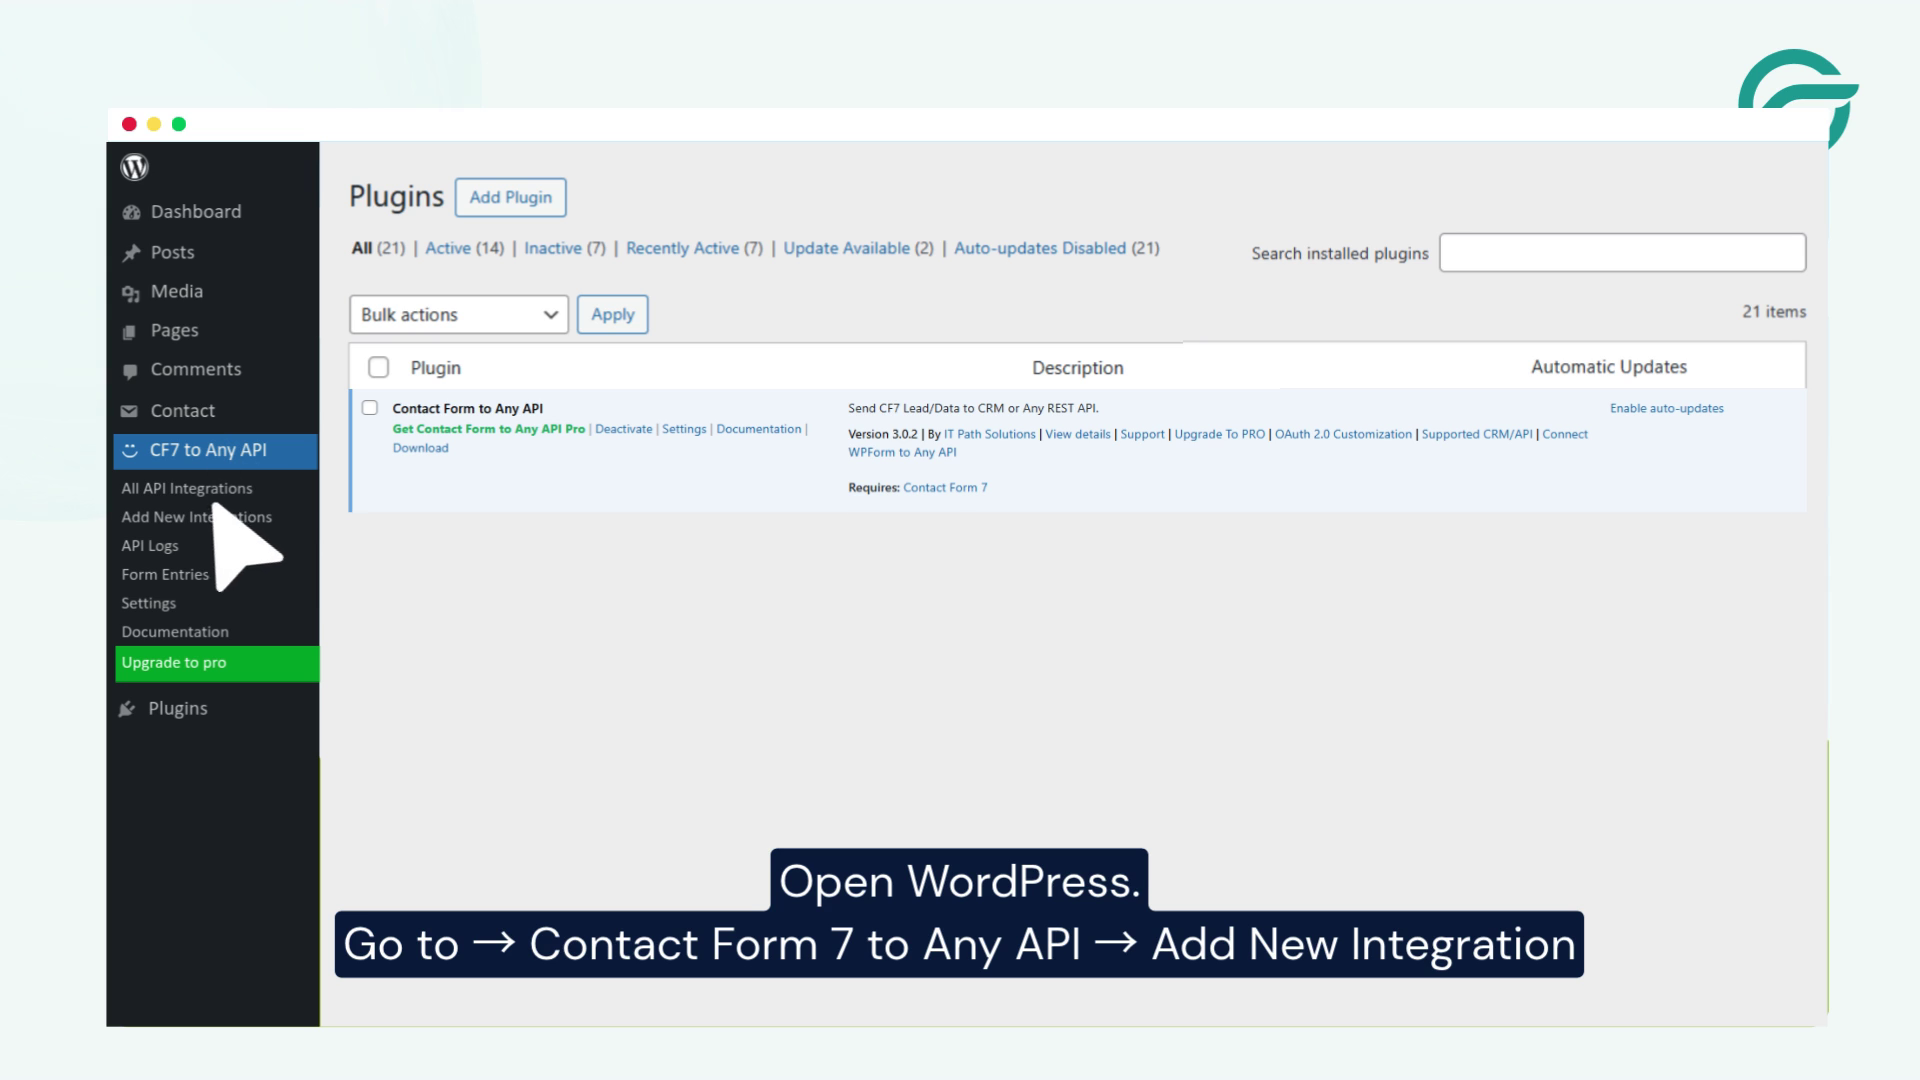
From the WordPress dashboard, navigate to:
Contact Form to Any API → Add New Integration
This opens the integration setup page where you’ll configure the API request.
Step 4: Enter an Integration Name
Give your integration a descriptive title so it’s easy to identify later.
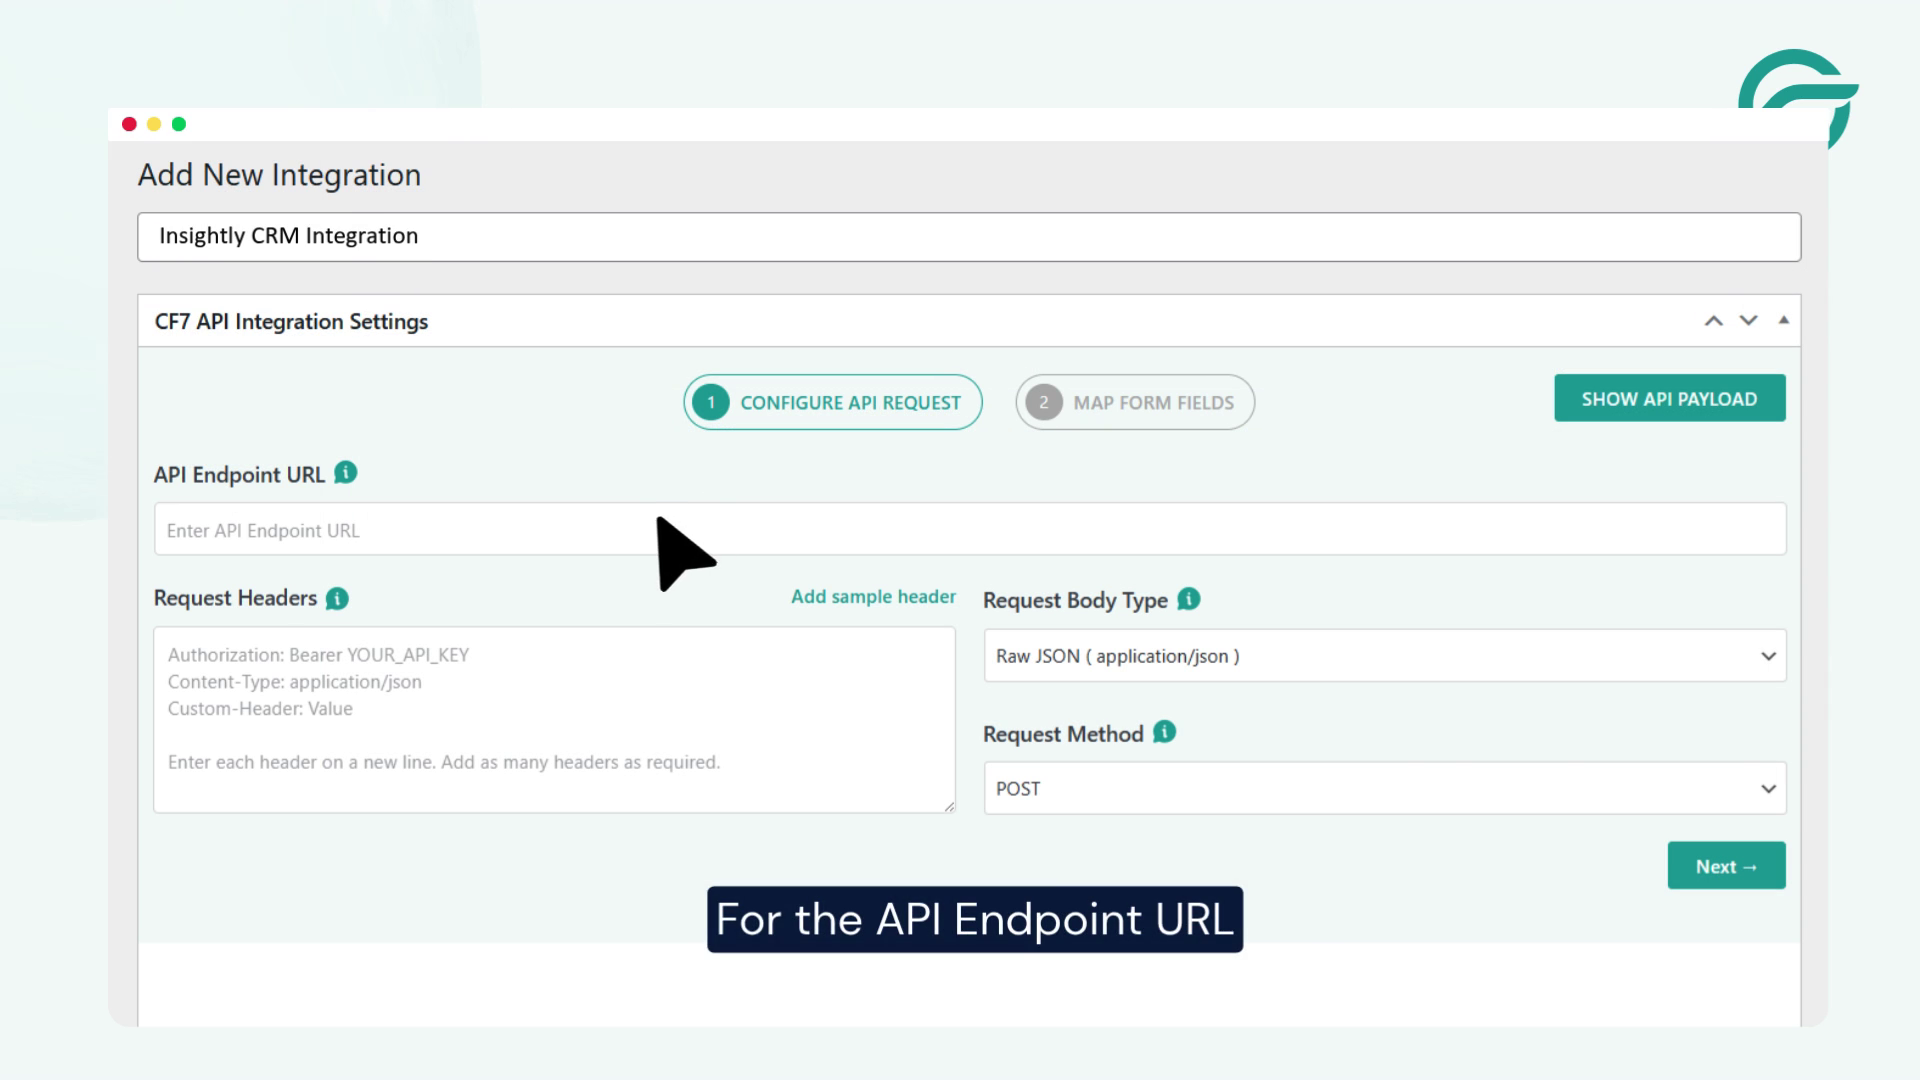
For example:
Insightly CRM Integration
You can use any name that helps distinguish this integration from others.
Step 5: Copy the Insightly API Endpoint
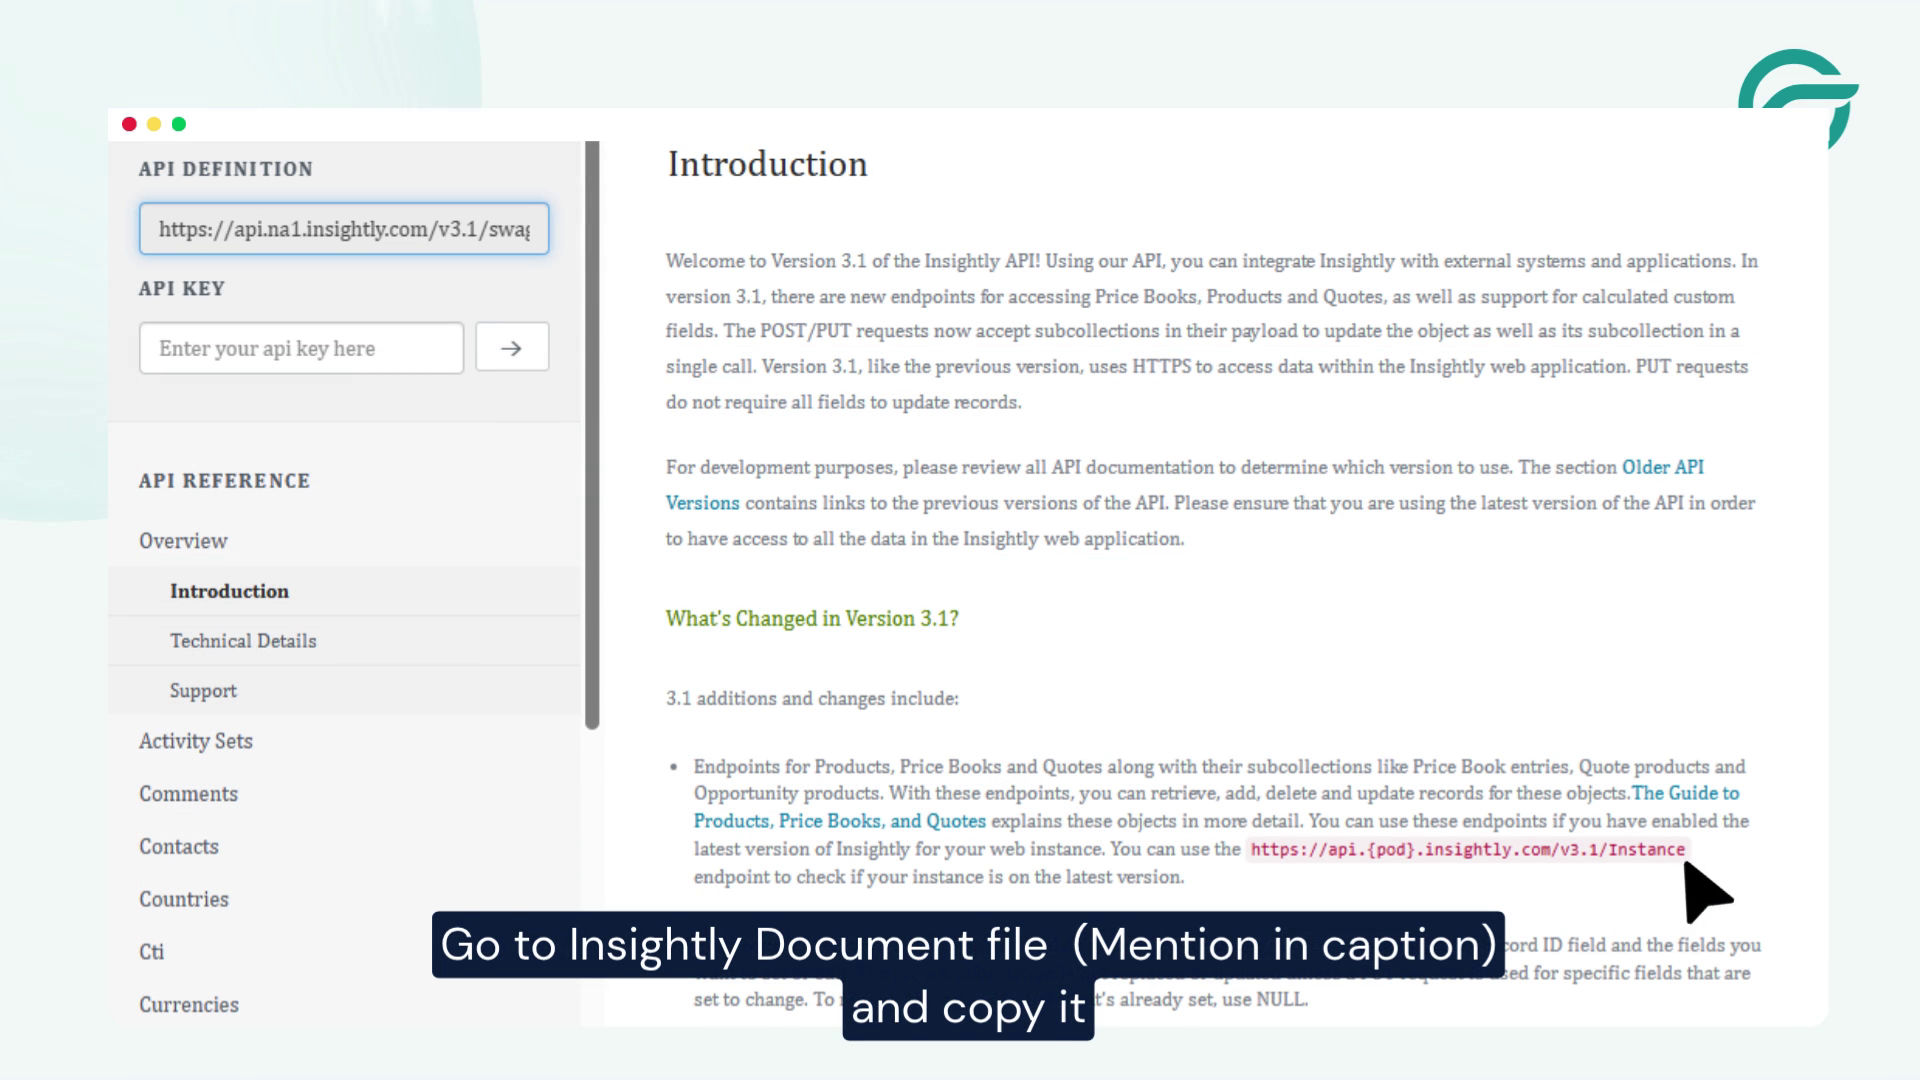
In your Insightly account, navigate to the API documentation or API reference section.
Locate the Contacts API endpoint and copy the endpoint URL.
For most accounts, it looks like:
https://api.na1.insightly.com/v3.1/Contacts
This endpoint tells the plugin where to send Contact Form 7 submissions.
Step 6: Paste the API Endpoint into WordPress
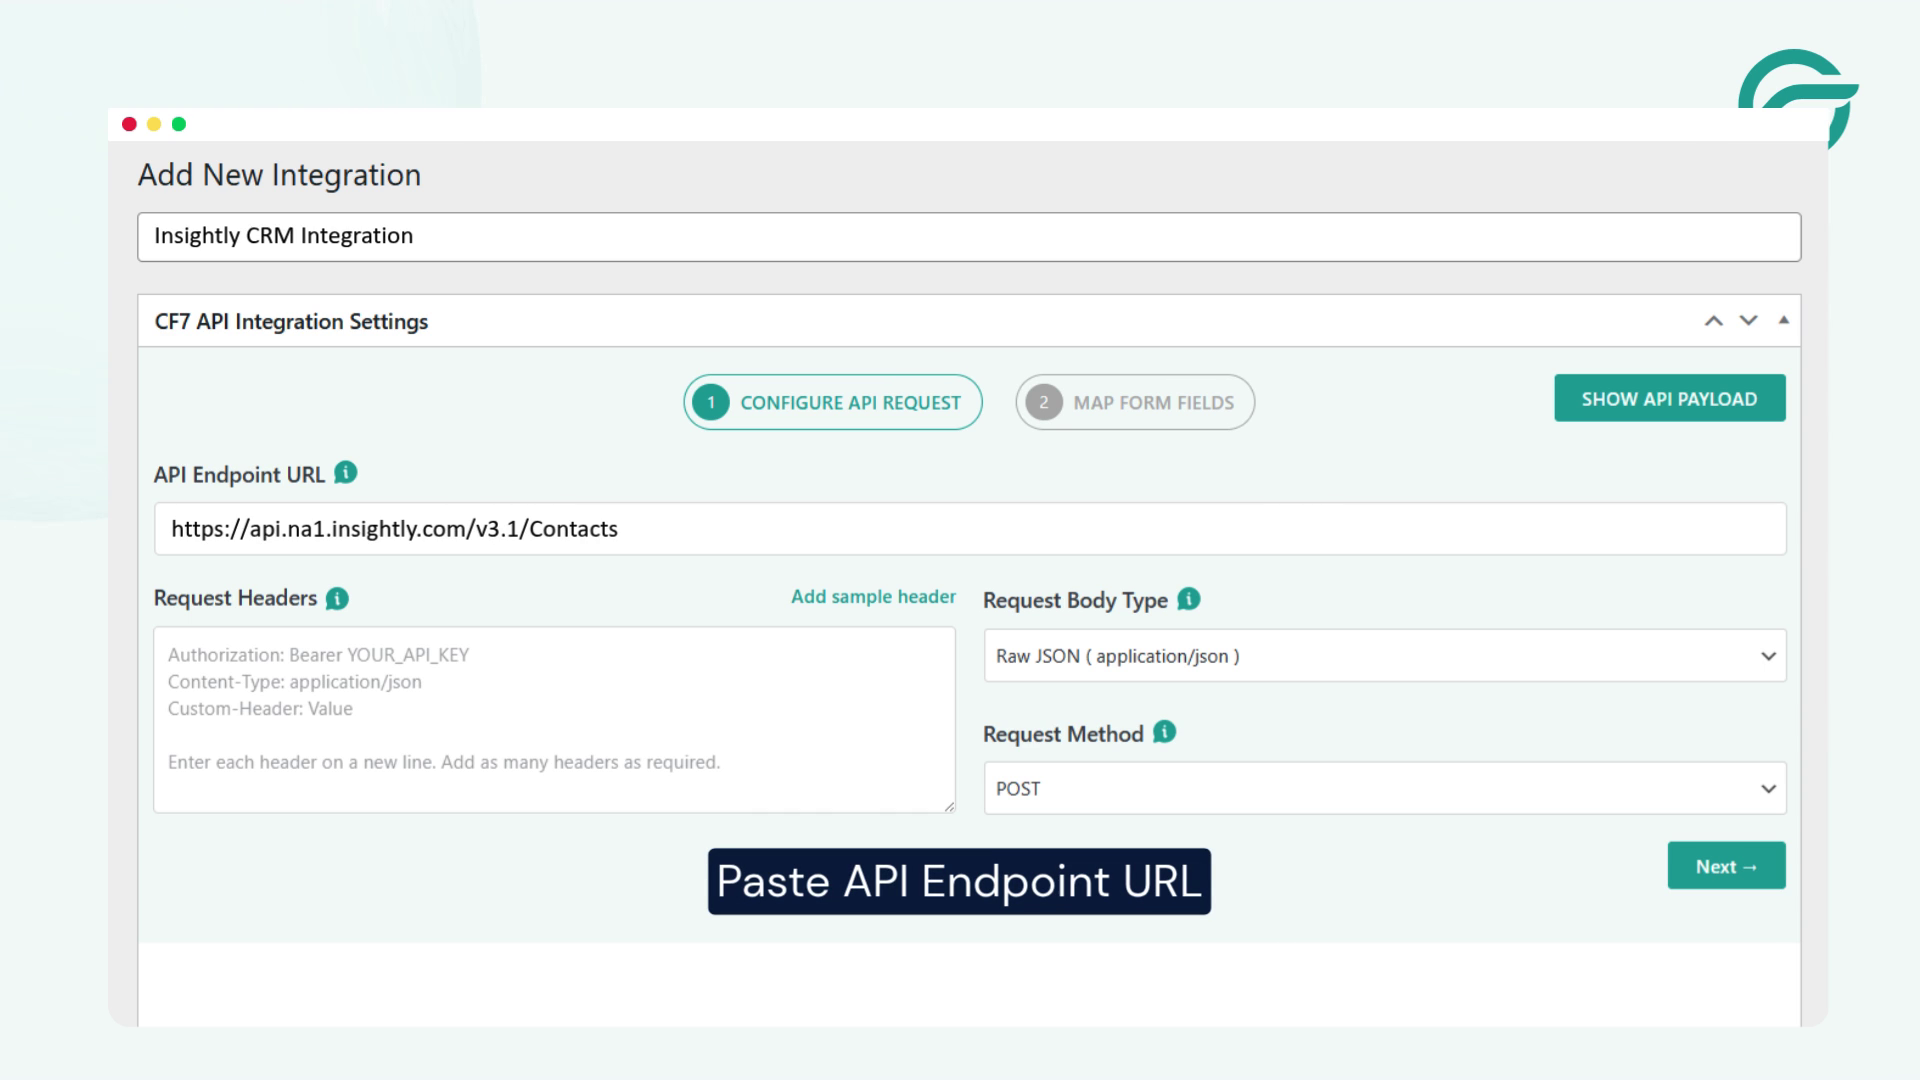
Return to your WordPress integration page.
Paste the copied endpoint into the API Endpoint URL field.
This connects your Contact Form 7 integration to the Insightly Contacts API.
Step 7: Get Your Insightly API Key
Inside your Insightly account:
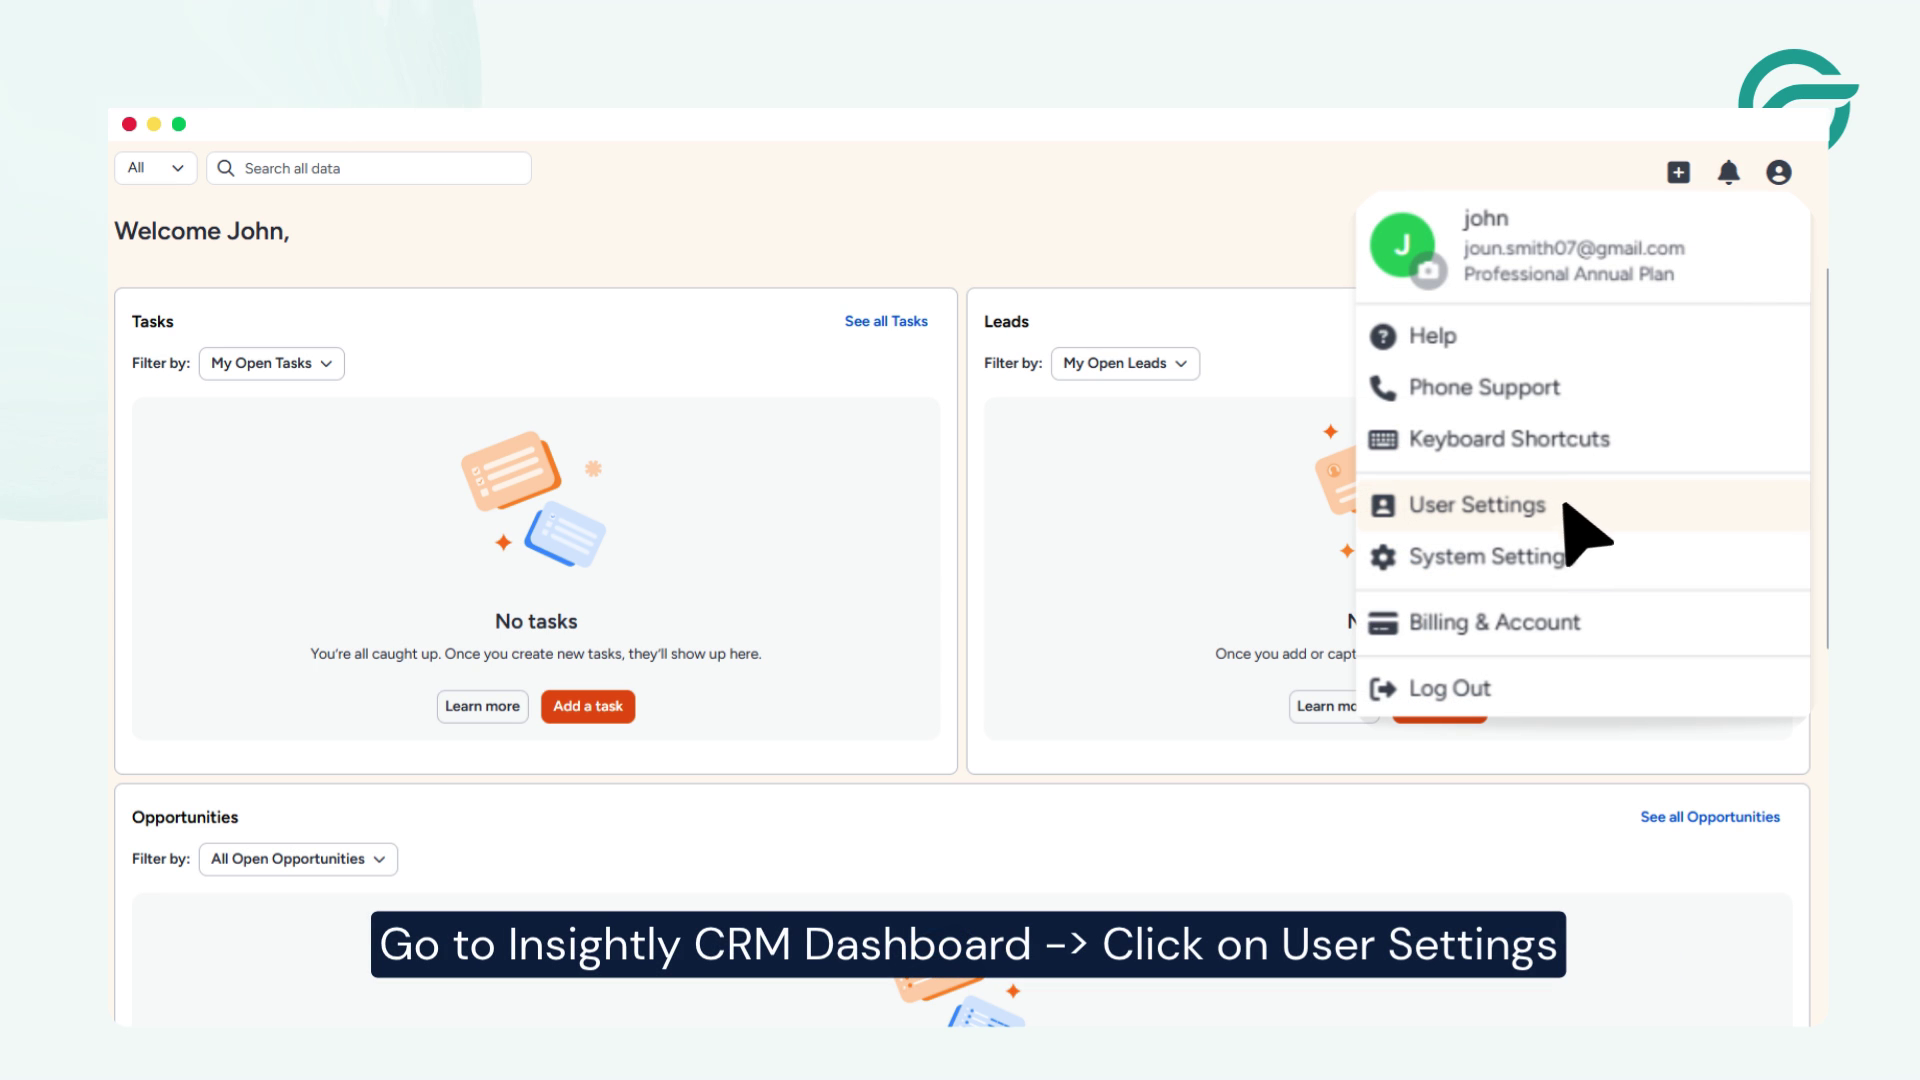
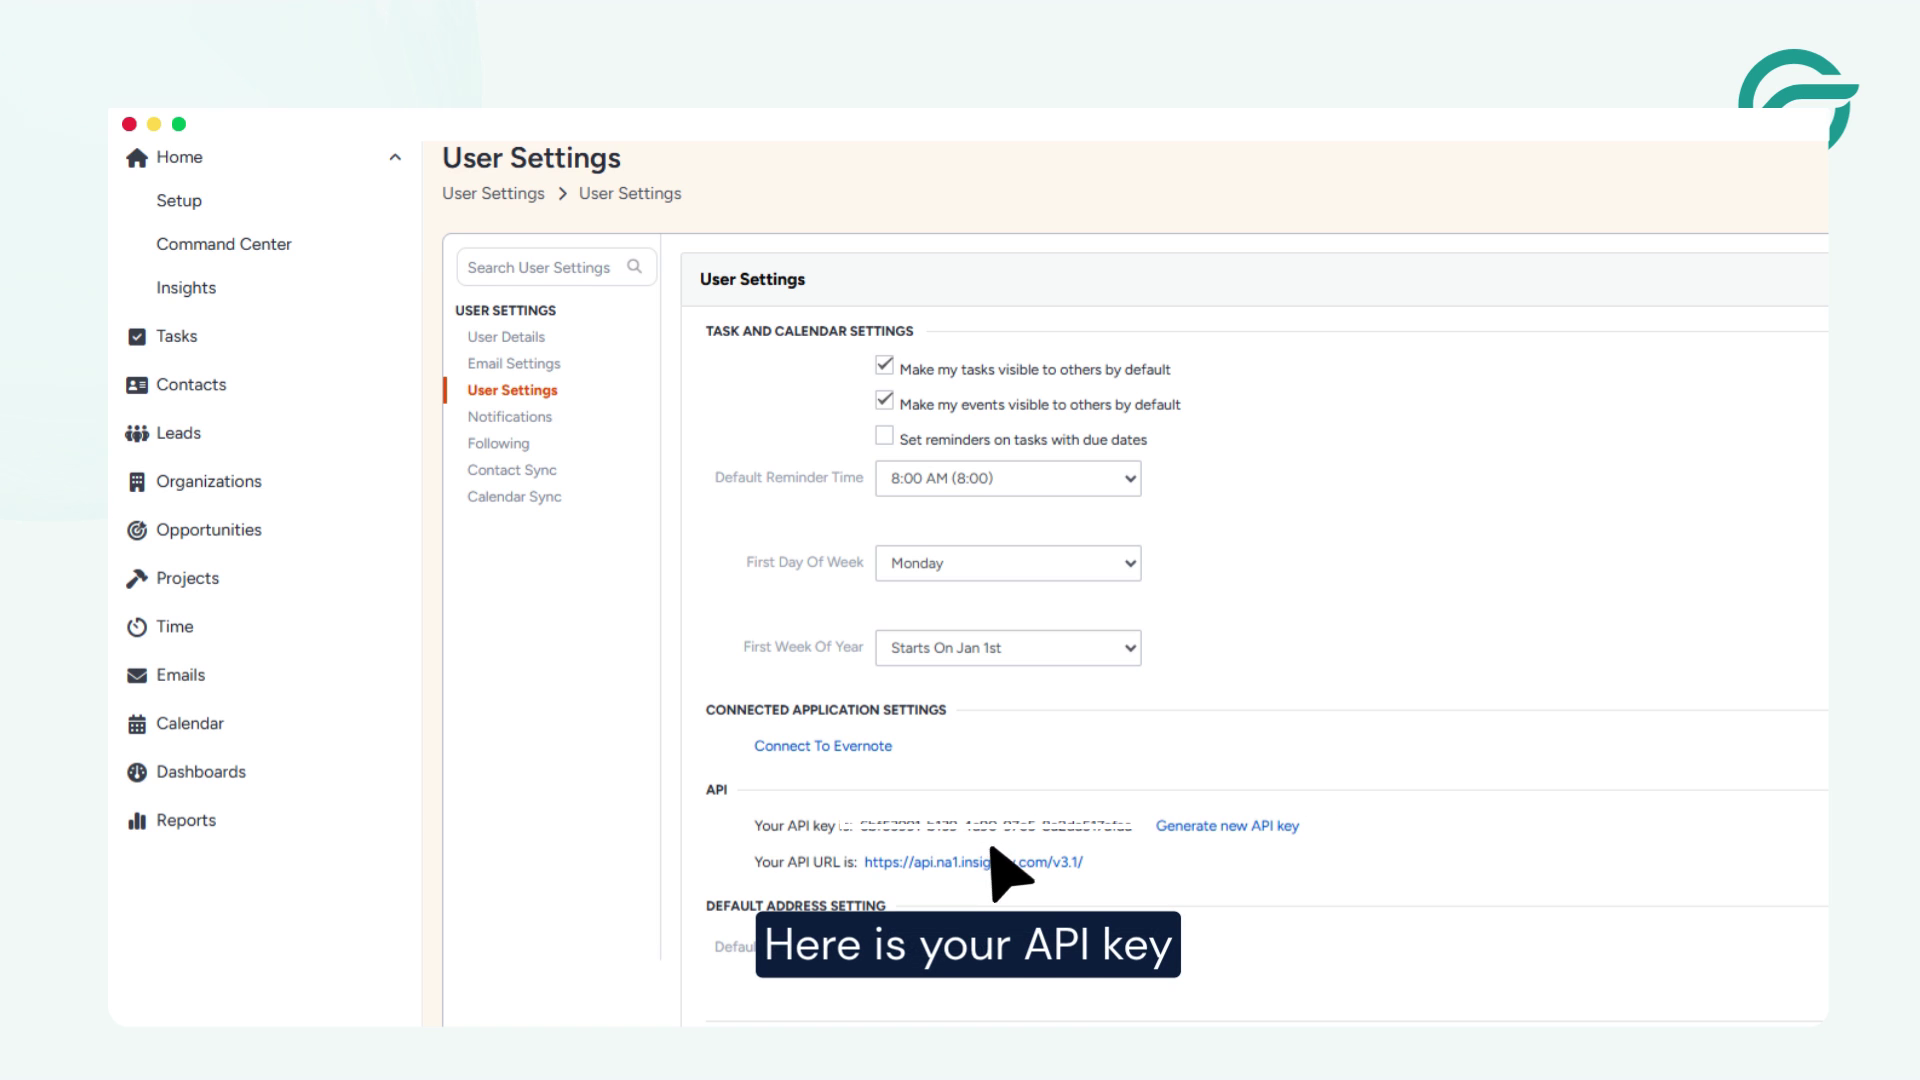
- Open your user profile or account settings.
- Locate your API Key.
- Copy the API key.
This key authenticates requests sent from your website.
Step 8: Configure the Request Headers
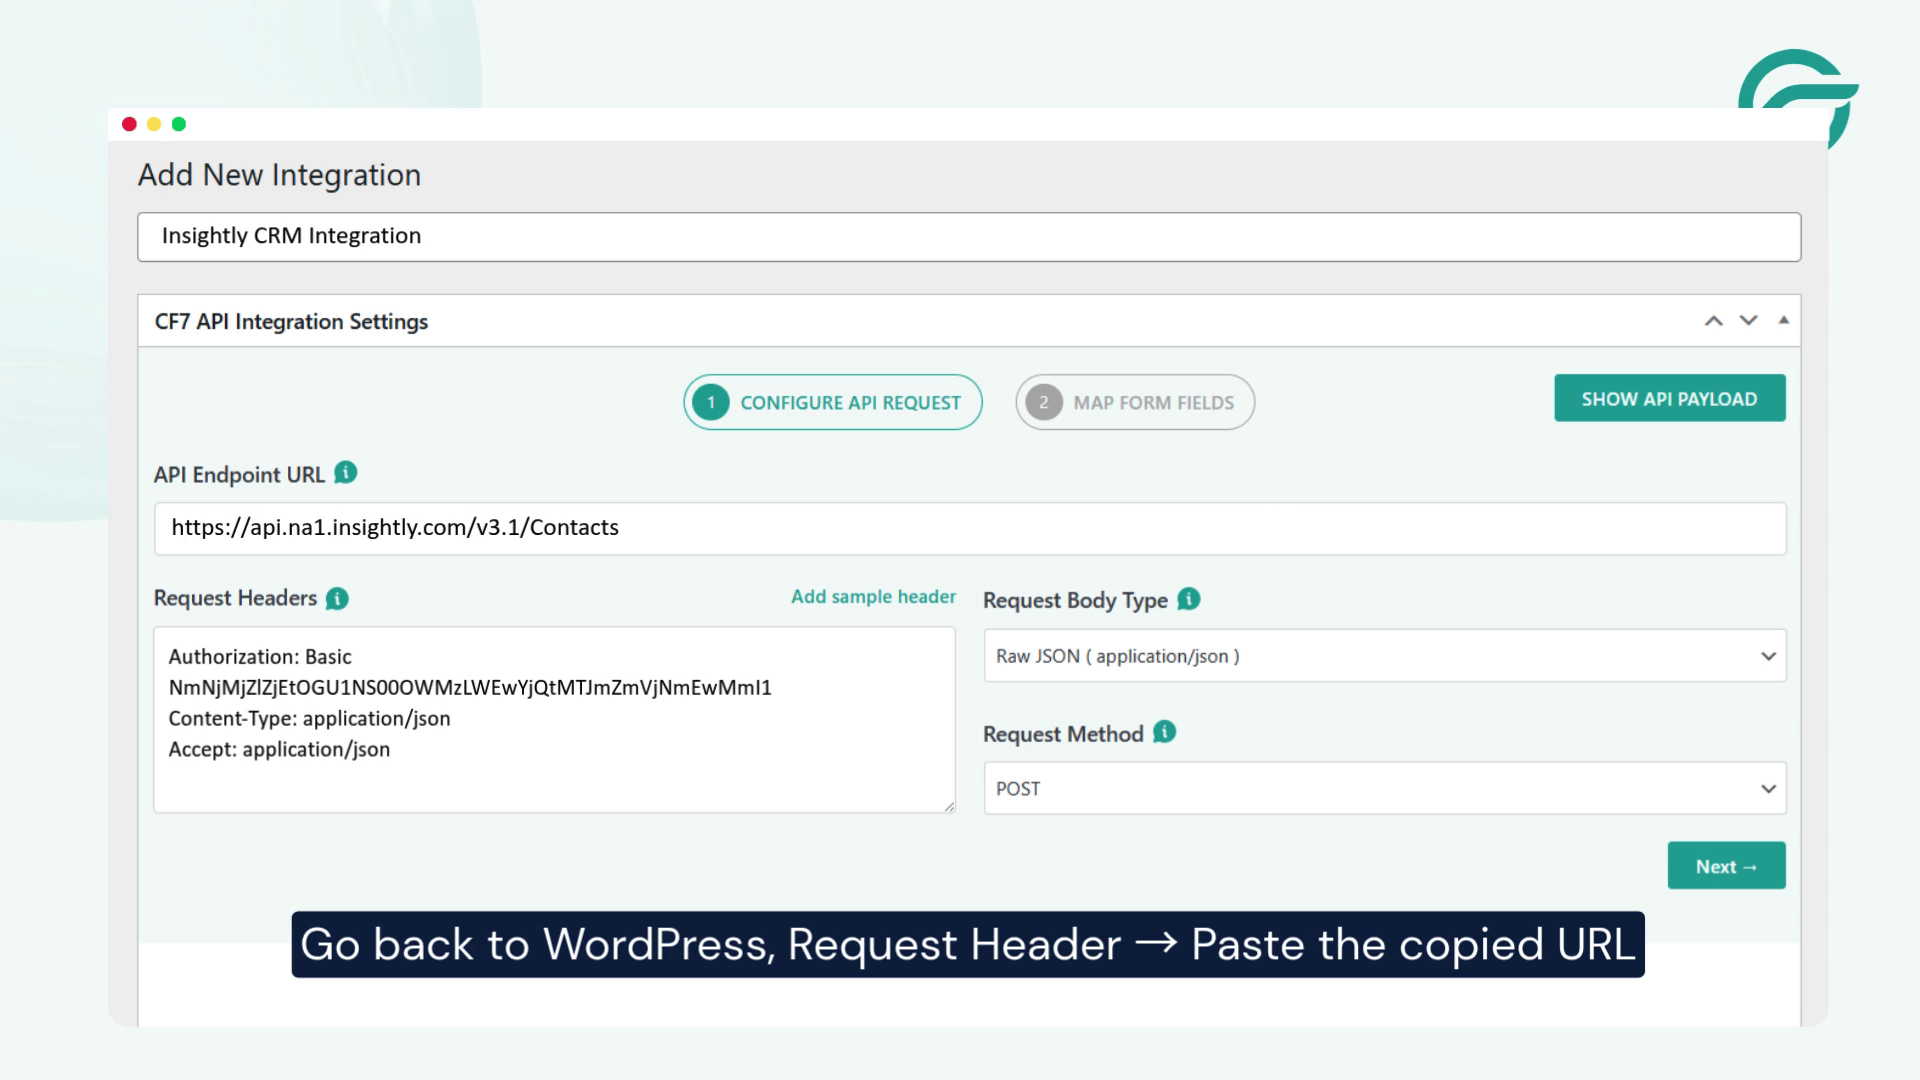
Go to Contact Form to Any API -> Paste the copied key in the “Request Headers” field
In the Request Headers section, add the authentication header using your Insightly API key.
Depending on your API configuration, your request headers may look similar to:
Authorization: Basic YOUR_API_KEY
Content-Type: application/json
Step 9: Continue to the Next Step
After completing the endpoint and request header configuration, click the Next button to continue.
Step 10: Select Contact Form 7
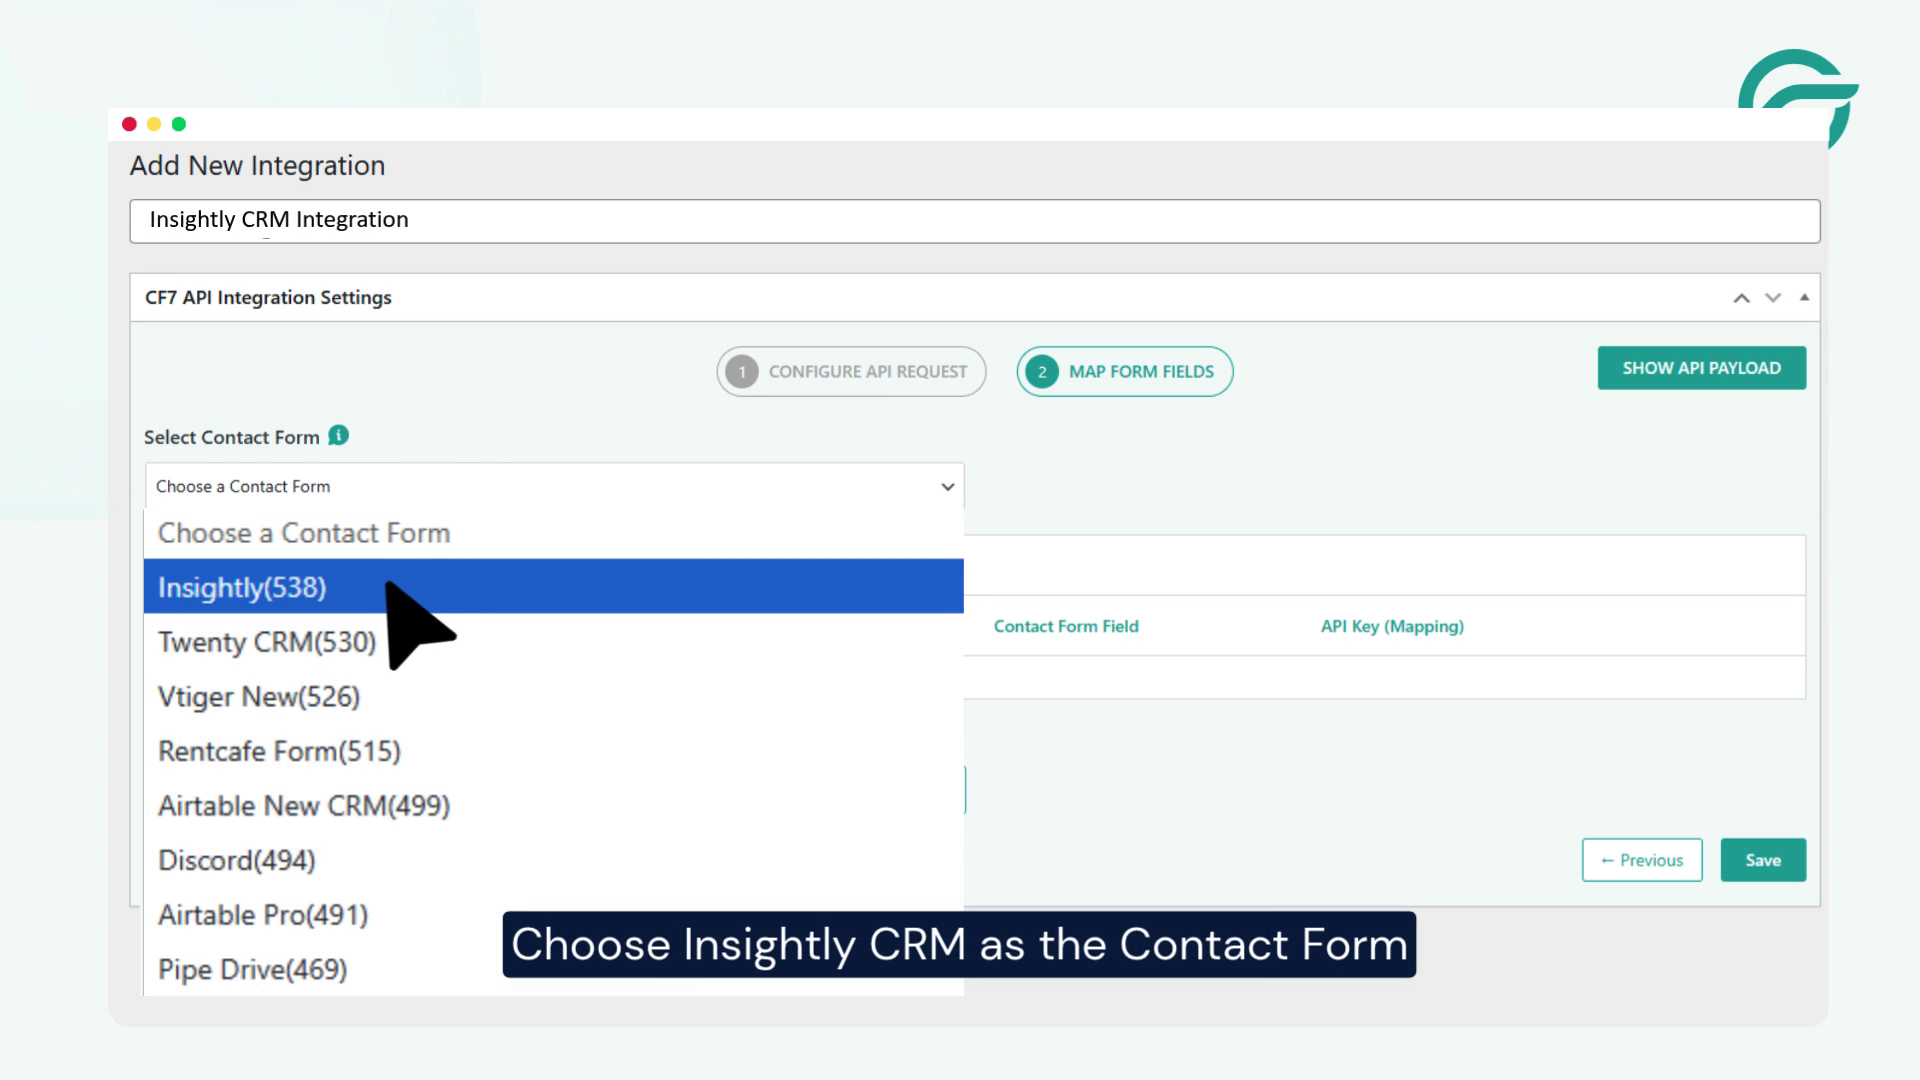
Choose Insightly CRM as the Contact Form.
This determines which form submissions will be sent to your CRM.
Step 11: Map Contact Form Fields to Insightly Fields
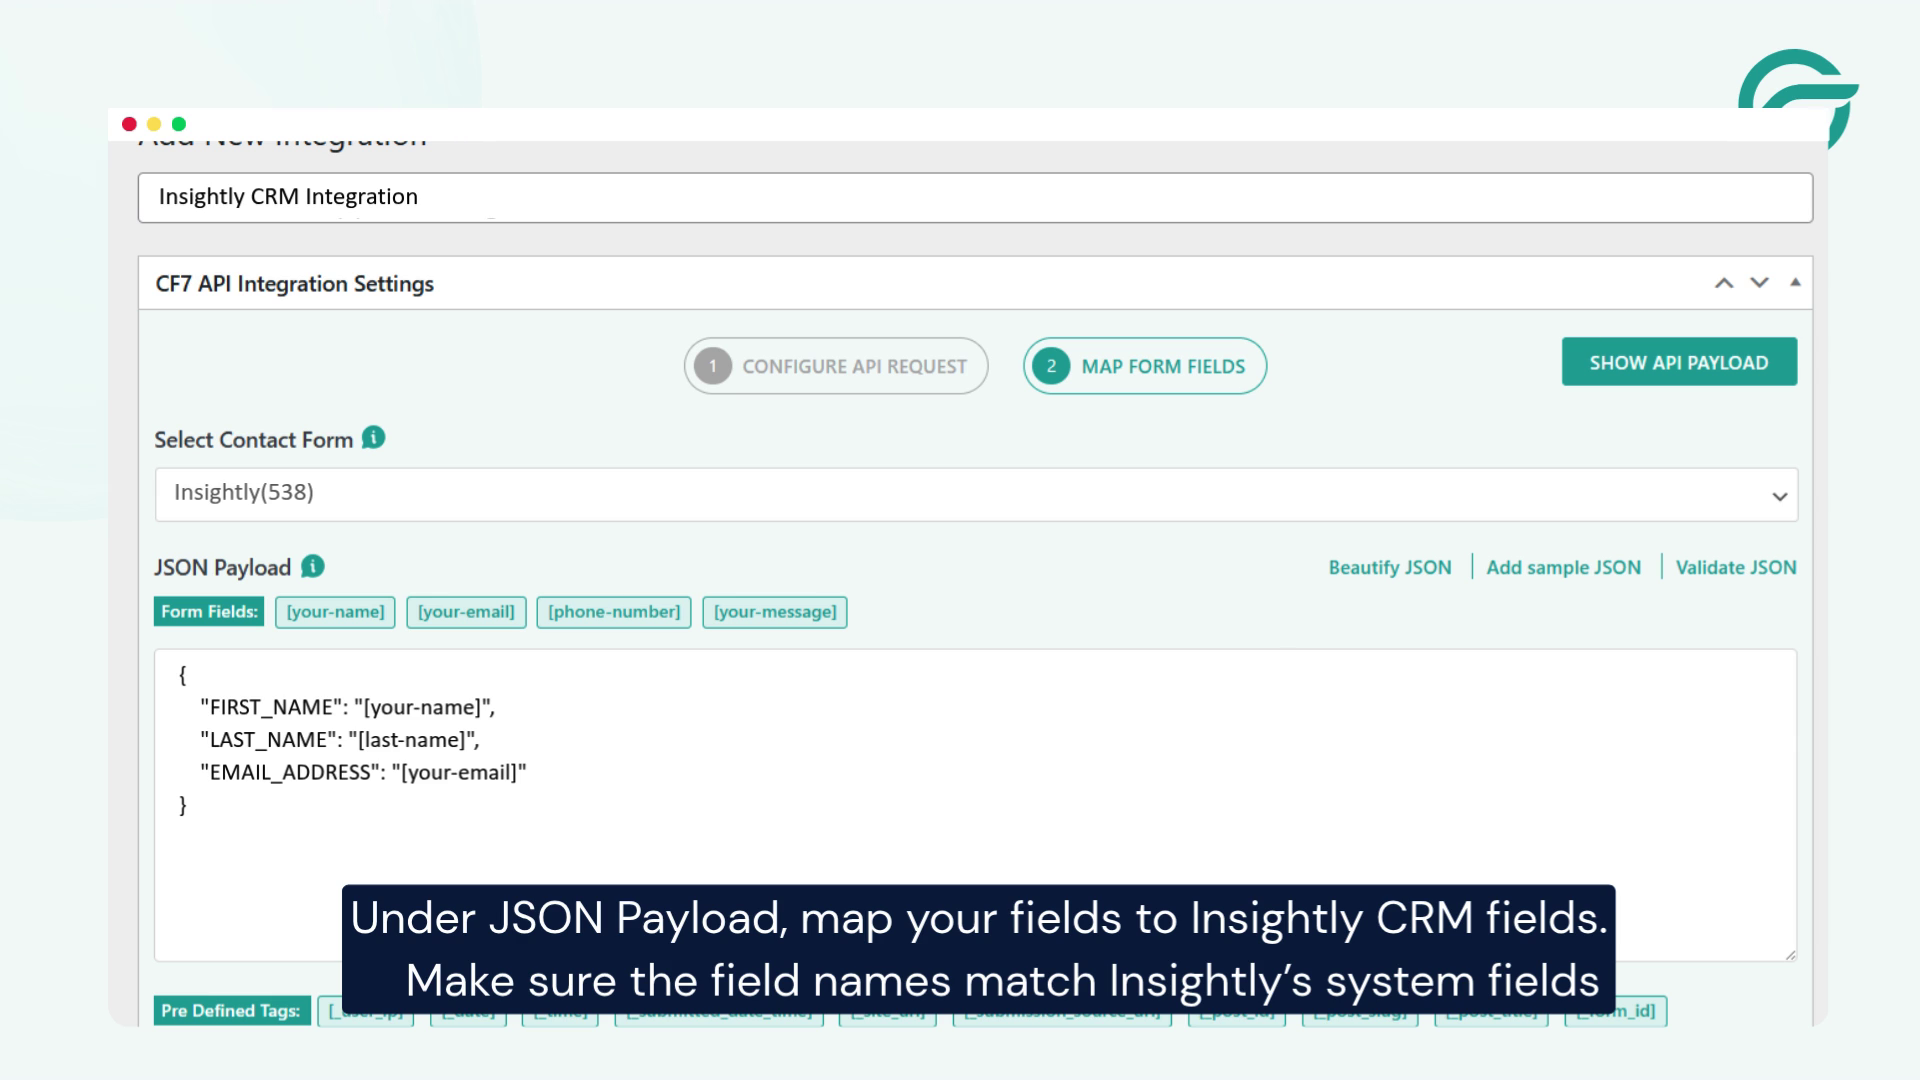
Under the JSON Payload section, map your Contact Form 7 fields to the corresponding Insightly contact fields.
For example:
{
“FIRST_NAME”: “[your-name]”,
“LAST_NAME”: “[last-name]”,
“EMAIL_ADDRESS”: “[your-email]”,
“PHONE”: “[your-phone]”,
“ORGANISATION_NAME”: “[company]”,
“BACKGROUND”: “[your-message]”
}
Ensure the field names match the field names expected by the Insightly Contacts API.
You can also map custom fields if you’ve created them in your Insightly account.
Step 12: Test the Integration
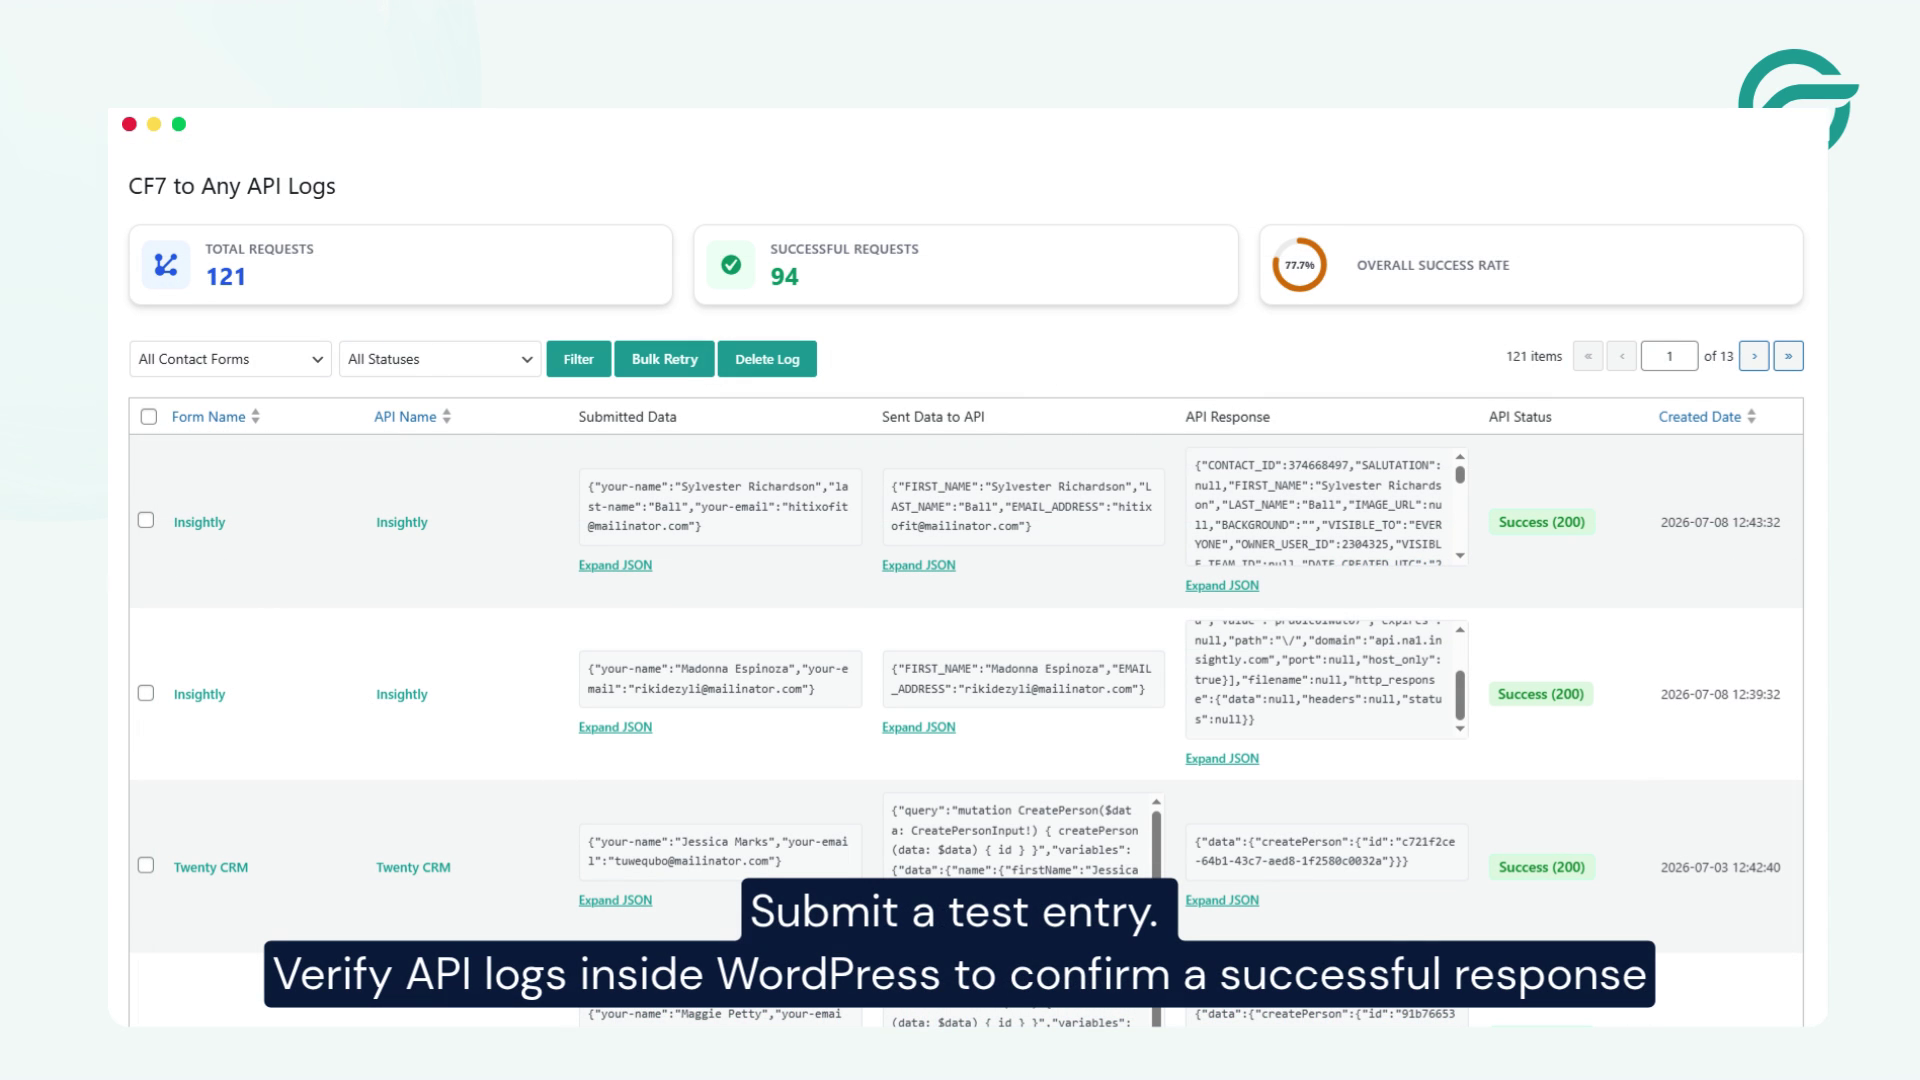
Submit a test entry through your Contact Form 7 form.
After submission:
- Open Contact Form to Any API → API Logs
- Confirm the request was sent successfully.
- Verify that a new contact has been created inside Insightly CRM.
Conclusion
Integrating Contact Form 7 with Insightly CRM using Contact Form to Any API is an easy way to automate lead collection and streamline your customer management process.
Once configured, every form submission is automatically sent to Insightly, allowing your sales team to respond faster while keeping your CRM accurate and up to date. Whether you’re capturing inquiries, support requests, or business leads, this integration helps eliminate repetitive manual work and improves overall efficiency.


