

A CF7 Airtable integration plugin lets businesses automatically send Contact Form 7 submissions to Airtable the moment a visitor fills out a form. Contact Form to Any API connects directly with the Airtable API without any Zapier integration, middleware, or custom code.
Introduction
This guide walks you through the complete setup process step by step.
Watch the Video Tutorial: CF7 with Airtable CRM Integration (Step-by-Step)
Before following the written steps, you can watch the complete integration setup in this quick video tutorial.
Step 1: Sign in to Your Airtable Account
Start by logging into your Airtable account. Make sure you already have a base (database) created where you want to store form submissions.

If you don’t have one, create a base such as:
- Leads Database
- Client Project Tracker
- Contact CRM
Step 2: Open Your WordPress Dashboard
Log in to your WordPress admin panel where your forms are set up.
Step 3: Install and Open Contact Form to Any API

Navigate to:
Contact Form to Any API → Add New Integration
This plugin will allow your WordPress form to communicate directly with Airtable’s API.
Step 4: Add Integration Title
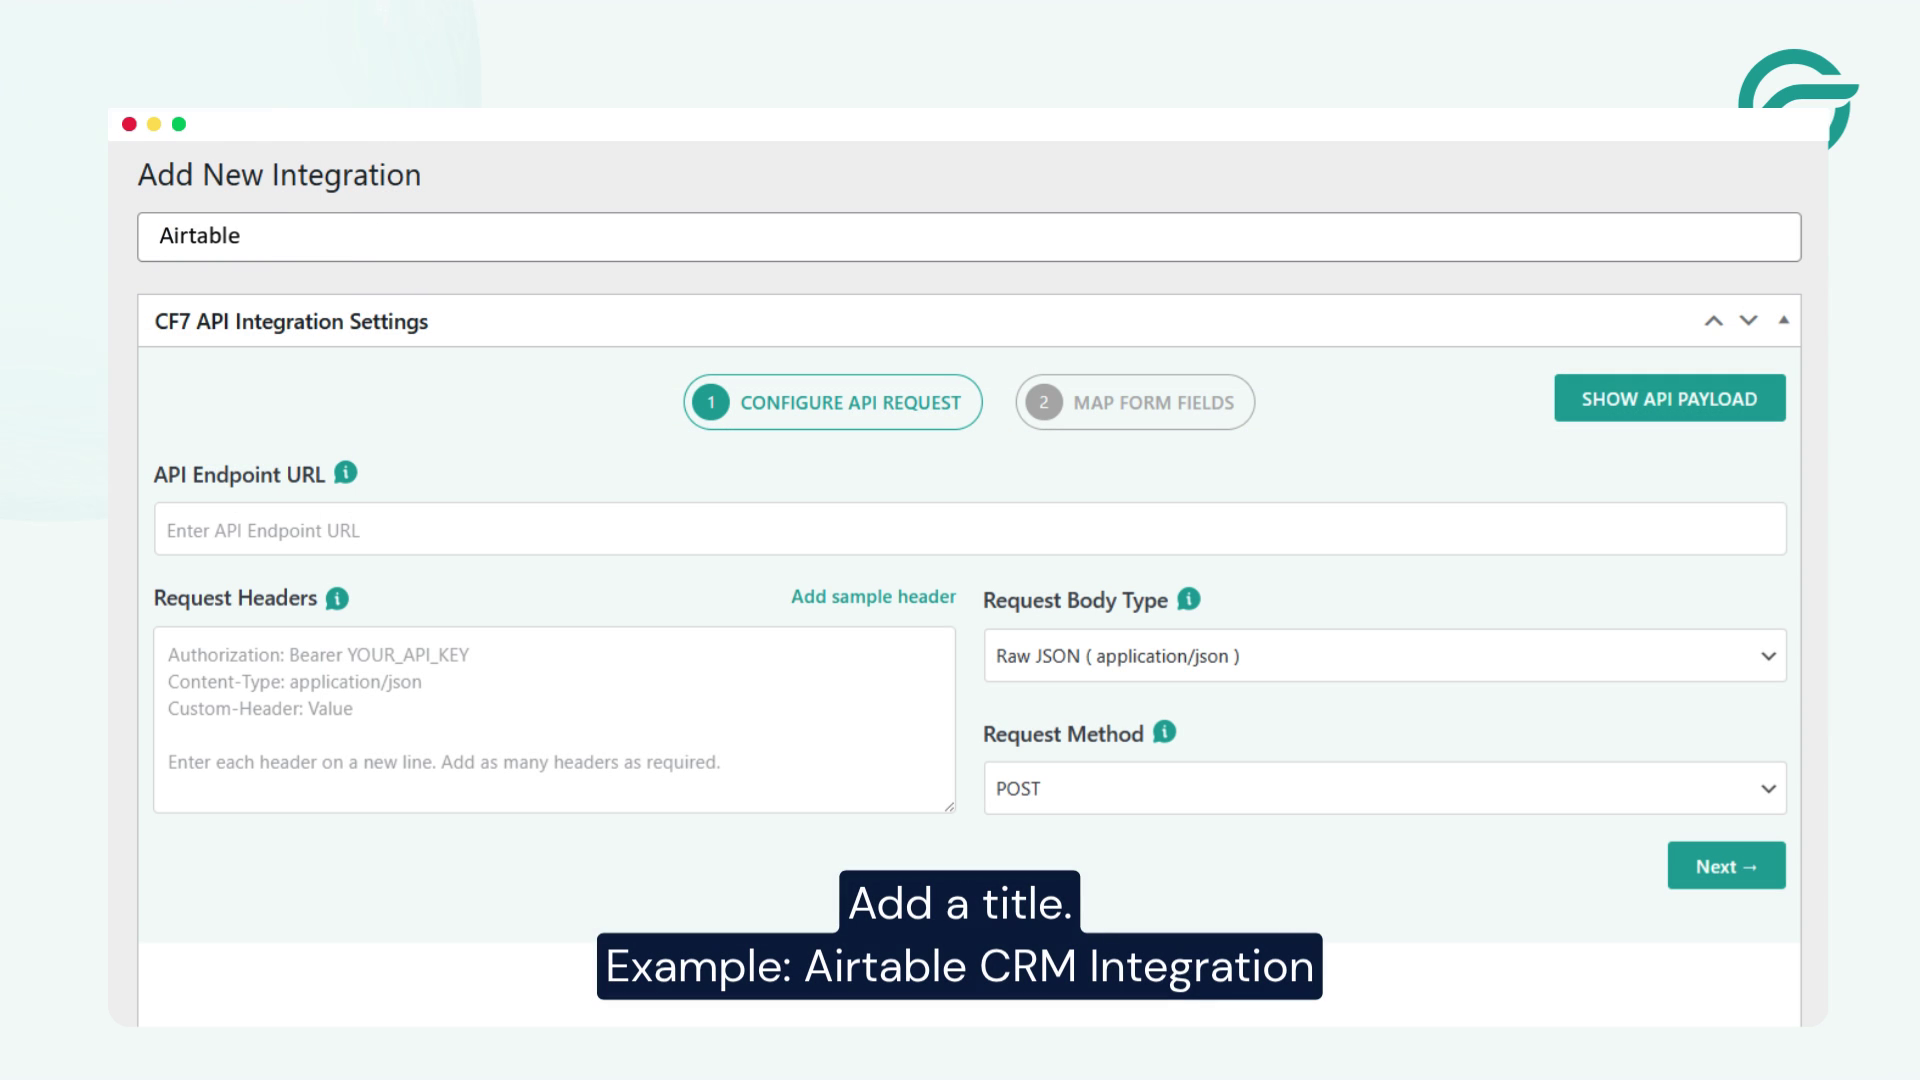
Create a clear name for your integration.
Example:
- Airtable Integration
- Lead Sync to Airtable
- Contact Form → Airtable CRM
This helps you identify it later easily.
Step 5: Get Airtable API Endpoint URL
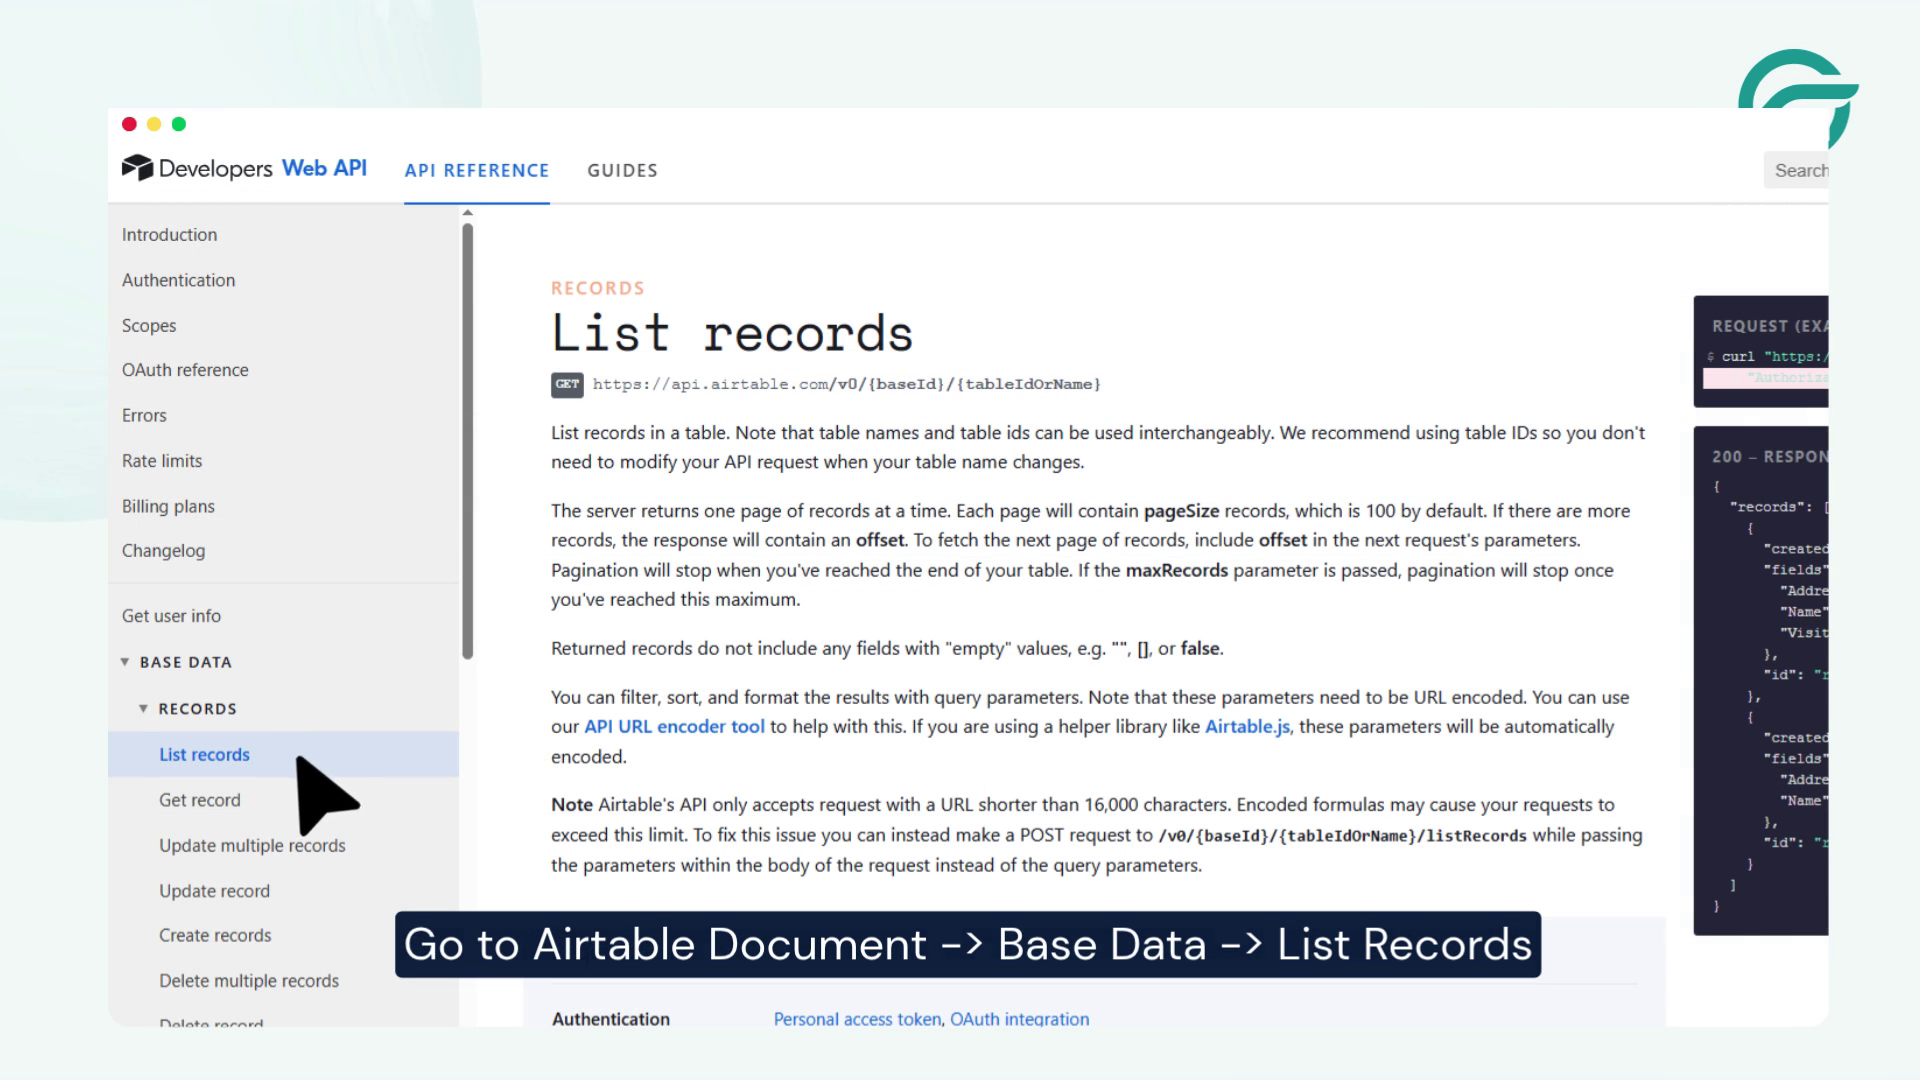
Go to your Airtable base:
Base Data → List Records → API Documentation
Copy the API endpoint URL:
https://api.airtable.com/v0/{baseId}/{tableNameOrId}
Step 6: Paste API Endpoint in WordPress
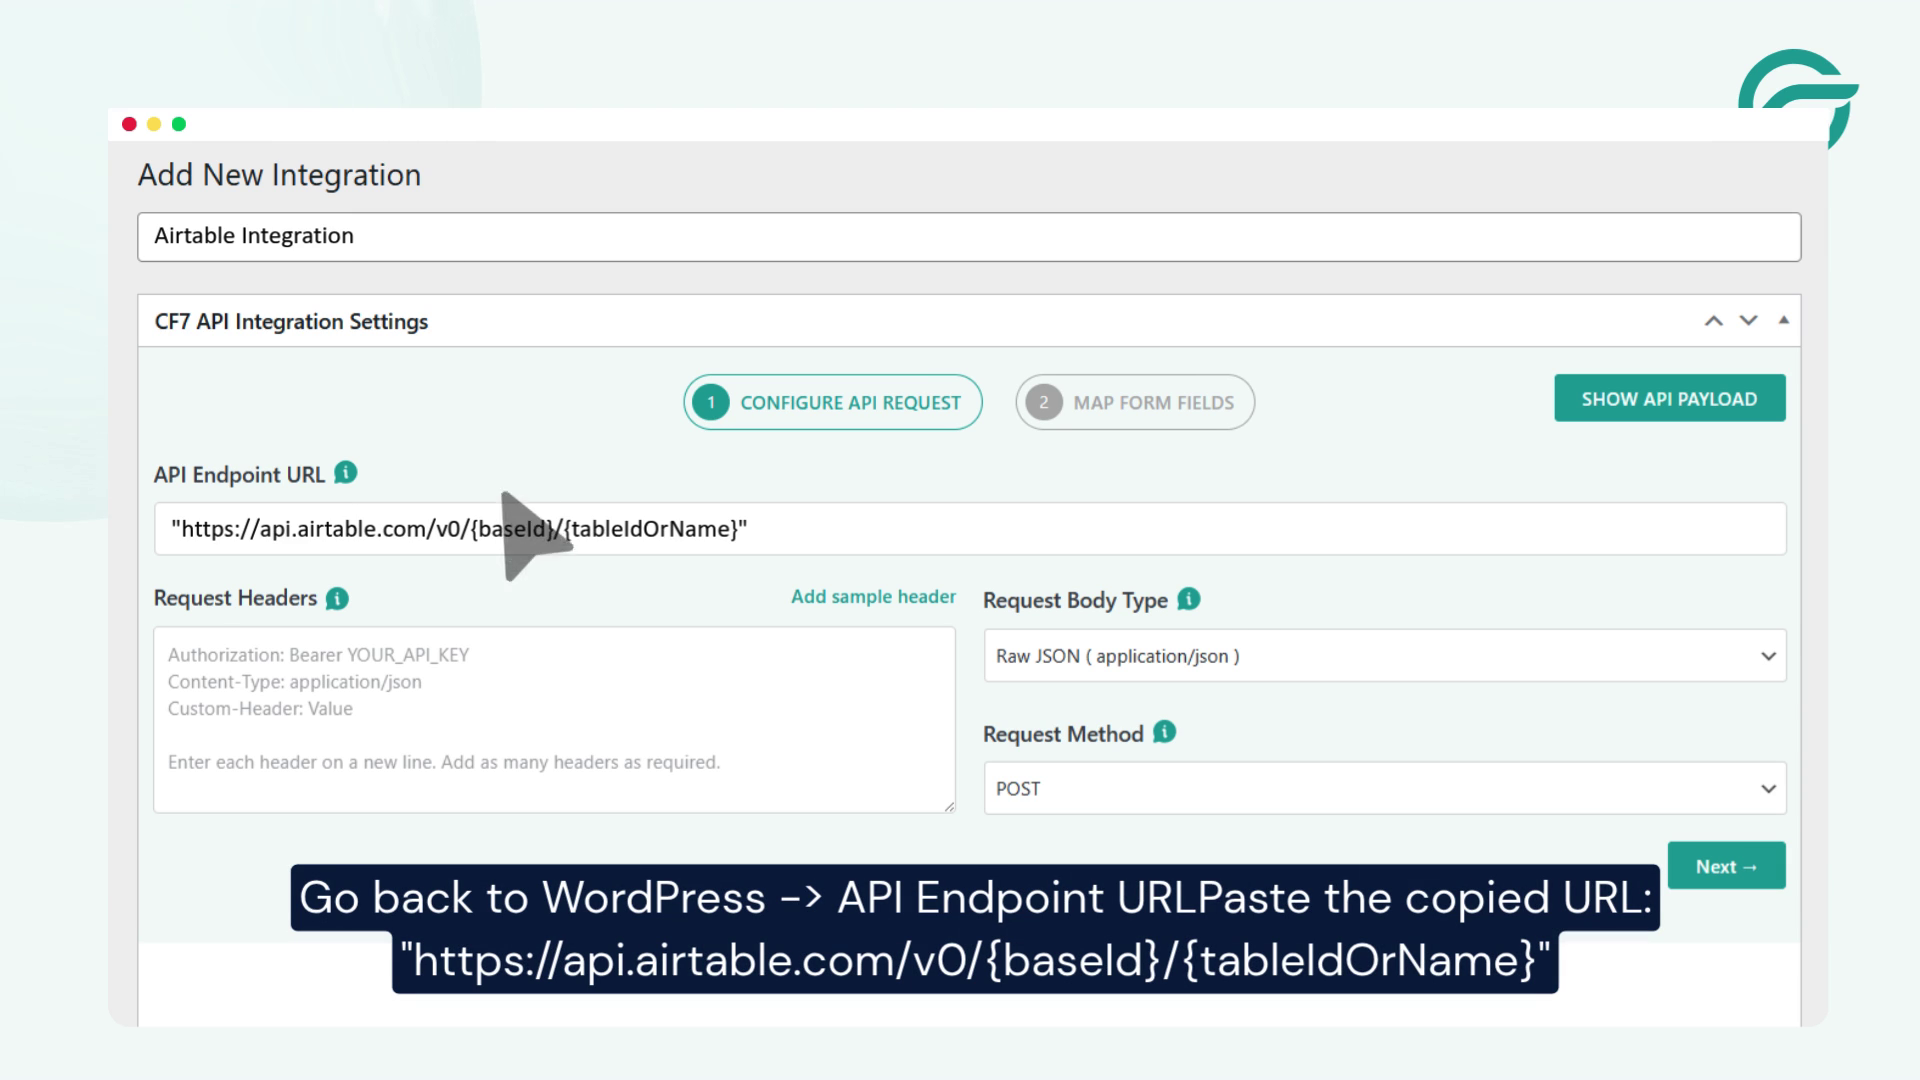
Return to WordPress and paste the copied endpoint URL into the API Endpoint URL field.
Step 7: Get Your Airtable Base ID
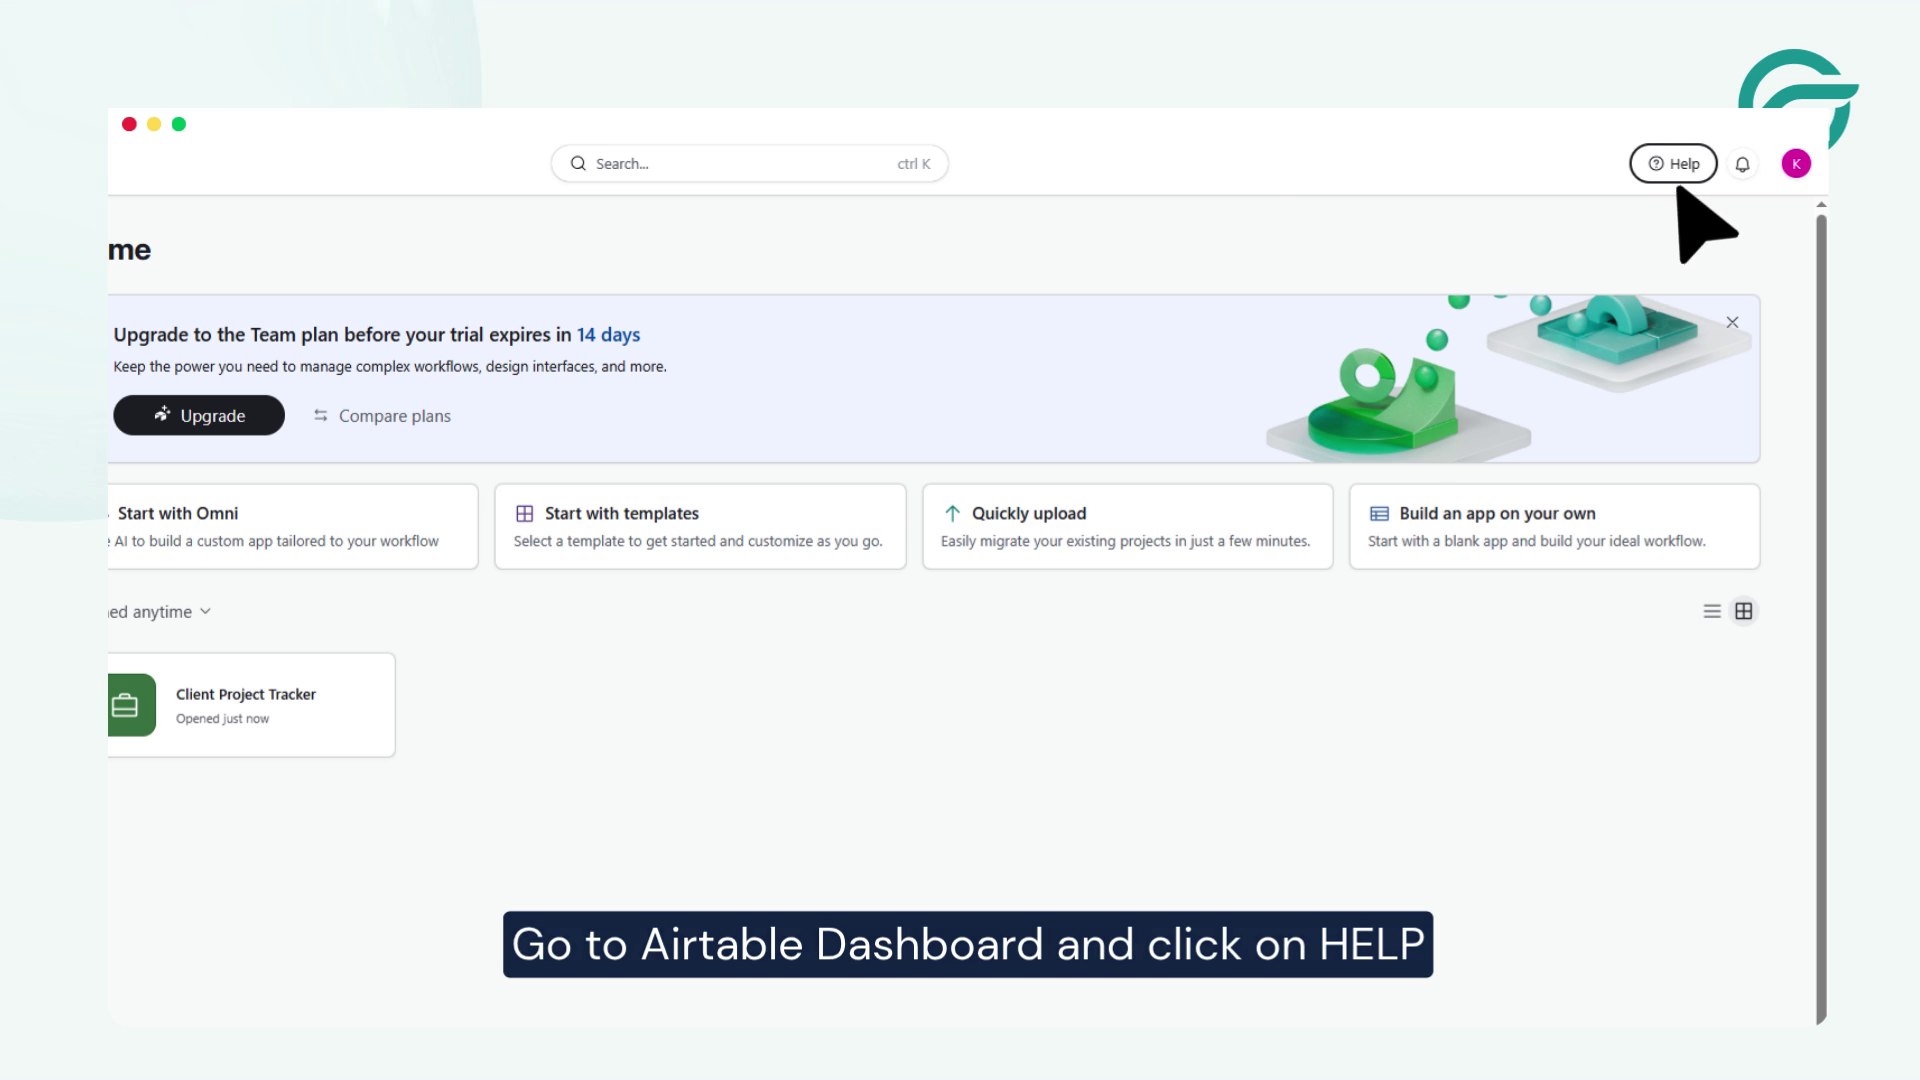
From Airtable:
- Go to Help
- Open API Documentation
- Select your workspace/base
- Copy the Base ID
This ID uniquely identifies your Airtable database.
Step 8: Paste Base ID in WordPress
Now return to your WordPress integration settings and paste the Base ID in the designated field.
Step 9: Get Your Table ID or Table Name
In your Airtable dashboard:
- Open your base (e.g., Client Project Tracker)
- Check the URL or table settings
- Copy the Table ID or Table Name
Paste it into WordPress.
Step 10: Generate Airtable API Token
Go to your Airtable account:
- Profile → Builder Hub
- Click Create Token
- Assign a name
- Add required scopes (read/write access)
This token will authenticate your API requests.
Step 11: Add Request Headers in WordPress
Go back to the plugin settings and paste your Airtable token into the Request Headers field.
This ensures secure API communication between WordPress and Airtable.
Step 12: Configure Integration Settings
Click Next and choose:
- Contact Form Type: Airtable CRM
Then proceed to mapping configuration.
Step 13: Map JSON Payload Fields
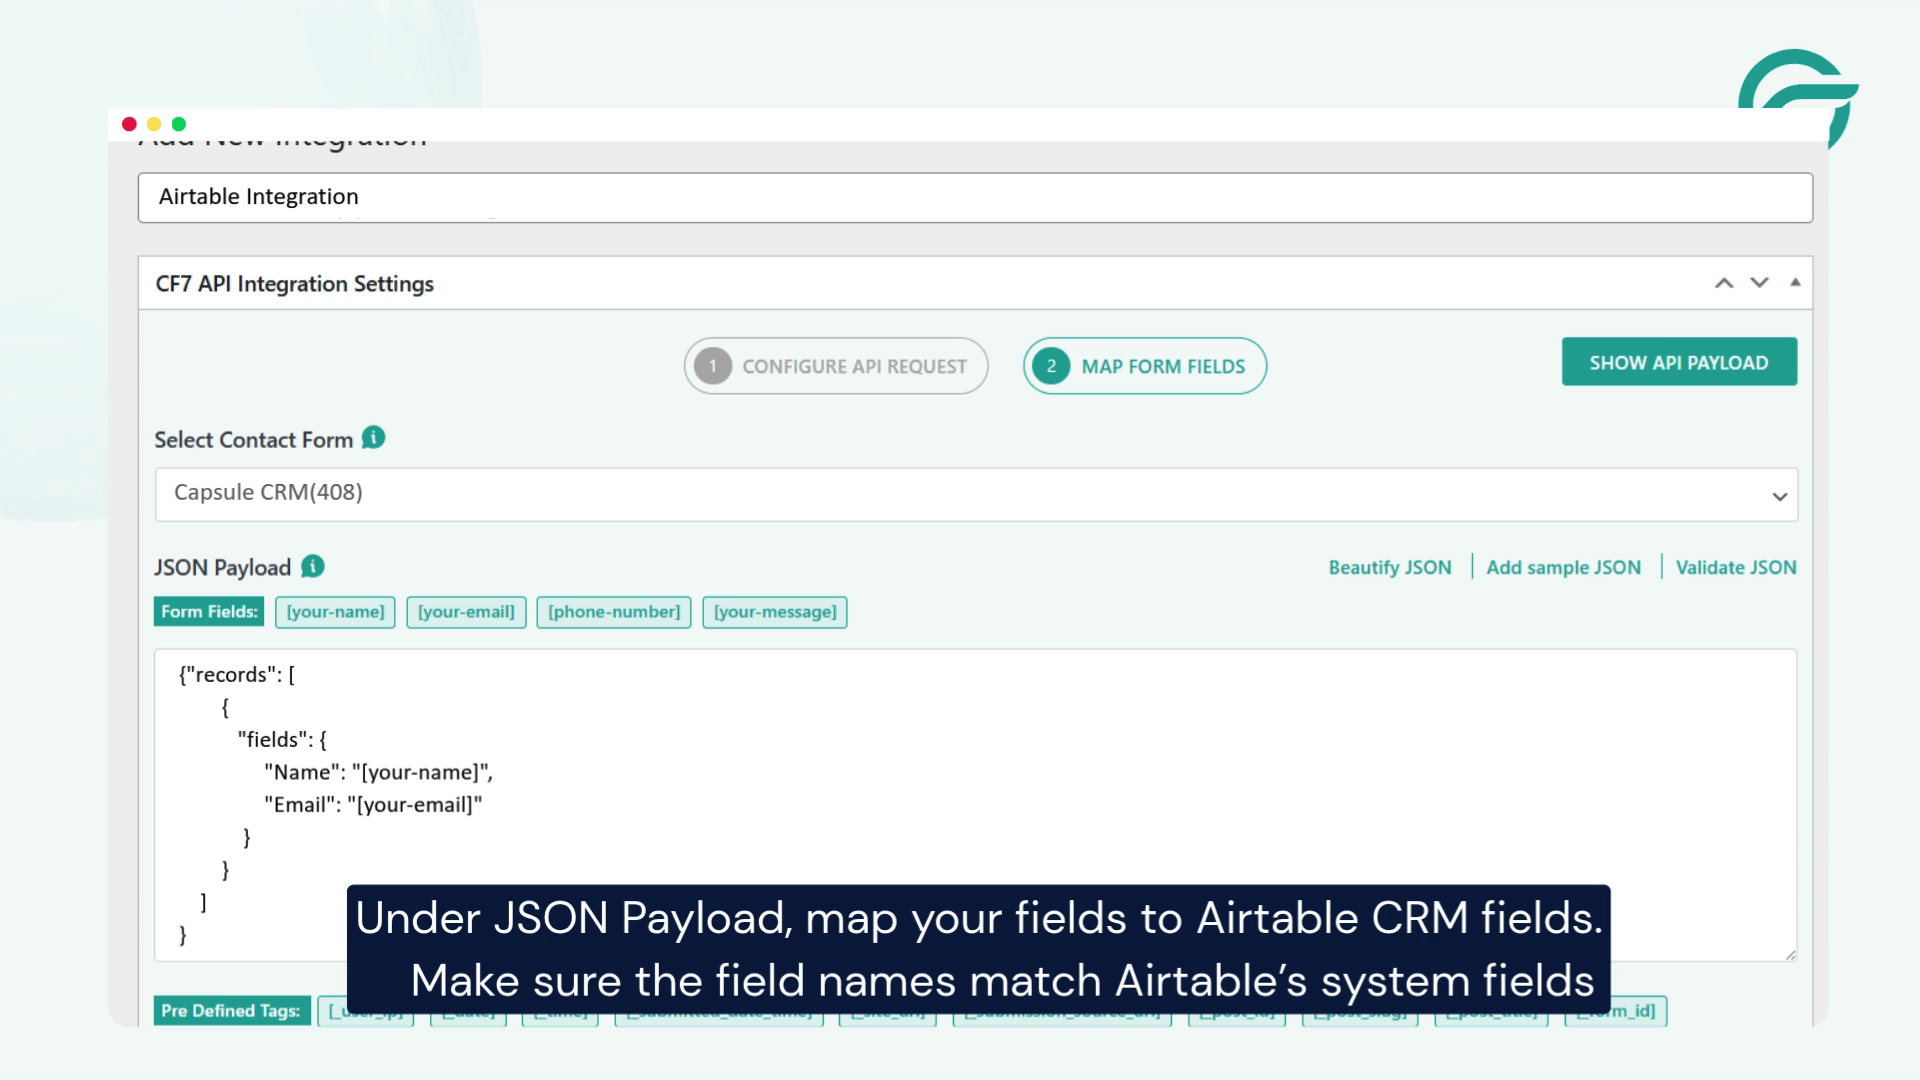
Under JSON Payload, map your form fields carefully.
Example:
- Name → Name field in Airtable
- Email → Email field
- Phone → Phone field
- Message → Notes/Comments field
Step 14: Submit a Test Entry
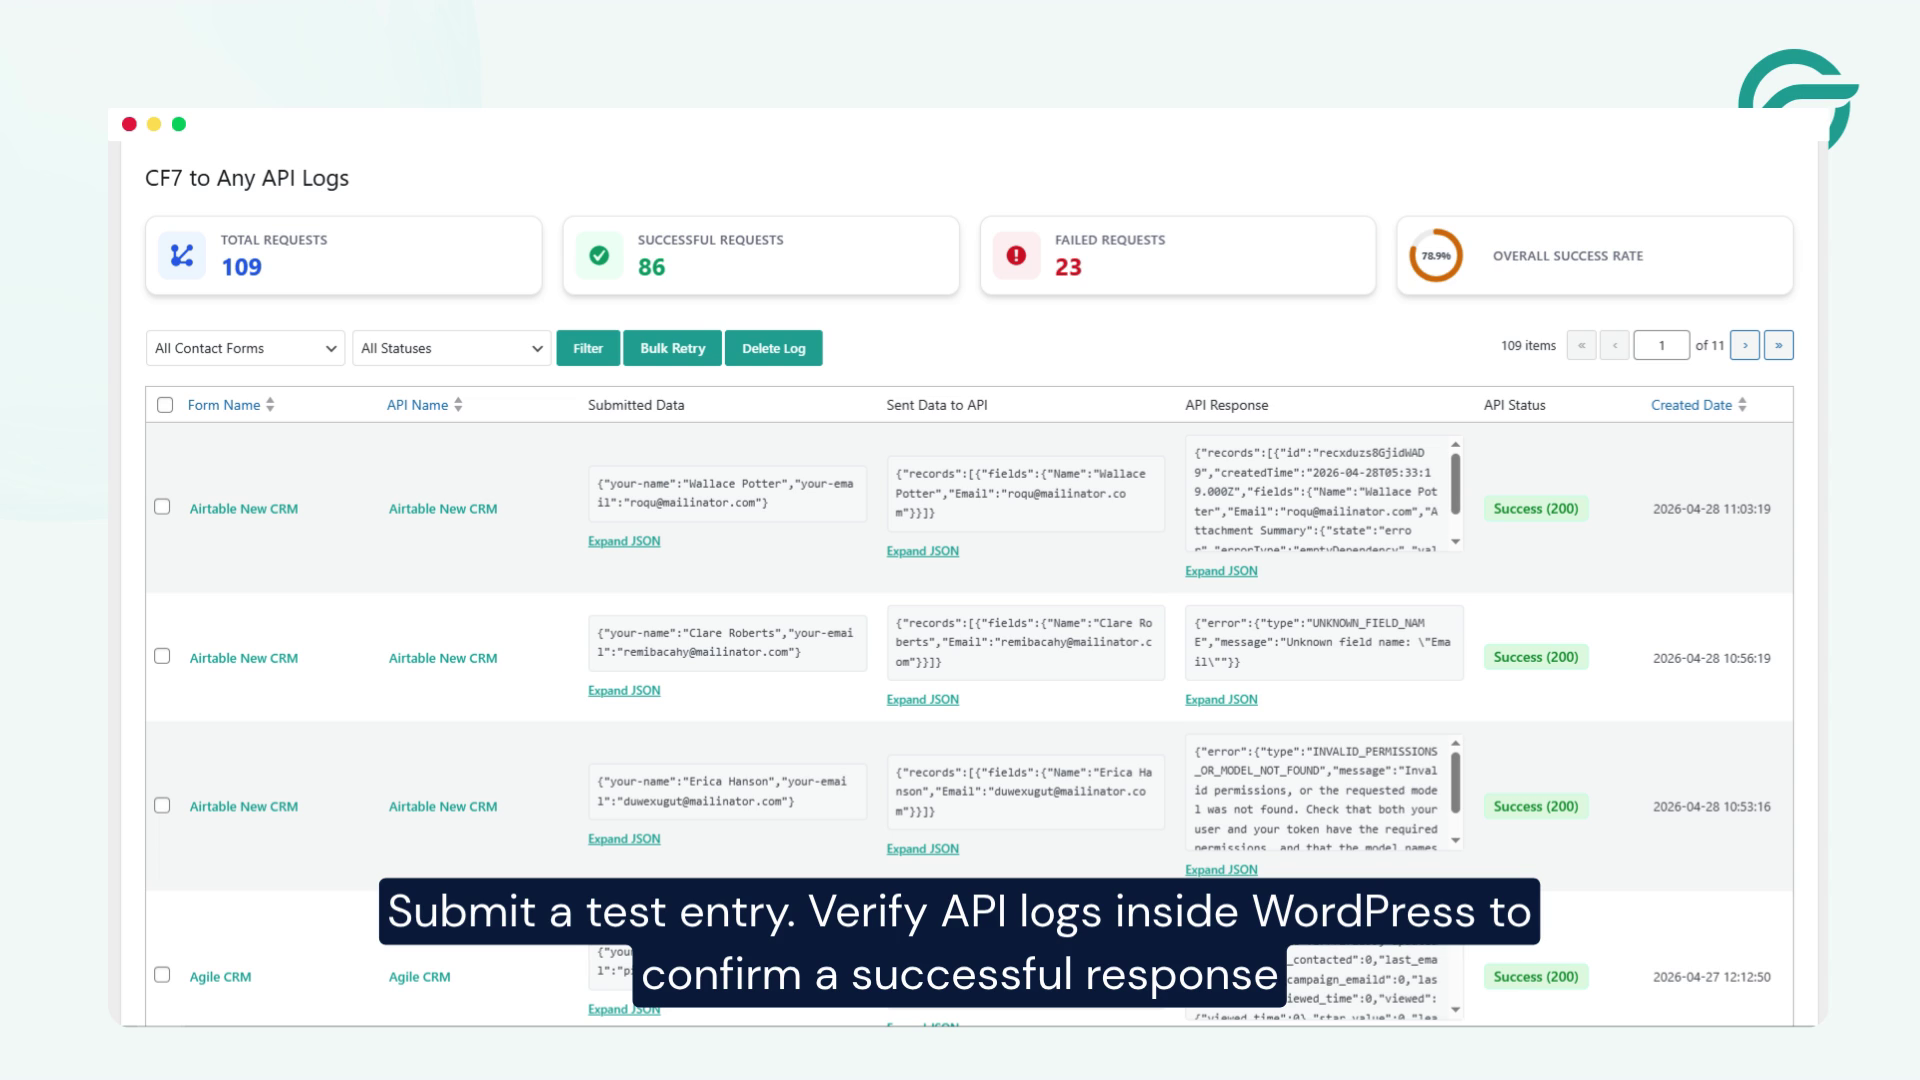
Now test the integration:
- Fill out your WordPress form
- Submit a sample entry
Check:
- Airtable base → new record created
- WordPress API logs → successful response
Step 15: Verify and Go Live
If everything works correctly:
- Your WordPress form is now fully connected to Airtable
- All submissions will be automatically stored in your database
You can now use Airtable as a lightweight CRM system.
Final Thoughts
Integrating Airtable with WordPress using the Contact Form to Any API plugin is a practical way to eliminate manual data handling and improve workflow efficiency. Once set up correctly, every form submission flows directly into your Airtable base in real time, ensuring your data stays organized, structured, and easy to manage.
This integration is especially useful for businesses that rely on lead capture, client inquiries, or project tracking. Instead of switching between multiple tools or exporting data manually, everything is centralized in one place—your Airtable database.
Another major advantage is flexibility. You can expand this setup anytime by adding more fields, connecting additional forms, or even integrating Airtable with CRM and automation tools to build a complete sales or operations pipeline.
Overall, this is a simple yet powerful automation that saves time, reduces errors, and helps you scale your business processes more efficiently.


