

Introduction
Capturing leads through your website is only the first step—what happens next is just as important. If you’re manually copying Contact Form 7 submissions into Capsule CRM, you’re spending unnecessary time and increasing the risk of missed or inaccurate customer data. By integrating Contact Form 7 with Capsule CRM, every form submission can be sent directly to your CRM, allowing your sales team to respond faster and keep contact records organized automatically.
Managing contacts and leads manually can slow down your workflow and increase the chances of missing important customer details. In this guide, we’ll walk you through the complete process of connecting Contact Form 7 with Capsule CRM using the CF7 to Any API plugin without writing custom code.
In this step-by-step guide, you’ll learn how to connect Contact Form 7 with Capsule CRM using the Contact form to Any API plugin without writing a single line of code. We’ll walk you through configuring the Capsule CRM API, adding authentication headers, mapping your Contact Form 7 fields, and testing the integration to ensure every new lead is synced seamlessly with your CRM in real time.
Watch the Video Tutorial: CF7 with Capsule CRM Integration (Step-by-Step)
Before following the written steps, you can watch the complete integration setup in this quick video tutorial.
This walkthrough covers the entire process of connecting Contact Form 7 with Capsule CRM using CF7 to Any API, including API endpoint setup, request headers, field mapping and testing submissions.
If you prefer visual learning, this video will help you understand each step before configuring the integration yourself.
Step 1: Sign In to Your Capsule CRM Account
Visit the Capsule CRM dashboard and log in to your account.
Once logged in, make sure your CRM workspace is ready to receive incoming contacts from your Contact Form 7 forms.
Step 2: Open CF7 to Any API in WordPress
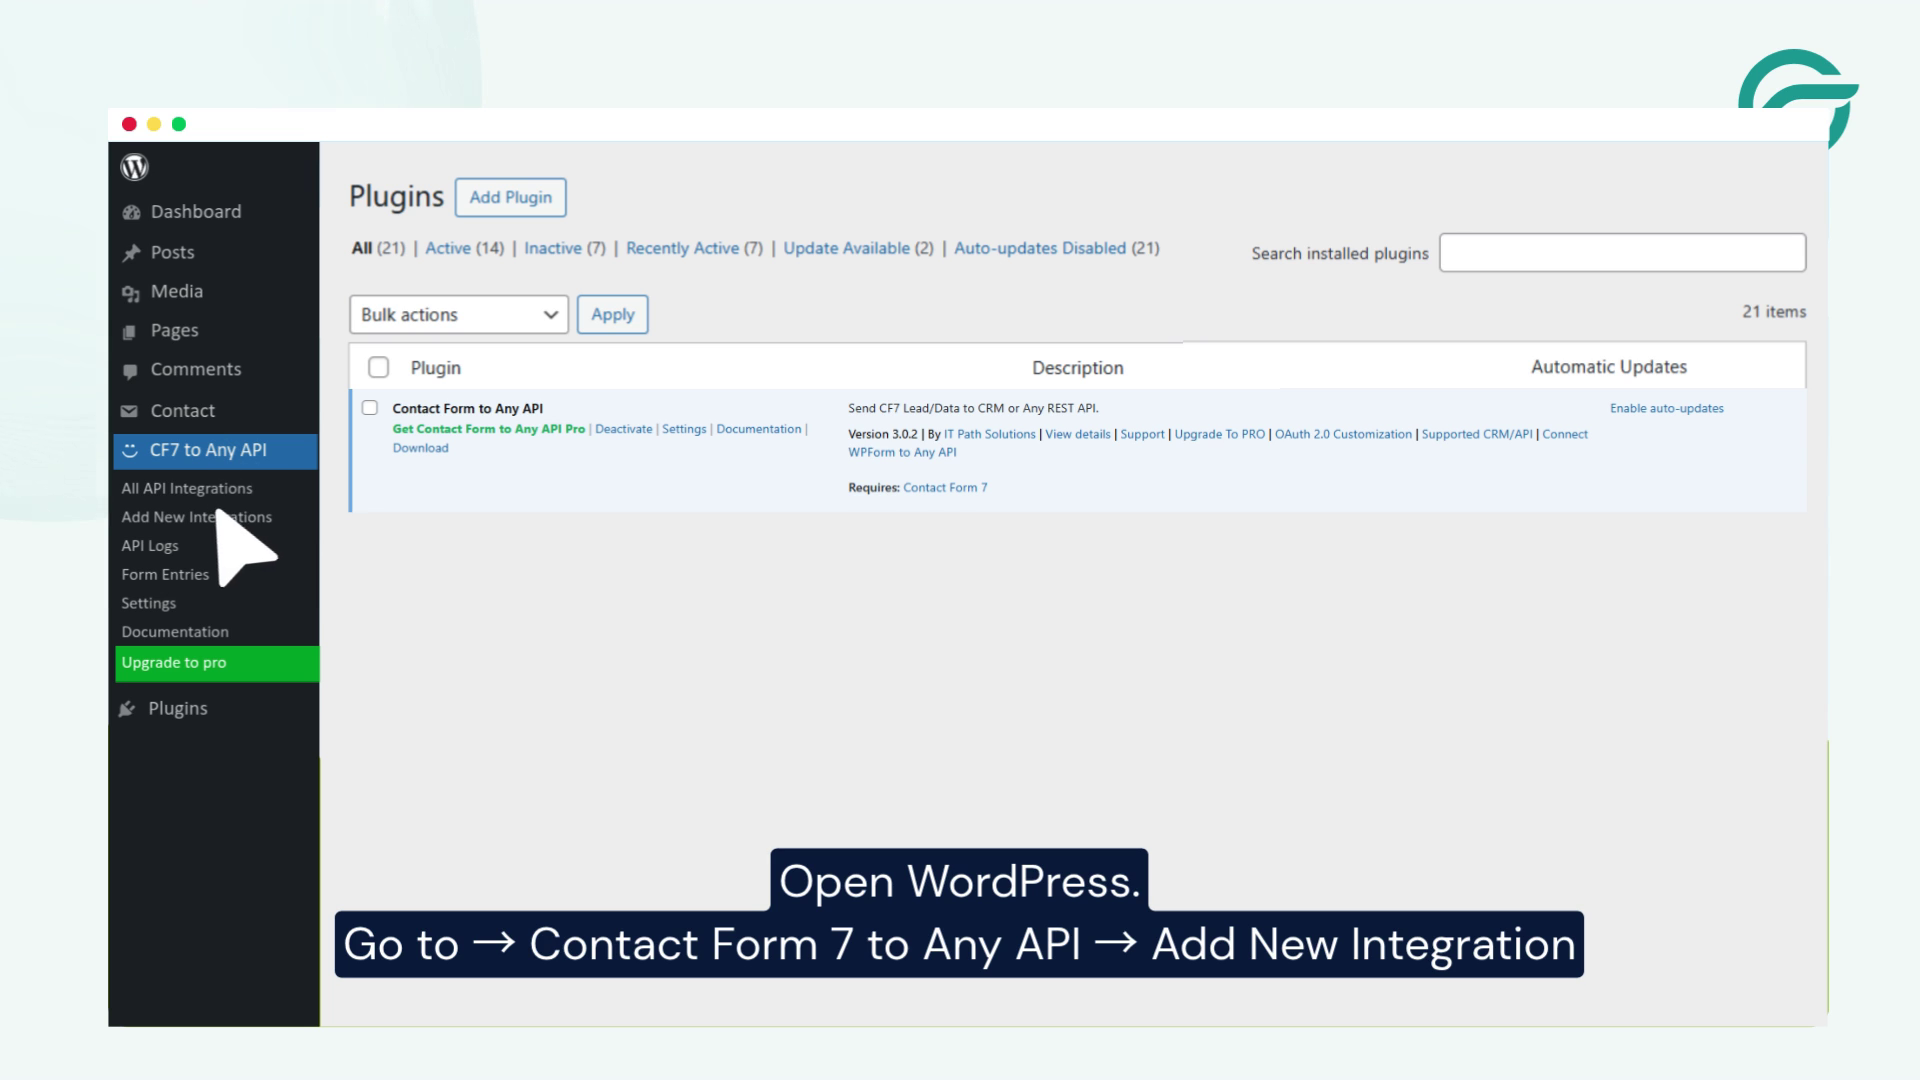
Log in to your WordPress dashboard.
From the left-hand menu, navigate to:
Contact Form to Any API → Add New Integration
This is where you’ll create the integration between Contact Form 7 and Capsule CRM.
Step 3: Create a New Integration
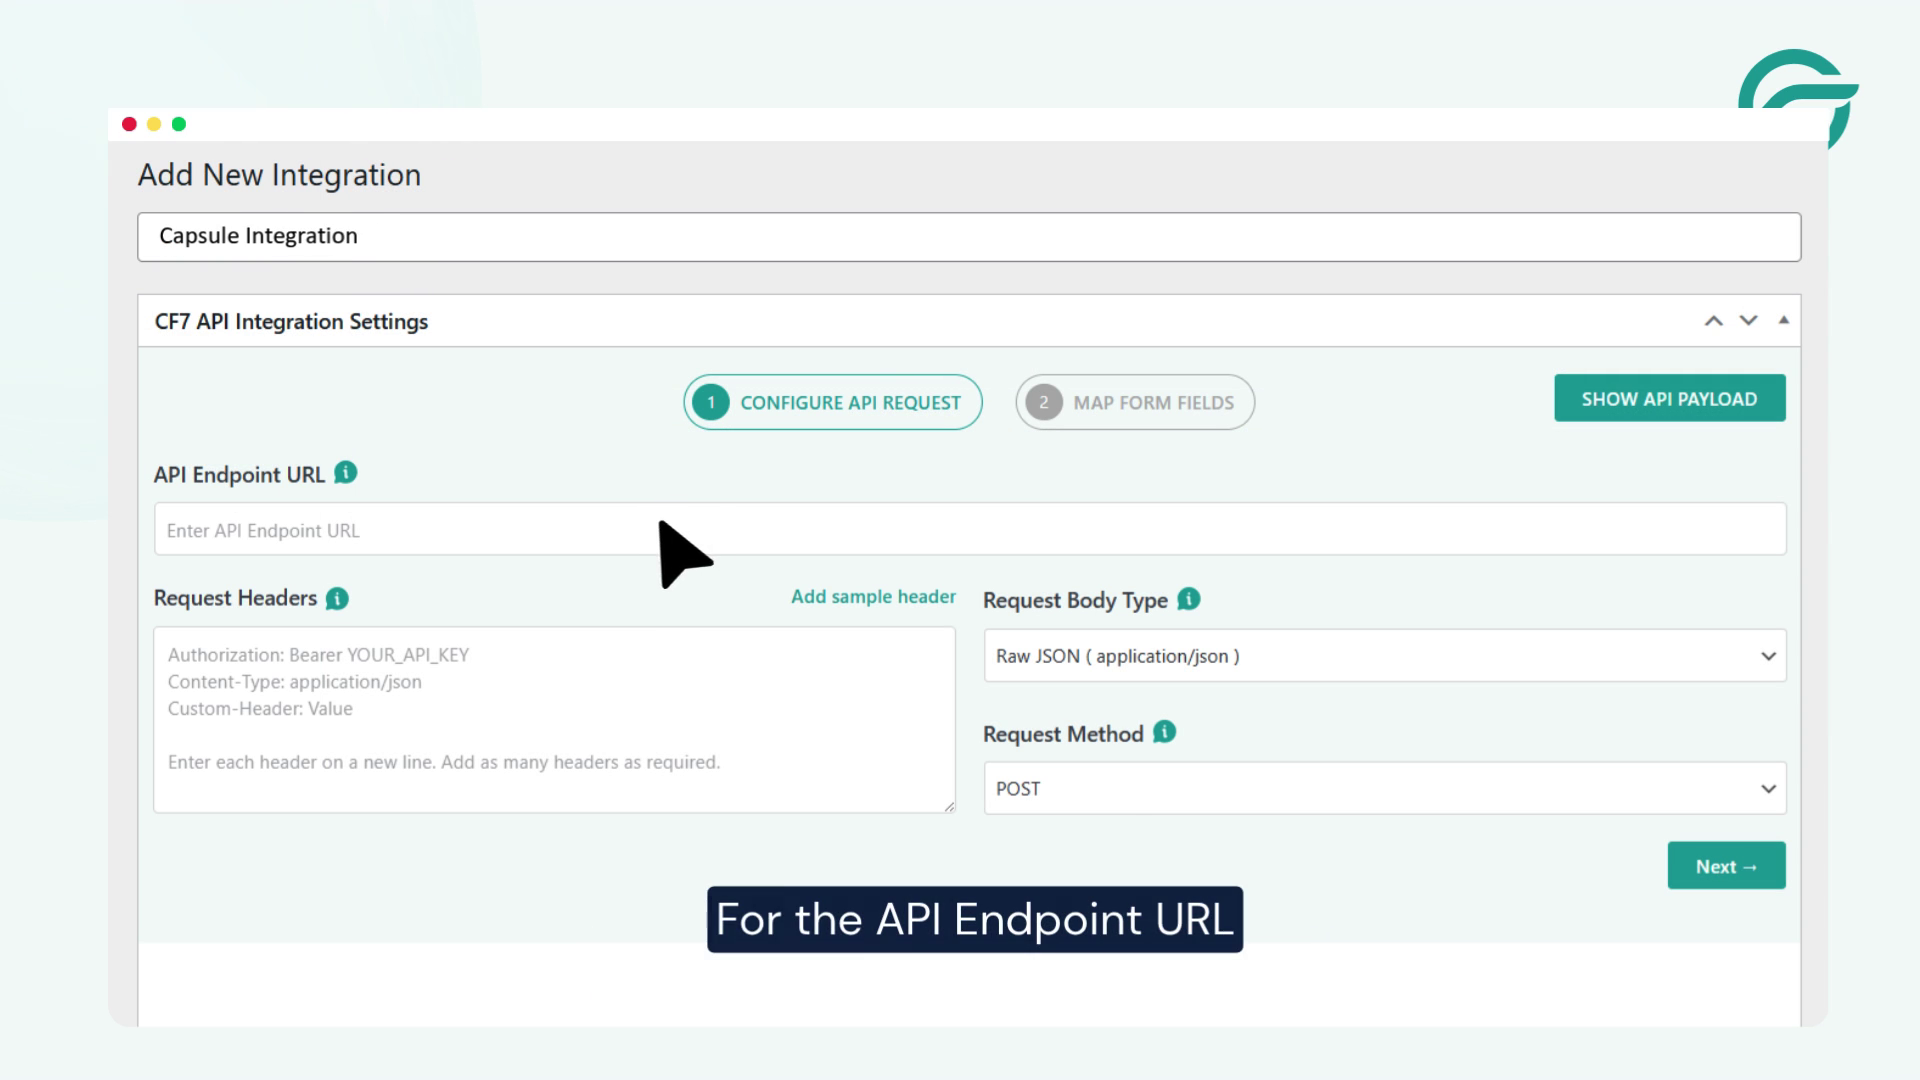
Add a title for your integration.
Example:
Capsule Integration
Using a clear title helps you identify the integration easily if you manage multiple API connections.
Step 4: Copy the Capsule CRM API Endpoint URL
Inside your Capsule CRM dashboard:
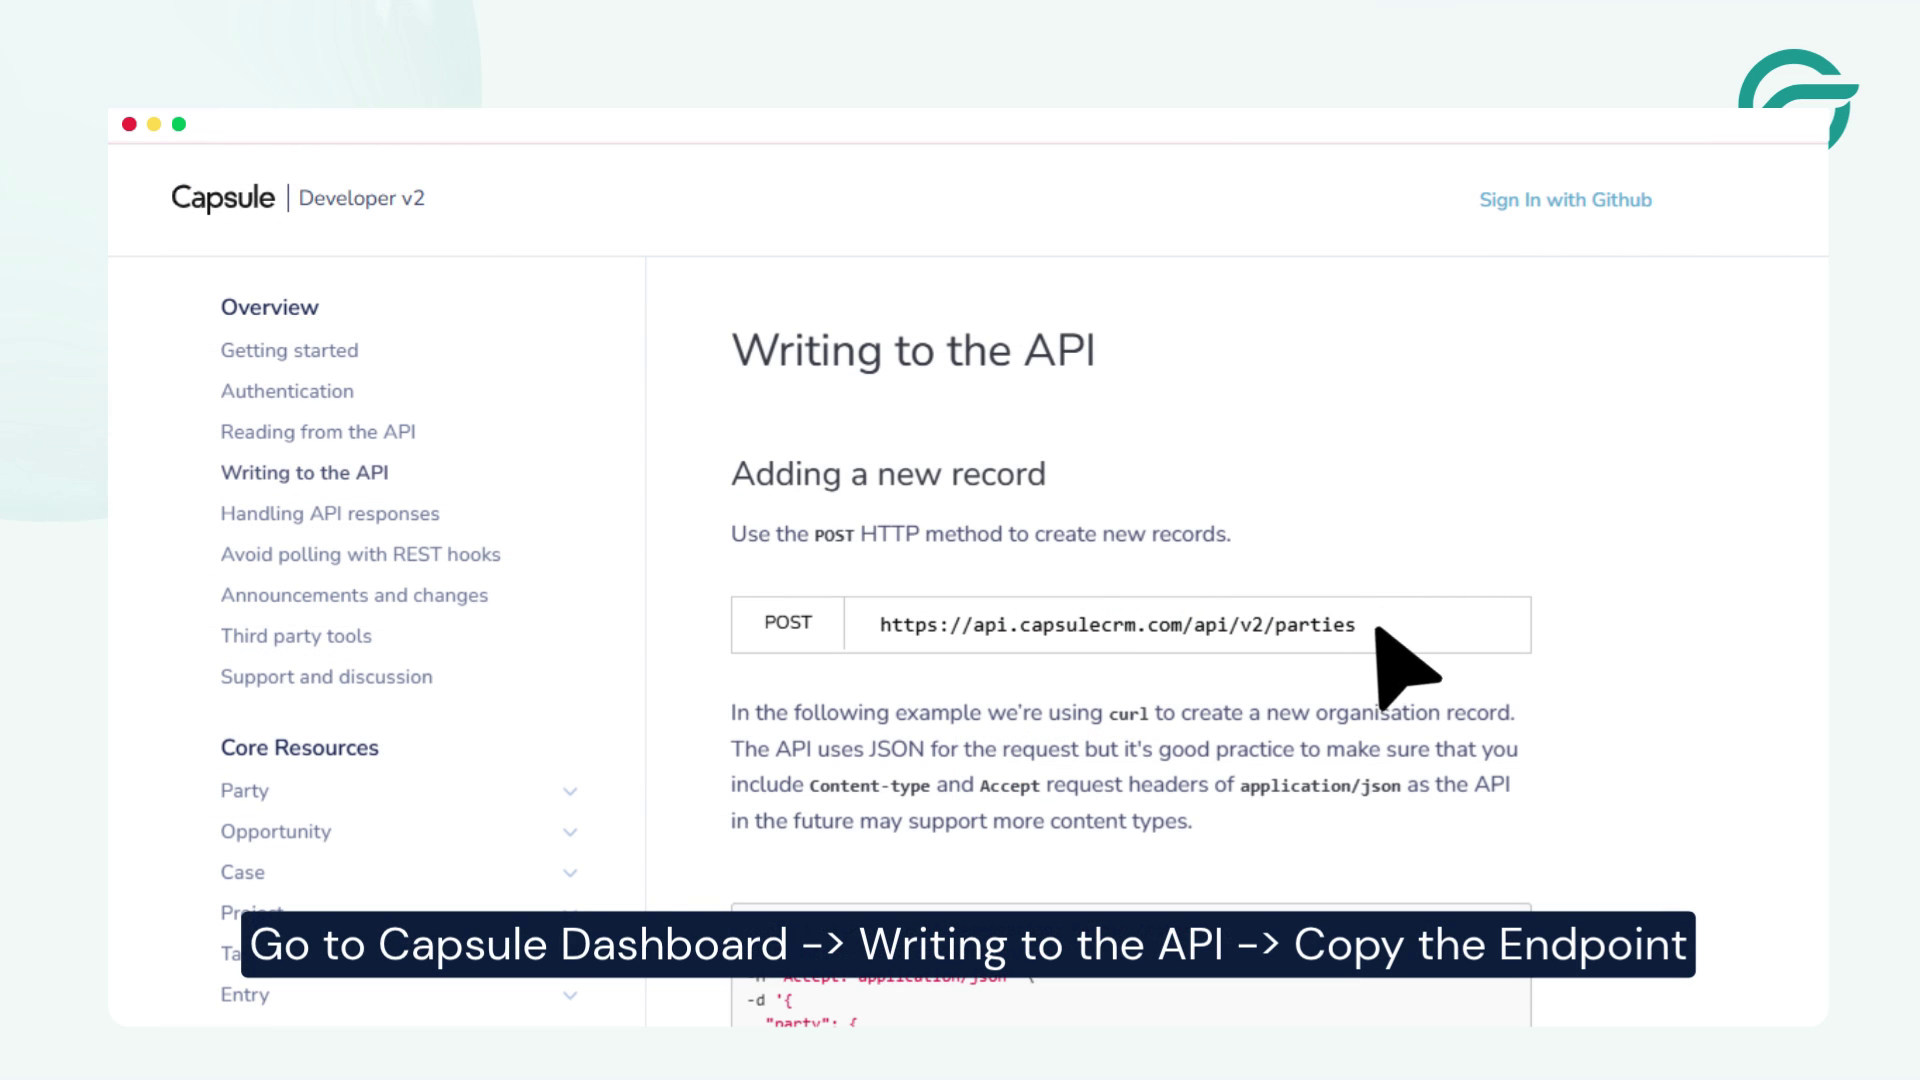
- Go to Writing to the API
- Copy the API endpoint URL
This endpoint allows Contact Form 7 submissions to send contact data directly into Capsule CRM.
Step 5: Add the API Endpoint URL in WordPress

Return to your WordPress dashboard.
Inside the API Endpoint URL field, paste the following endpoint:
https://api.capsulecrm.com/api/v2/parties
This endpoint is used for creating and managing contacts inside Capsule CRM.
Step 6: Locate the Request Headers in Capsule CRM
To authenticate your API requests, you’ll need the request header details from Capsule CRM documentation.
These headers typically include:
- Authorization token
- Content-Type
- Accept headers
Copy the required request header information.
Step 7: Add Request Headers in CF7 to Any API
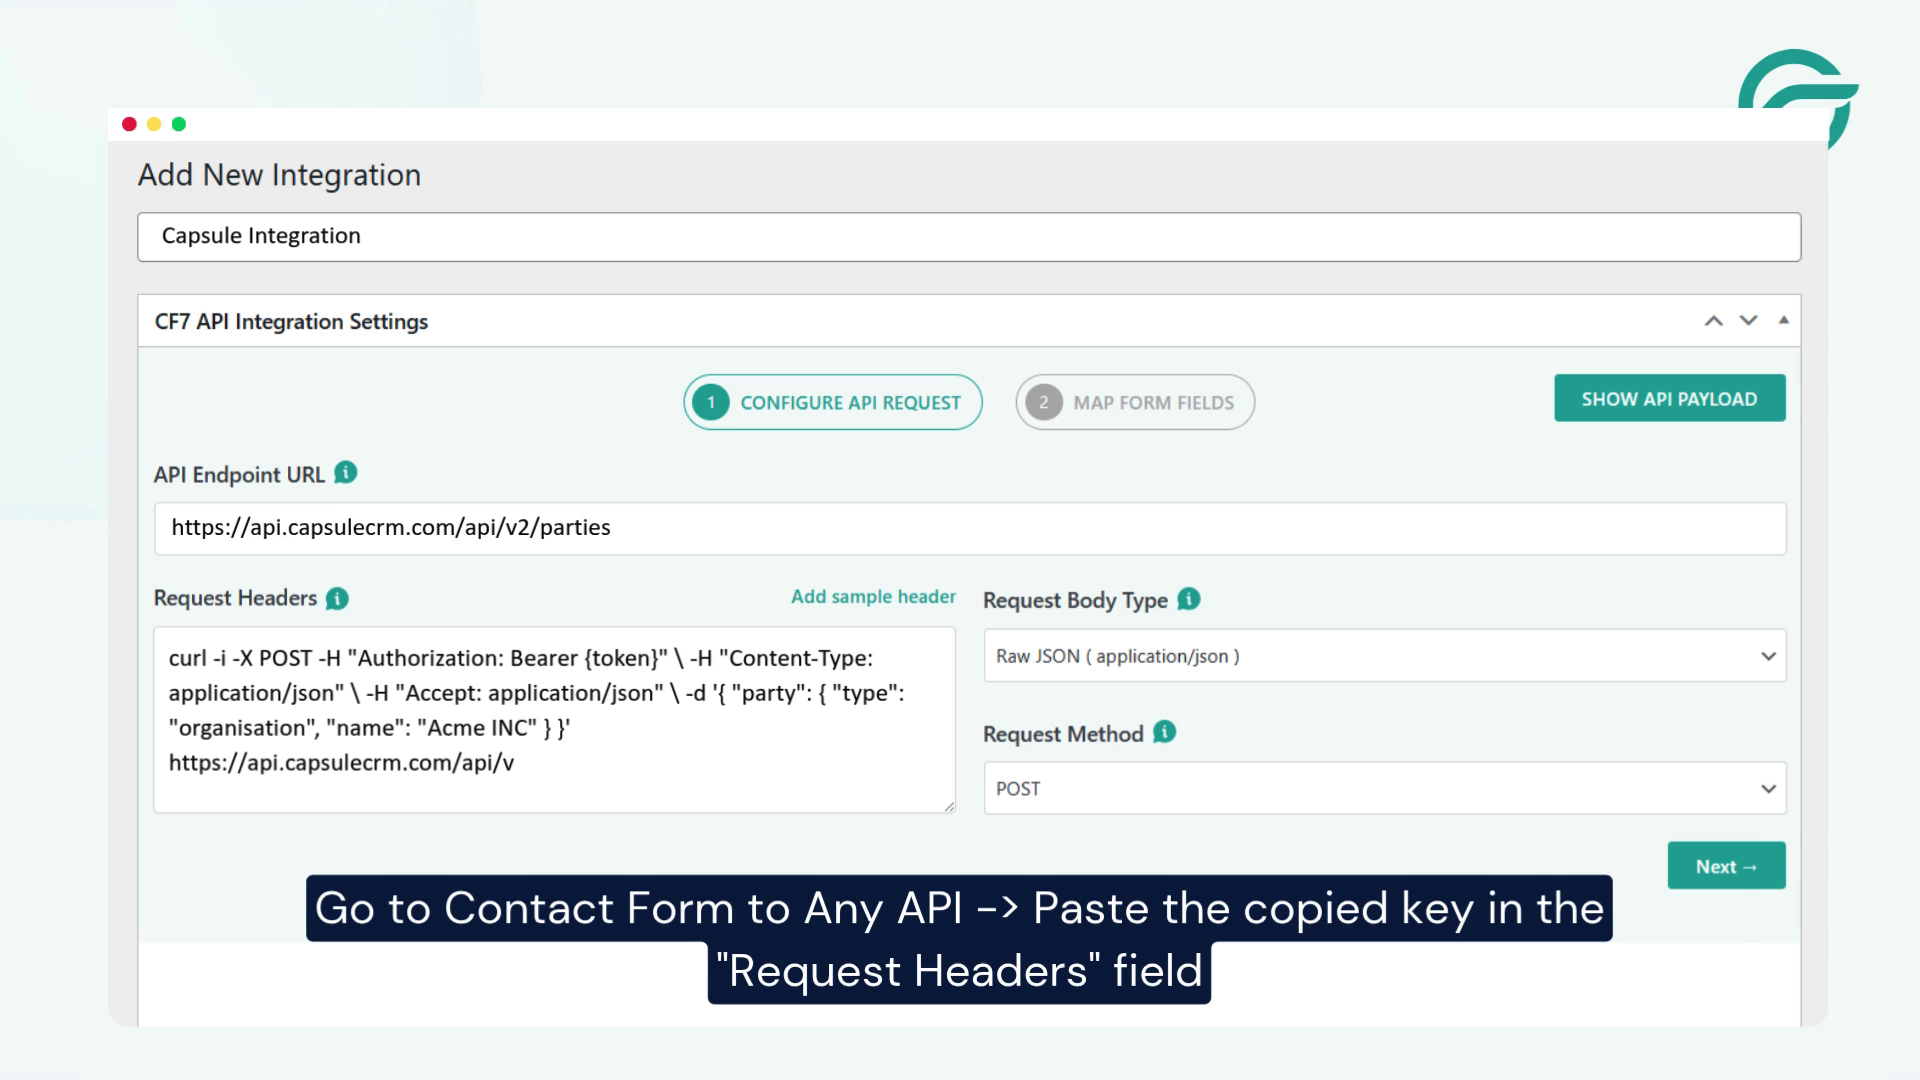
Go back to your integration settings in WordPress.
Inside the Request Headers section:
- Paste the copied request header details
- Save the configuration
This step ensures secure communication between your website and Capsule CRM.
Step 8: Continue to the Next Step
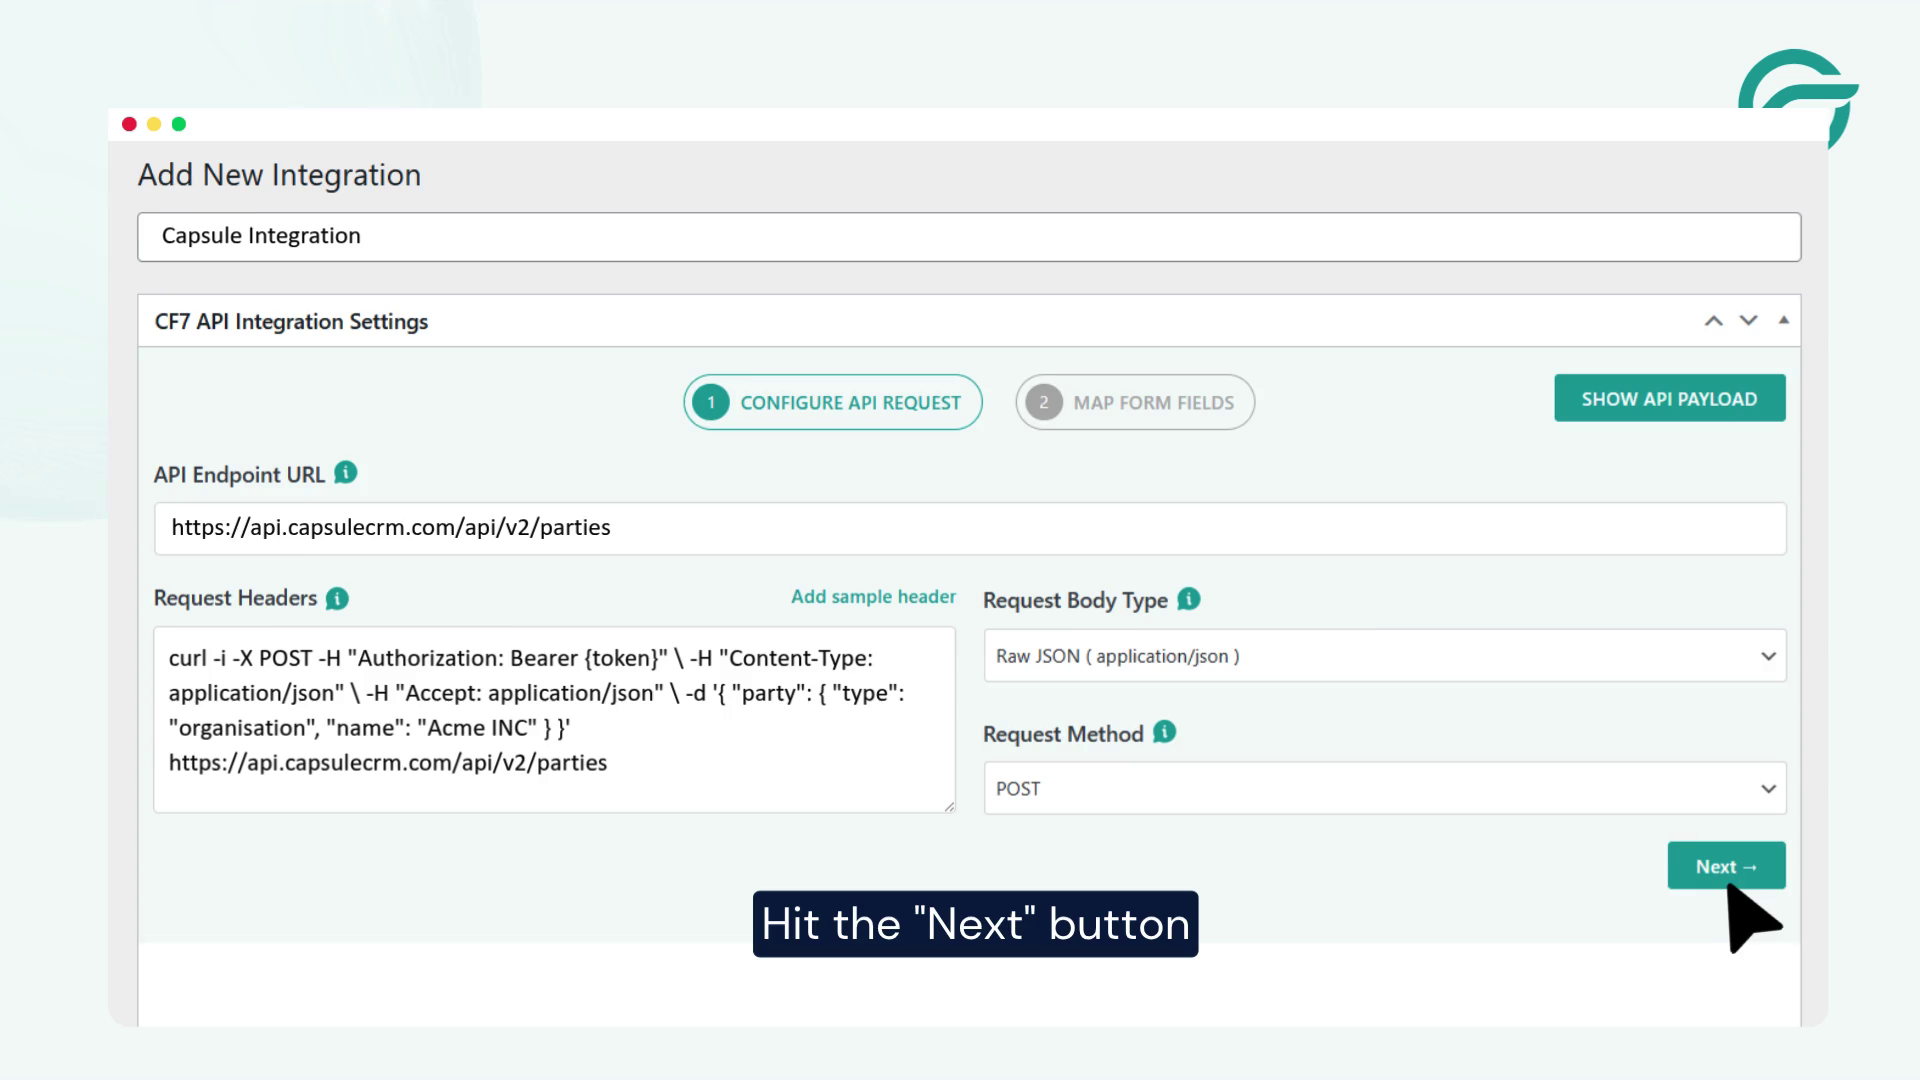
Click the Next button to proceed with the form setup and field mapping configuration.
Step 9: Select Your Contact Form 7 Form
Choose the Contact Form 7 form you want to connect with Capsule CRM.
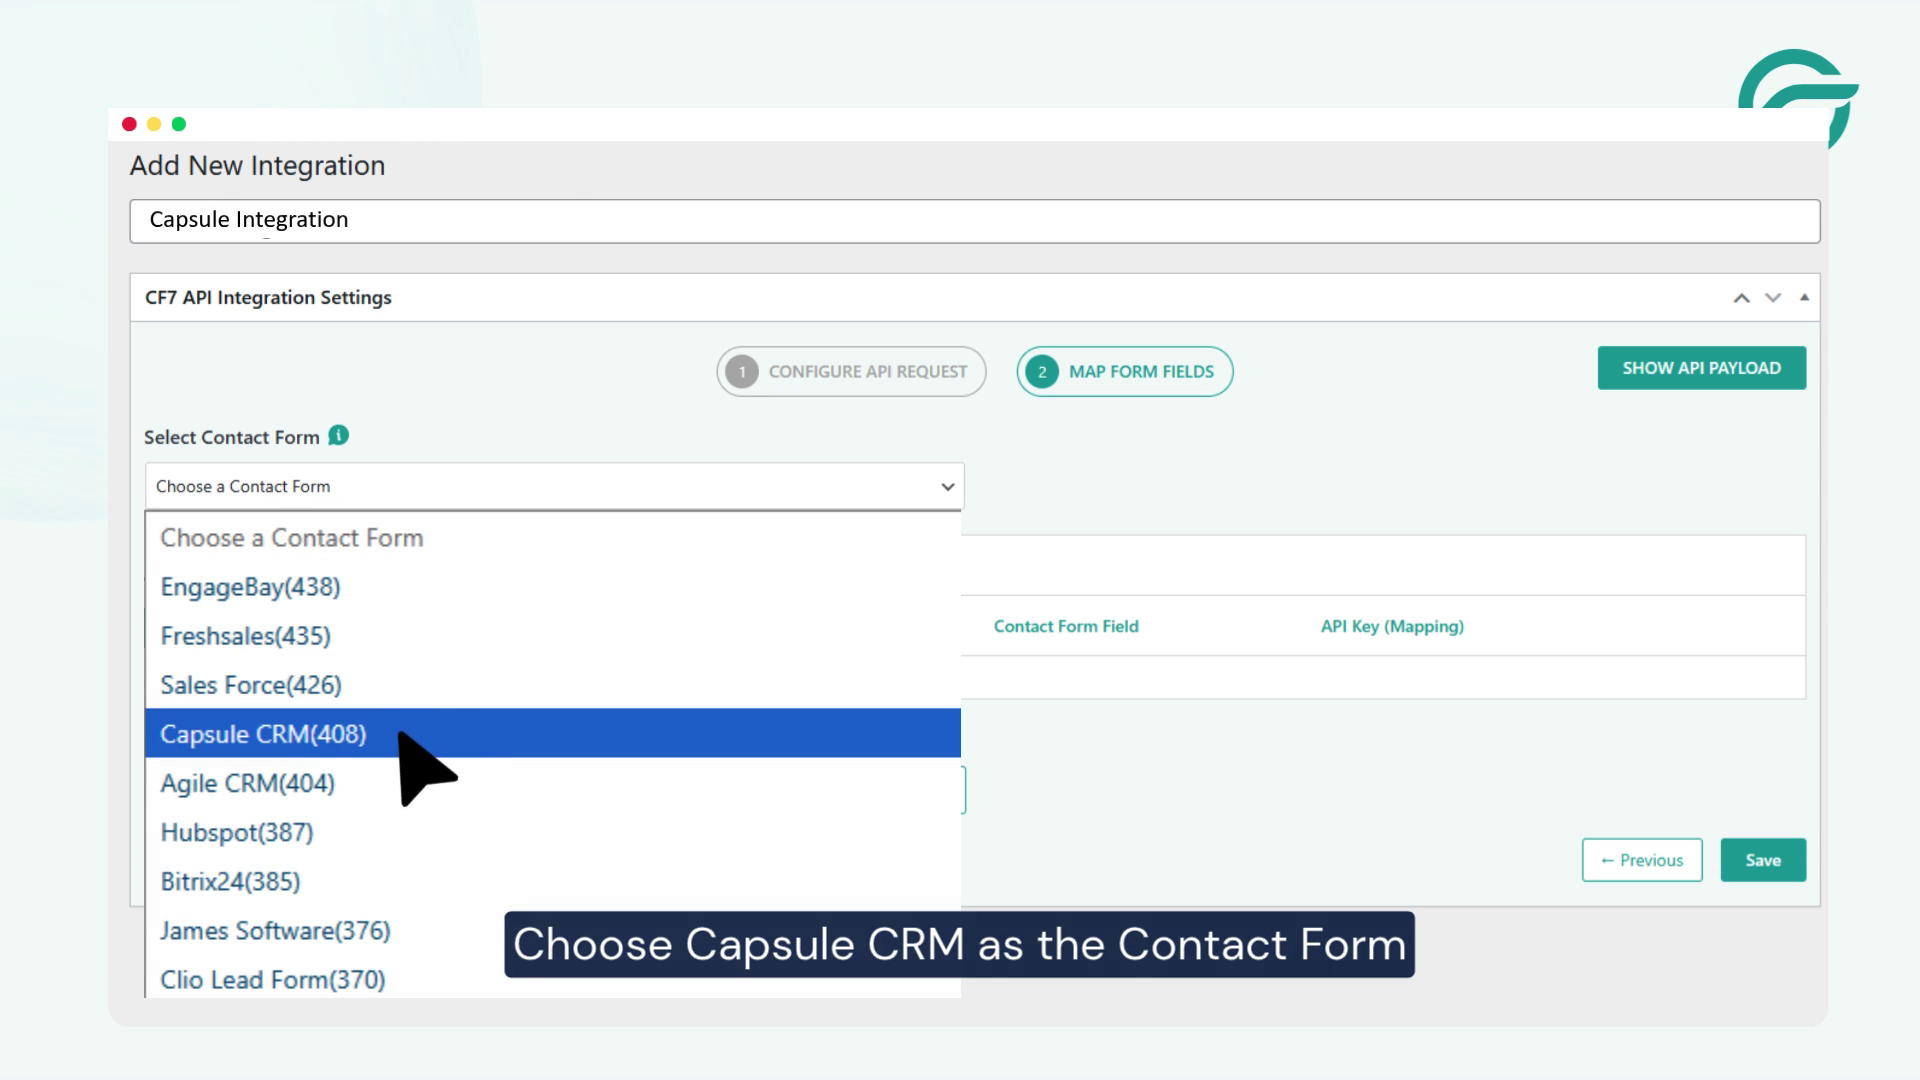
This could be:
- Contact form
- Lead generation form
- Inquiry form
- Support request form
Any Contact Form 7 form can be connected using this method.
Step 10: Configure JSON Payload Field Mapping
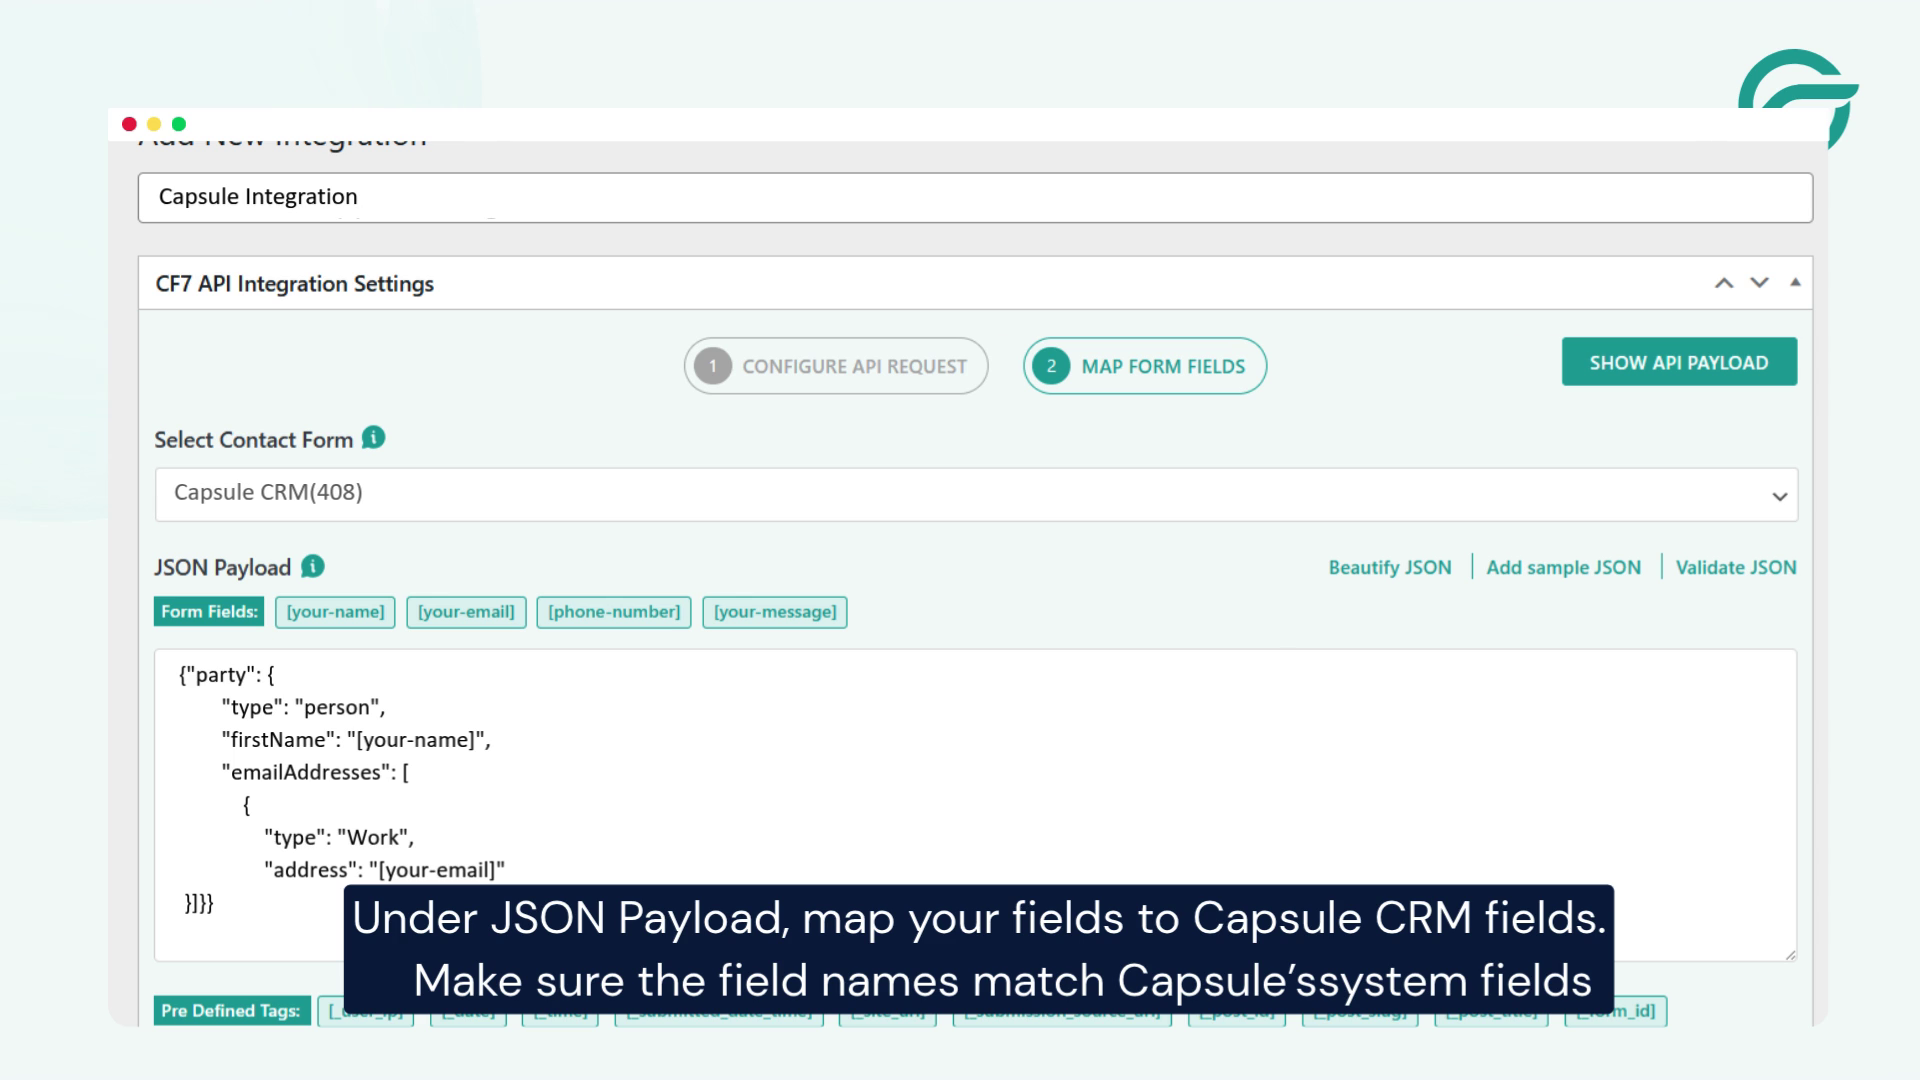
Under the JSON Payload section, map your Contact Form 7 fields to the appropriate Capsule CRM fields. Make sure all field names match Capsule CRM’s API field structure correctly to avoid validation errors.
Step 11: Submit a Test Entry
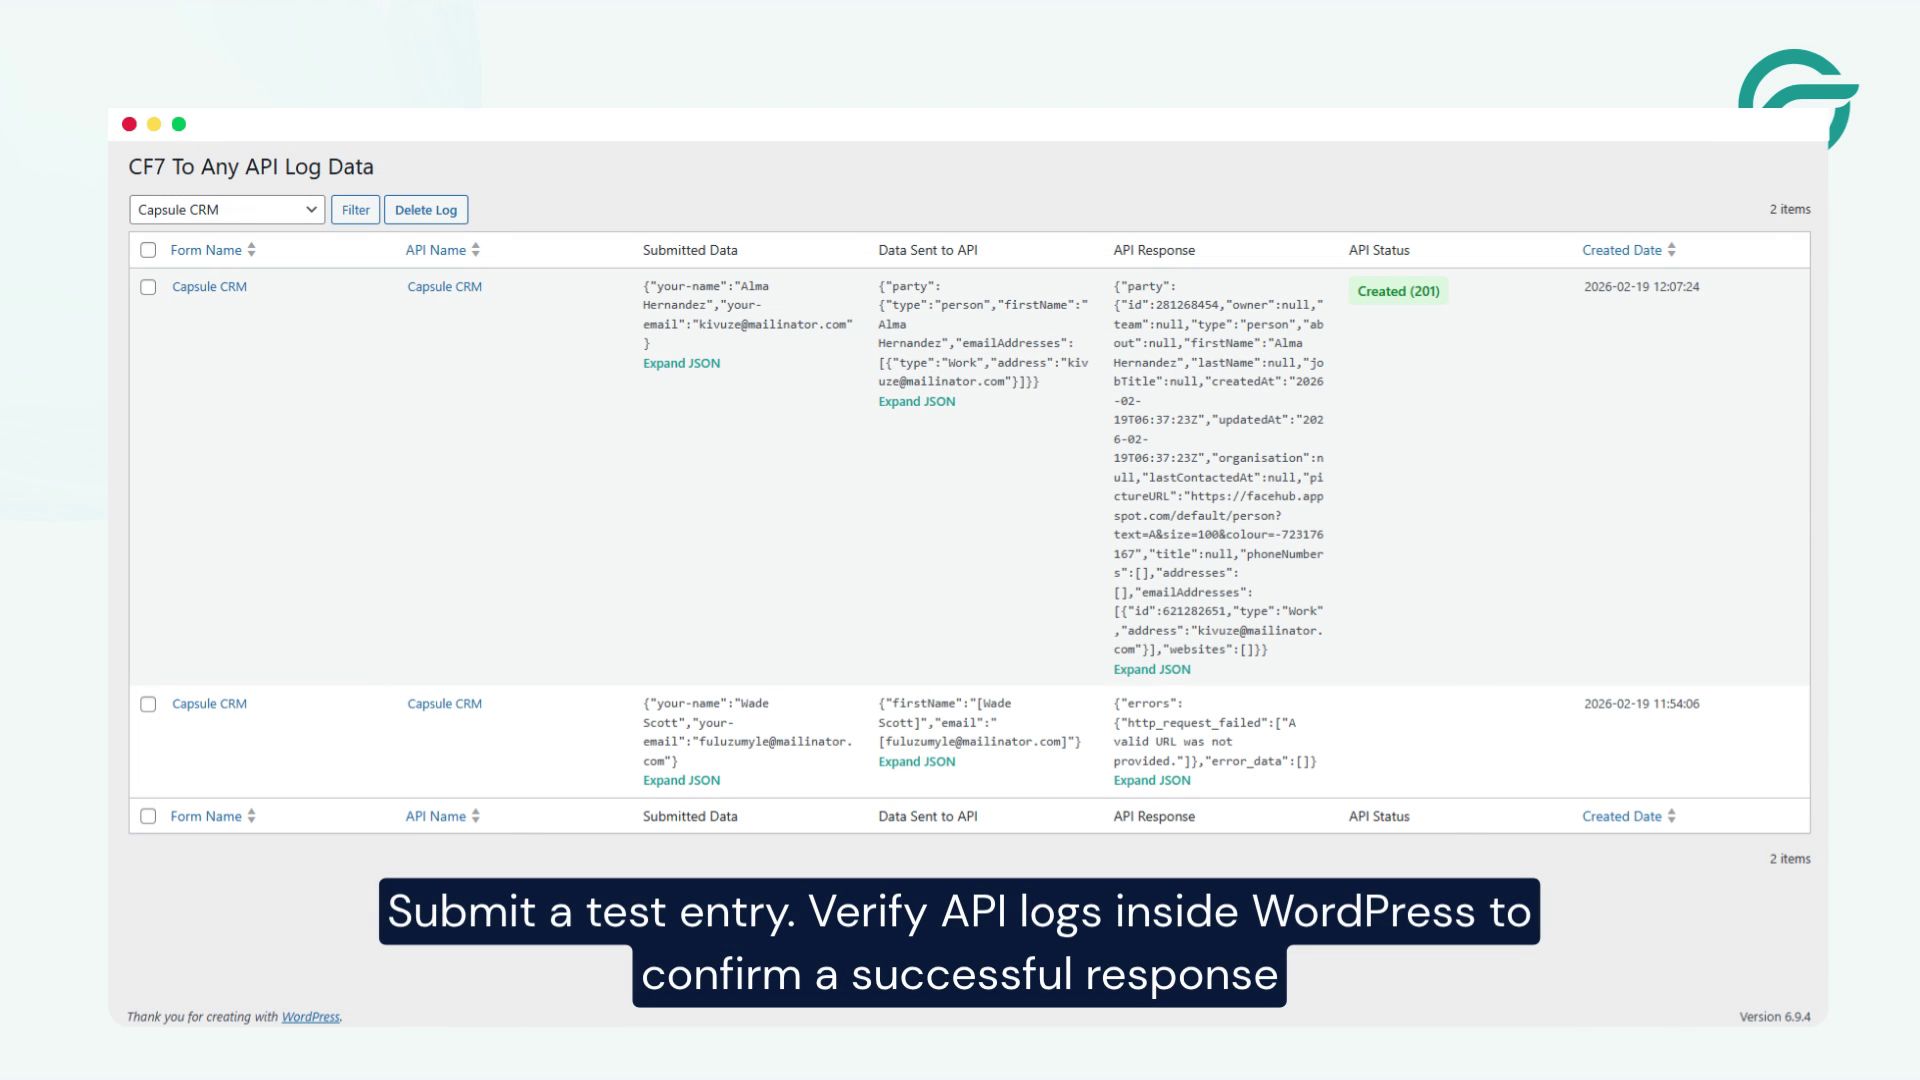
Submit a test form entry from your Contact Form 7 form.
This helps verify that the integration is working correctly.
Step 12: Verify API Logs and CRM Data
After submitting the form, check:
- API Logs inside WordPress
- Your Capsule CRM dashboard
If the contact appears correctly inside Capsule CRM, your integration setup is complete.
Final Thoughts
With Contact Form to Any API, connecting Contact Form 7 with Capsule CRM becomes fast, flexible and completely code-free. This integration helps automate lead capture, reduce manual data entry and keep your CRM data organized in real time.
As your business grows, the same workflow can also be used to connect Contact Form 7 with hundreds of other CRMs, marketing tools and external applications, making CF7 to Any API a scalable integration solution.


