

Integrating your WordPress forms with Agile CRM allows you to automatically capture leads, streamline customer data, and improve your sales workflow. If you’re using Contact Form 7, you can easily connect it to Agile CRM using our plugin, Contact Form to Any API, for seamless API integration.
In this guide, we’ll walk you through the step-by-step process to integrate Contact Form 7 with Agile CRM and automate your lead management system.
Watch the Step-by-Step Video Tutorial
If you prefer a visual walkthrough, watch this detailed tutorial on integrating Contact Form 7 with HubSpot:
Step-by-Step Guide to Integrate Contact Form 7 with Agile CRM
Step 1: Access WordPress Dashboard
Log in to your WordPress admin panel.
Step 2: Navigate to API Integration
Go to Contact Form 7 to Any API → Add New Integration.
Step 3: Create Integration
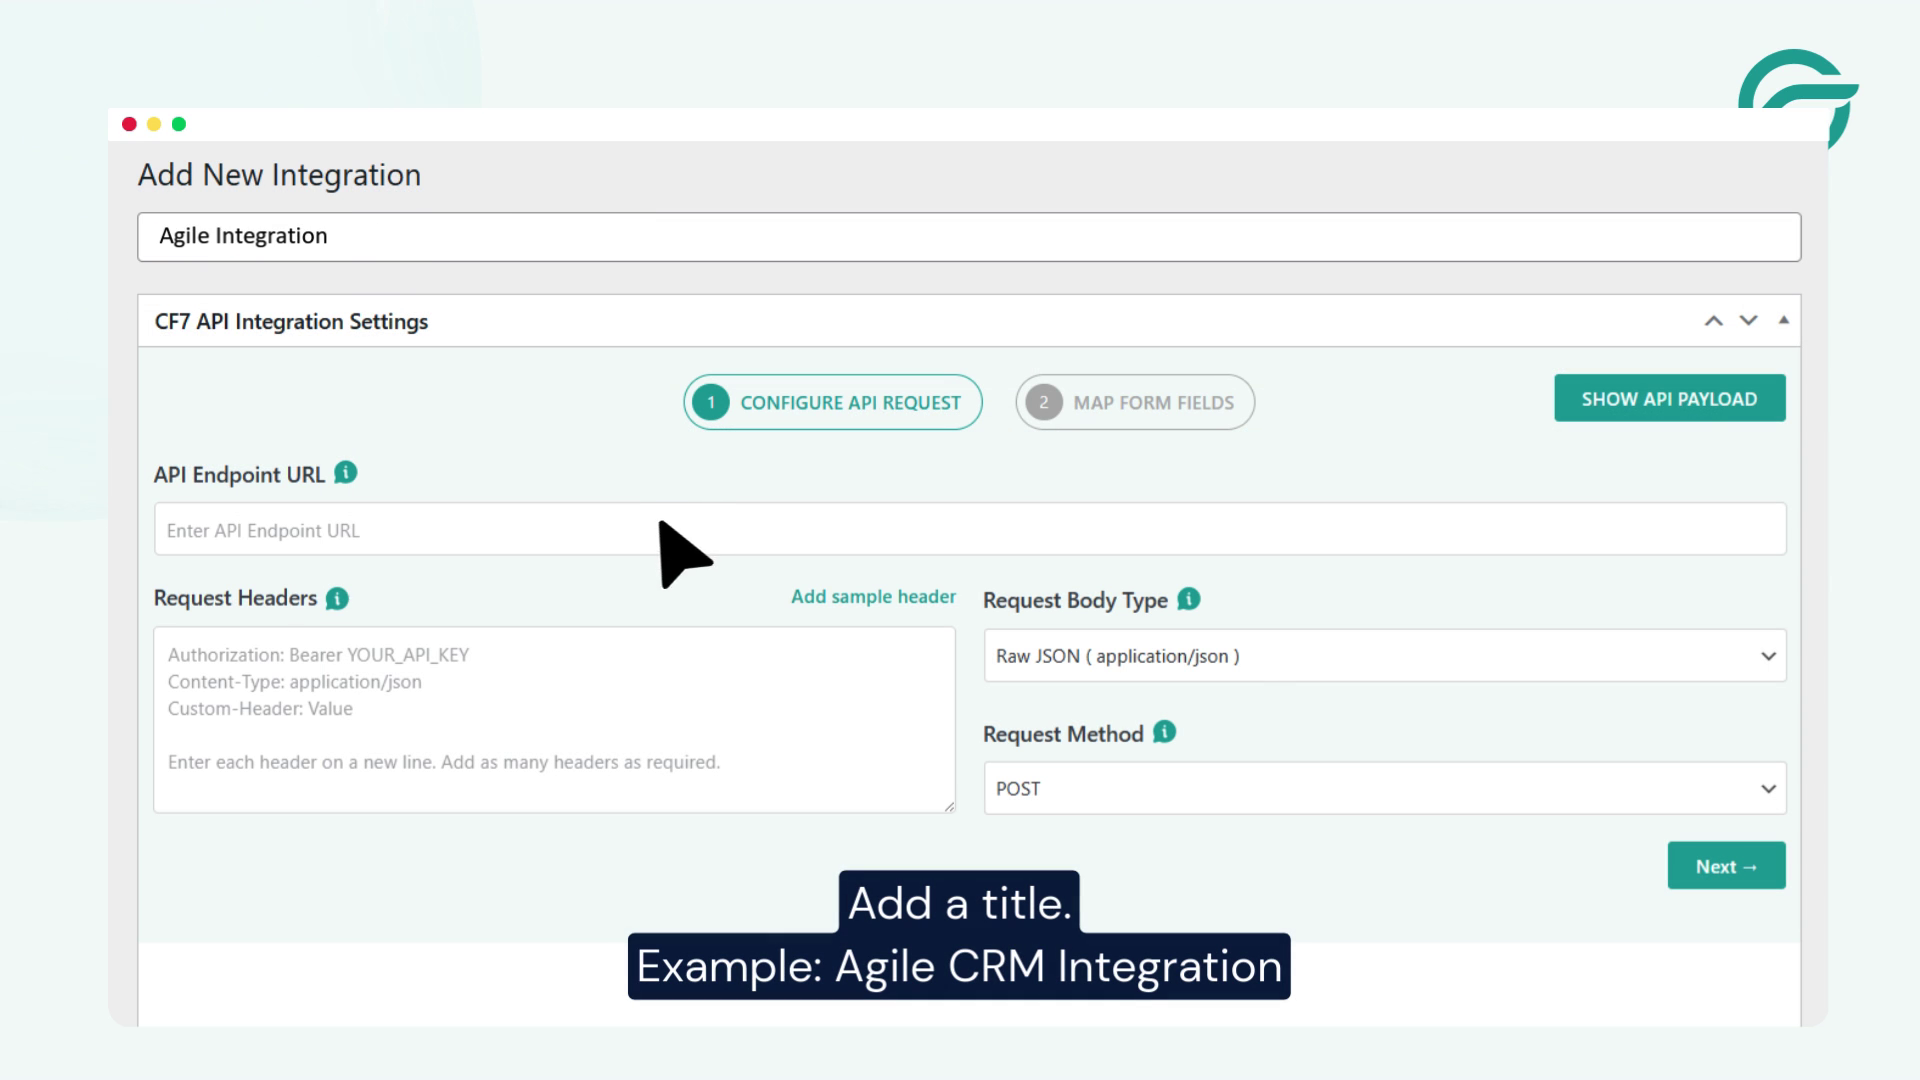
Enter a name for your integration.
Example: Agile CRM Integration
Step 4: Log in to Agile CRM
Access your Agile CRM account.
Step 5: Open API Settings
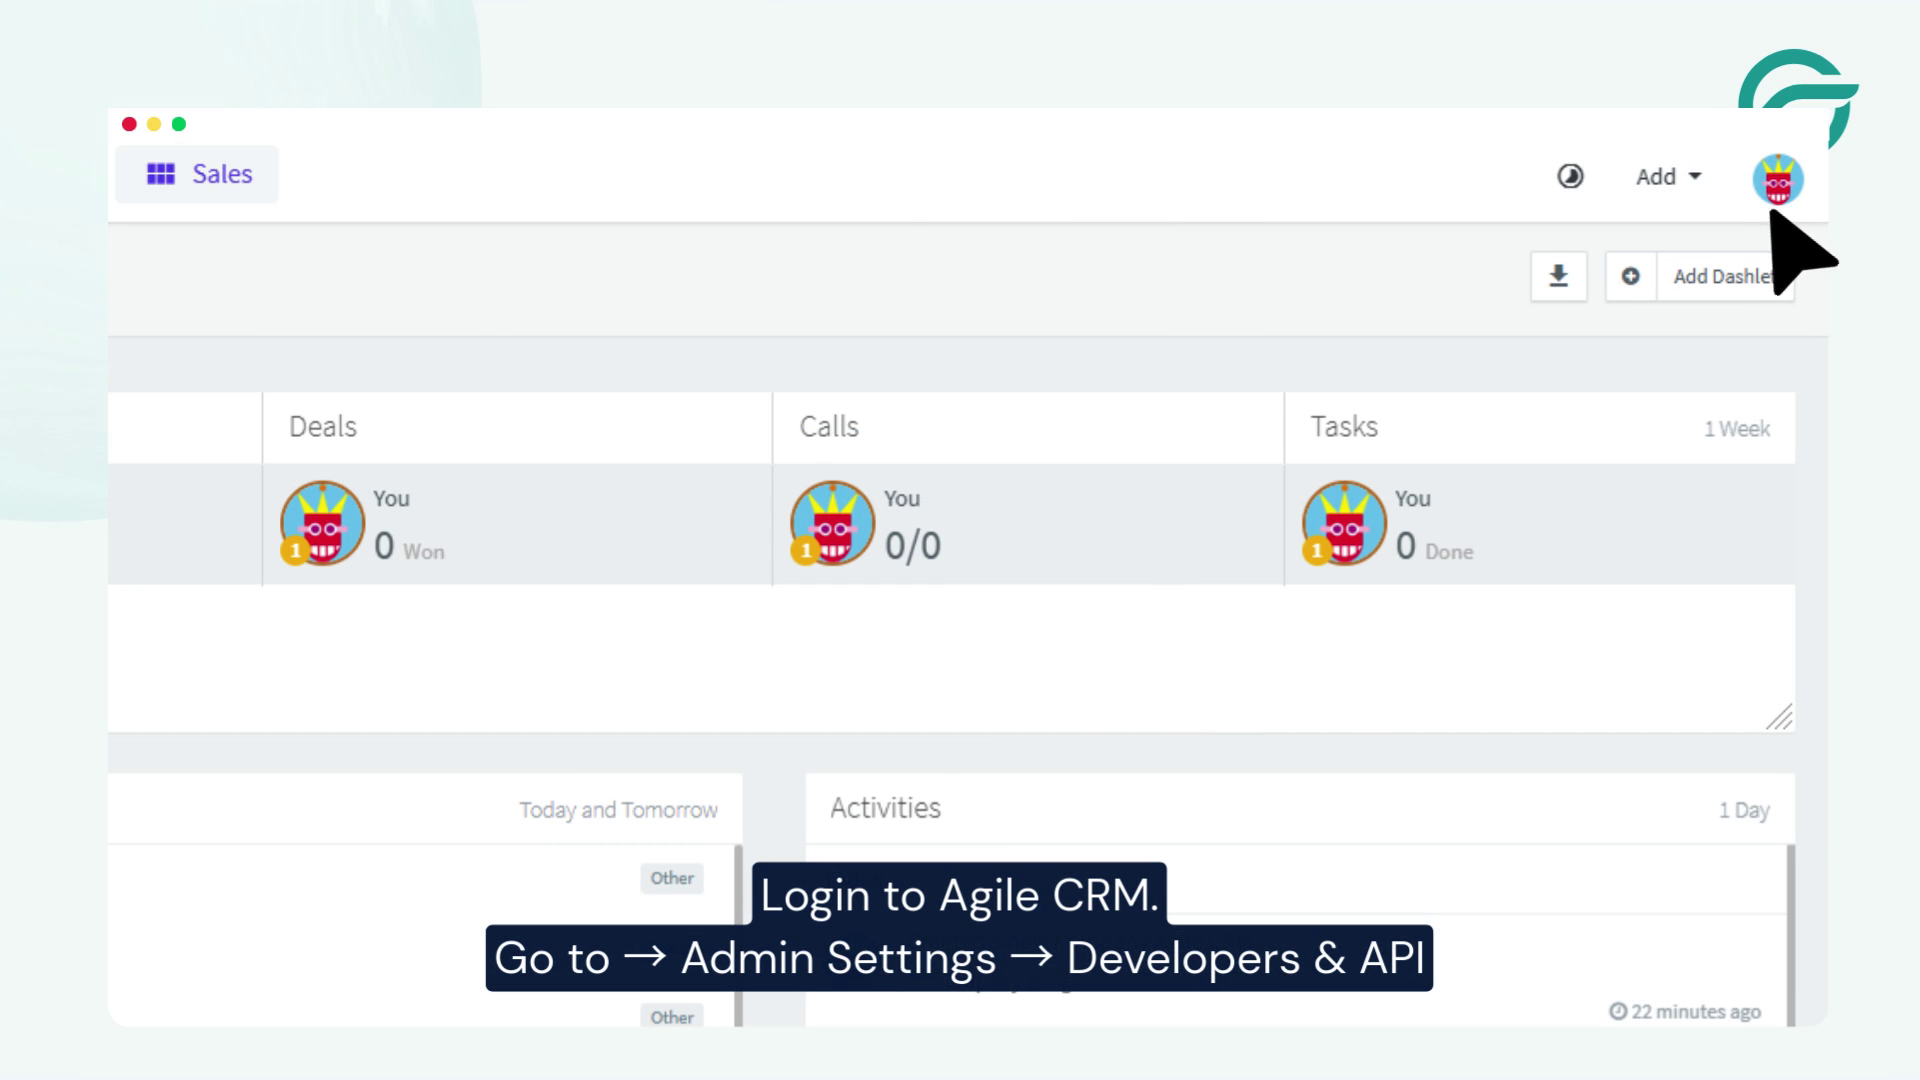
Go to Admin Settings → Developers & API.
Step 6: Enable API Access
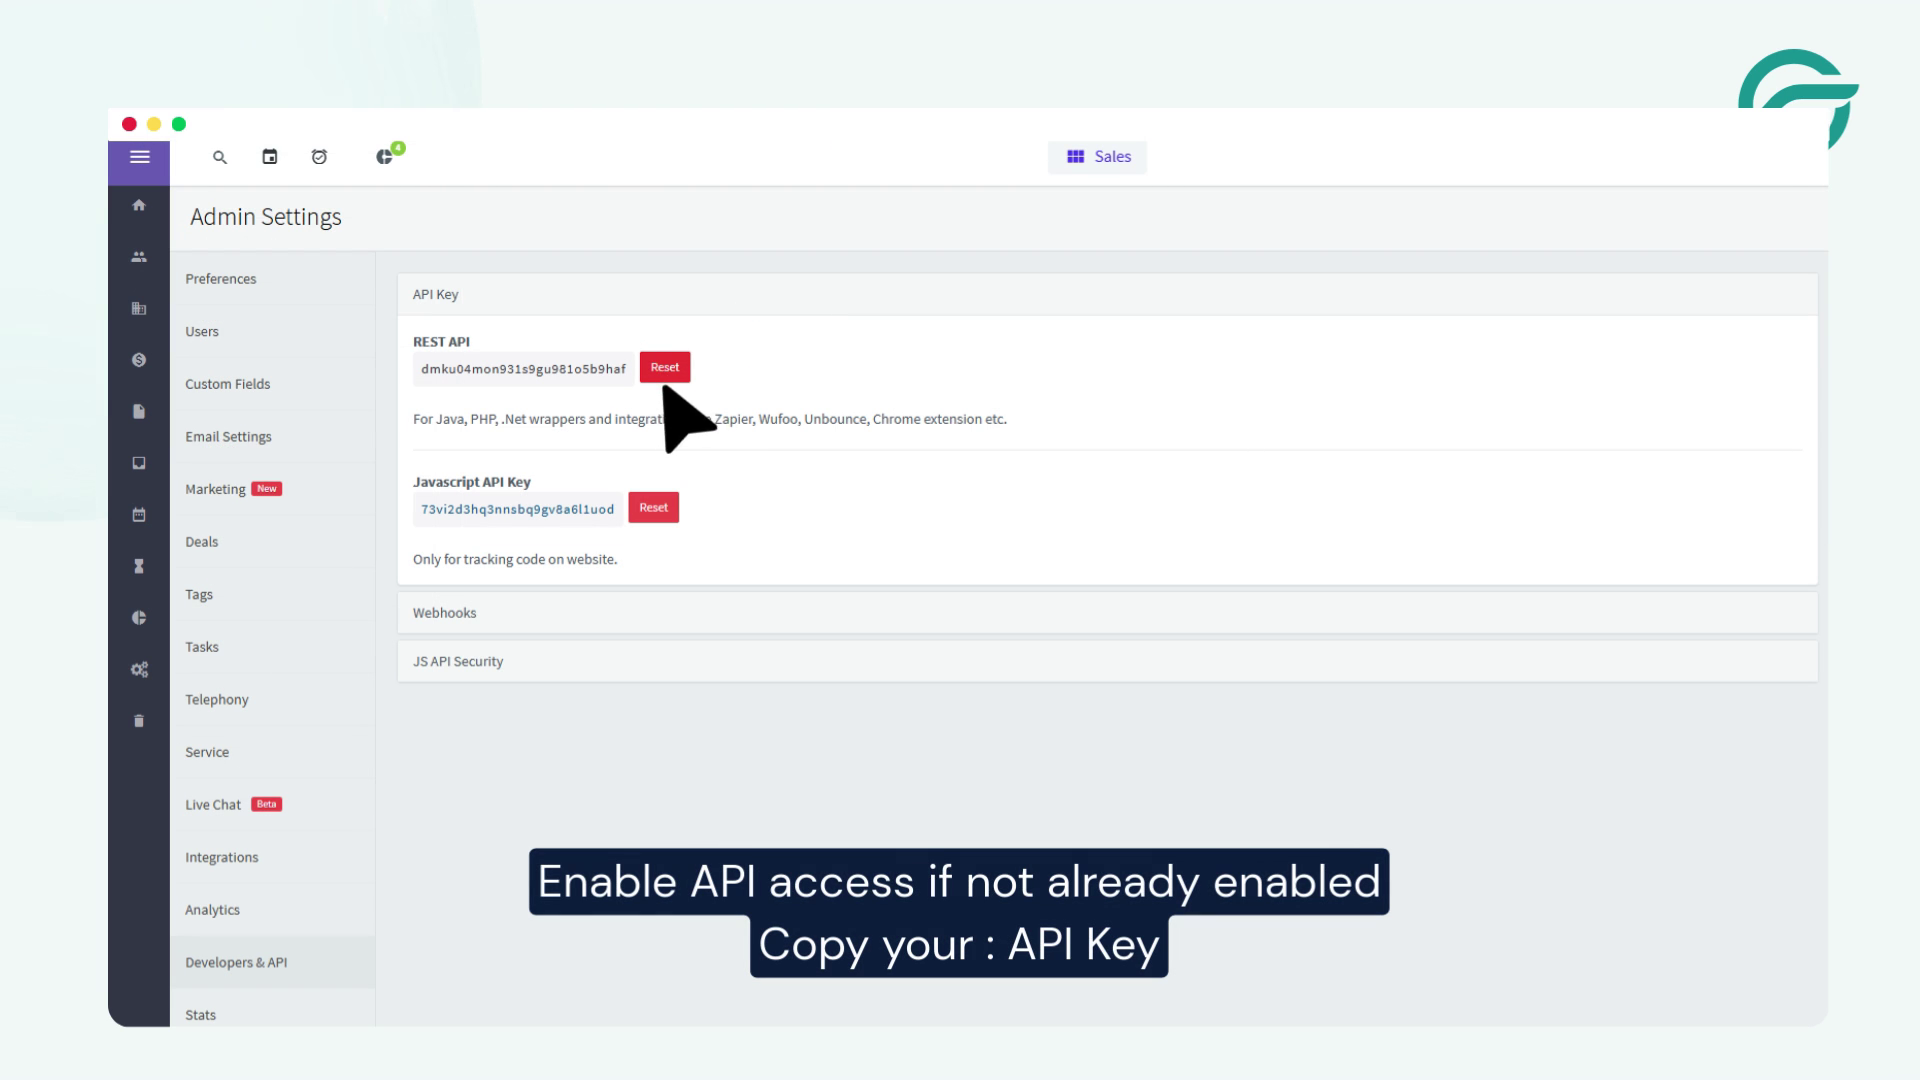
Enable API access if it is not already activated.
Step 7: Copy Required Credentials
Collect the following details:
- API Key
- Registered Email ID
- Domain URL
Example:
https://yourdomain.agilecrm.com
Step 8: Return to WordPress
Go back to your WordPress integration setup.
Step 9: Add API Endpoint
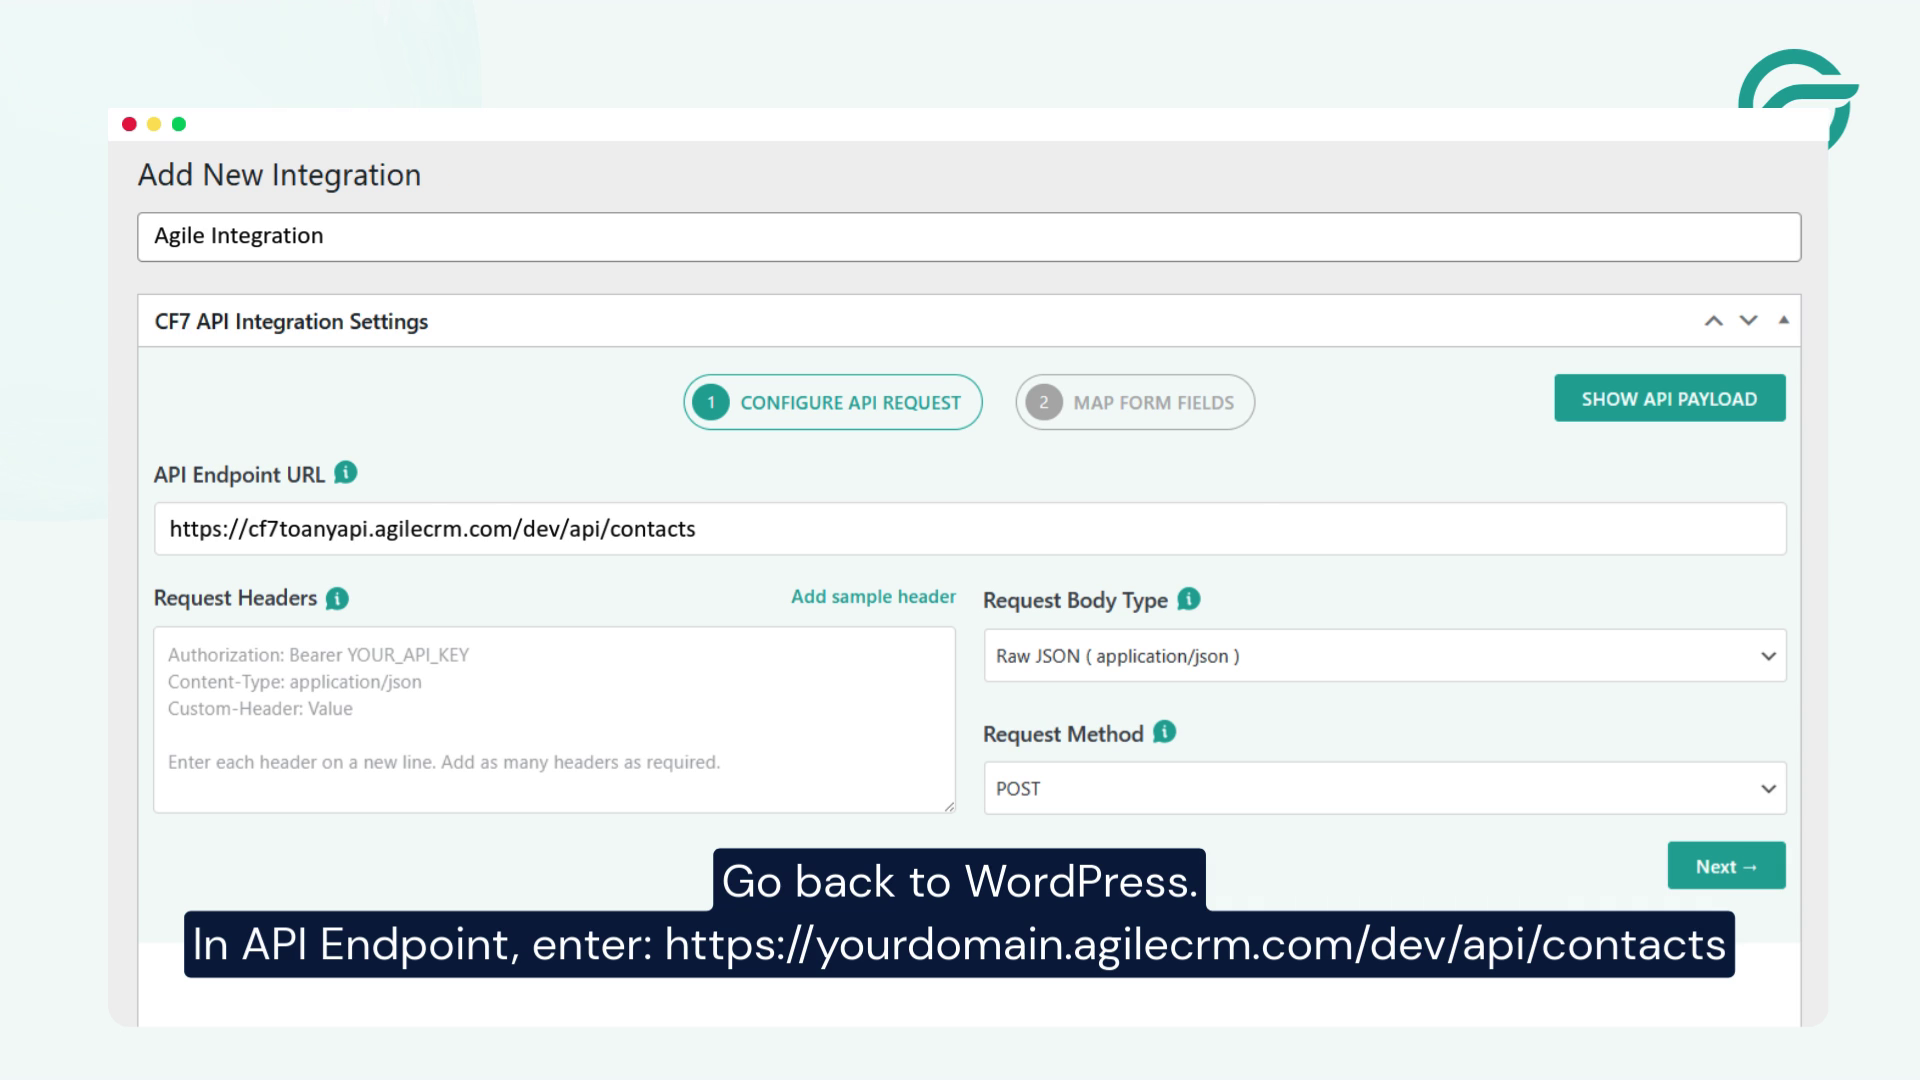
Enter the following in the API Endpoint field:
https://yourdomain.agilecrm.com/dev/api/contacts
Step 10: Set Request Method

Select POST as the request method.
Step 11: Configure Authentication
Choose Basic Authentication and enter:
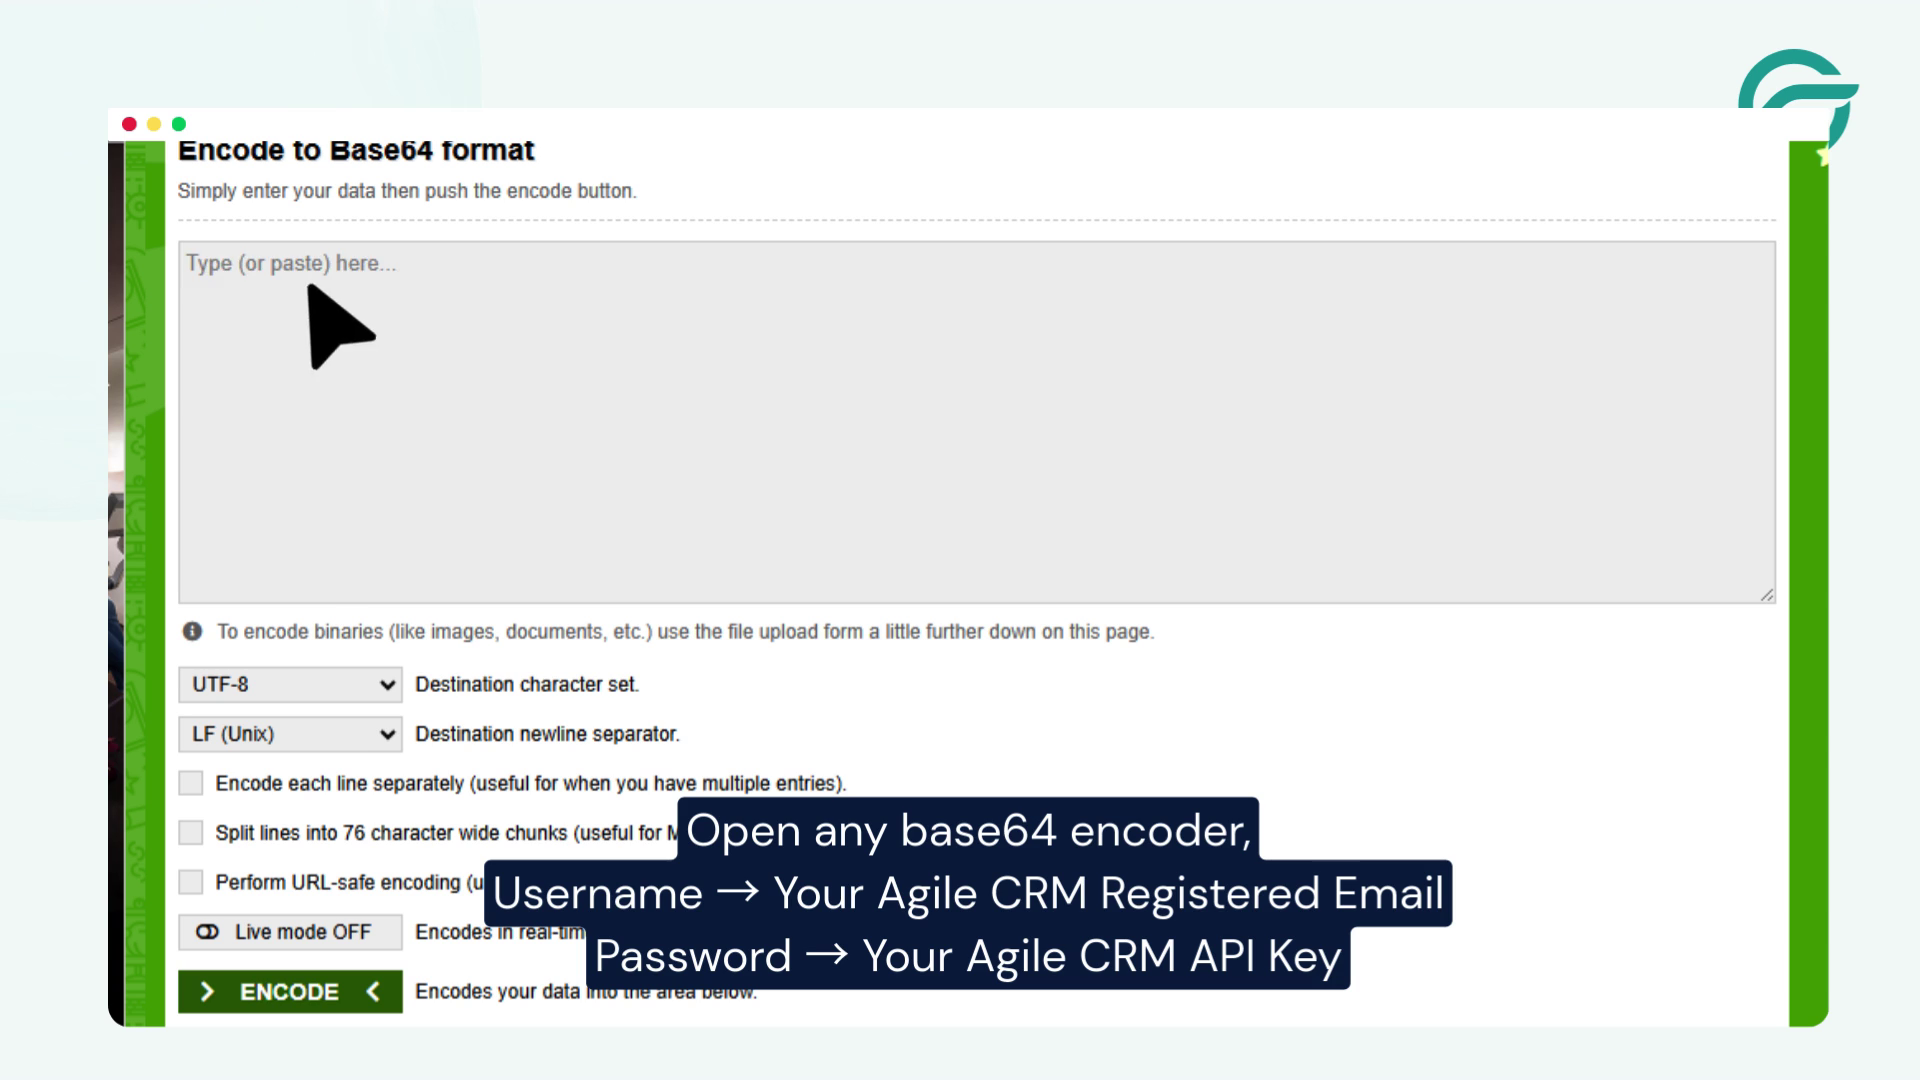
- Username: Your Agile CRM Email
- Password: Your API Key
Step 12: Add Request Headers
Add the following header:
Content-Type: application/json
Step 13: Select Contact Form
Choose the Contact Form 7 form you want to integrate.
Step 14: Map Form Fields Using JSON Payload
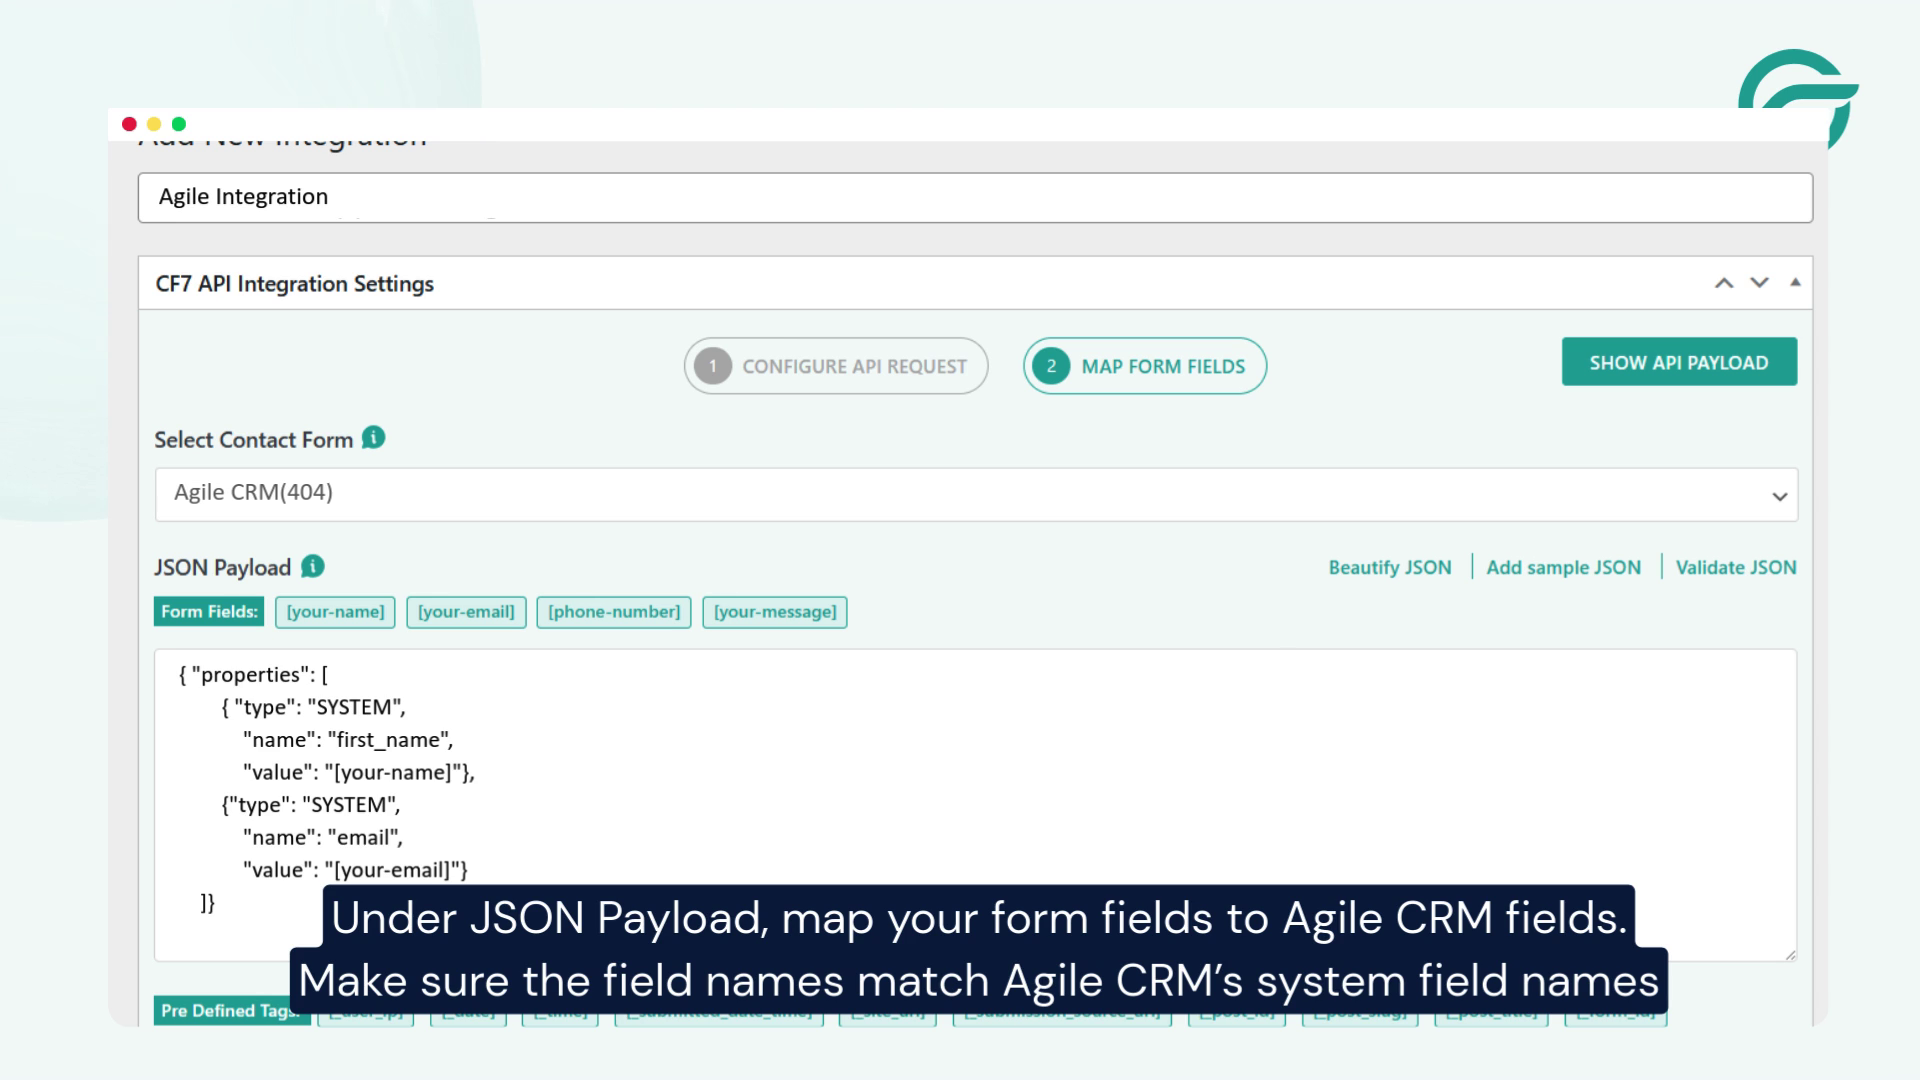
Map your form fields to Agile CRM system fields using JSON:
{
“properties”: [
{
“type”: “SYSTEM”,
“name”: “email”,
“value”: “[your-email]”
},
{
“type”: “SYSTEM”,
“name”: “first_name”,
“value”: “[your-first-name]”
},
{
“type”: “SYSTEM”,
“name”: “last_name”,
“value”: “[your-last-name]”
},
{
“type”: “SYSTEM”,
“name”: “phone”,
“value”: “[your-phone]”
}
]
}
Make sure the field names exactly match Agile CRM’s system fields.
Step 15: Save the Integration
Click on Save to store your settings.
Step 16: Test the Integration
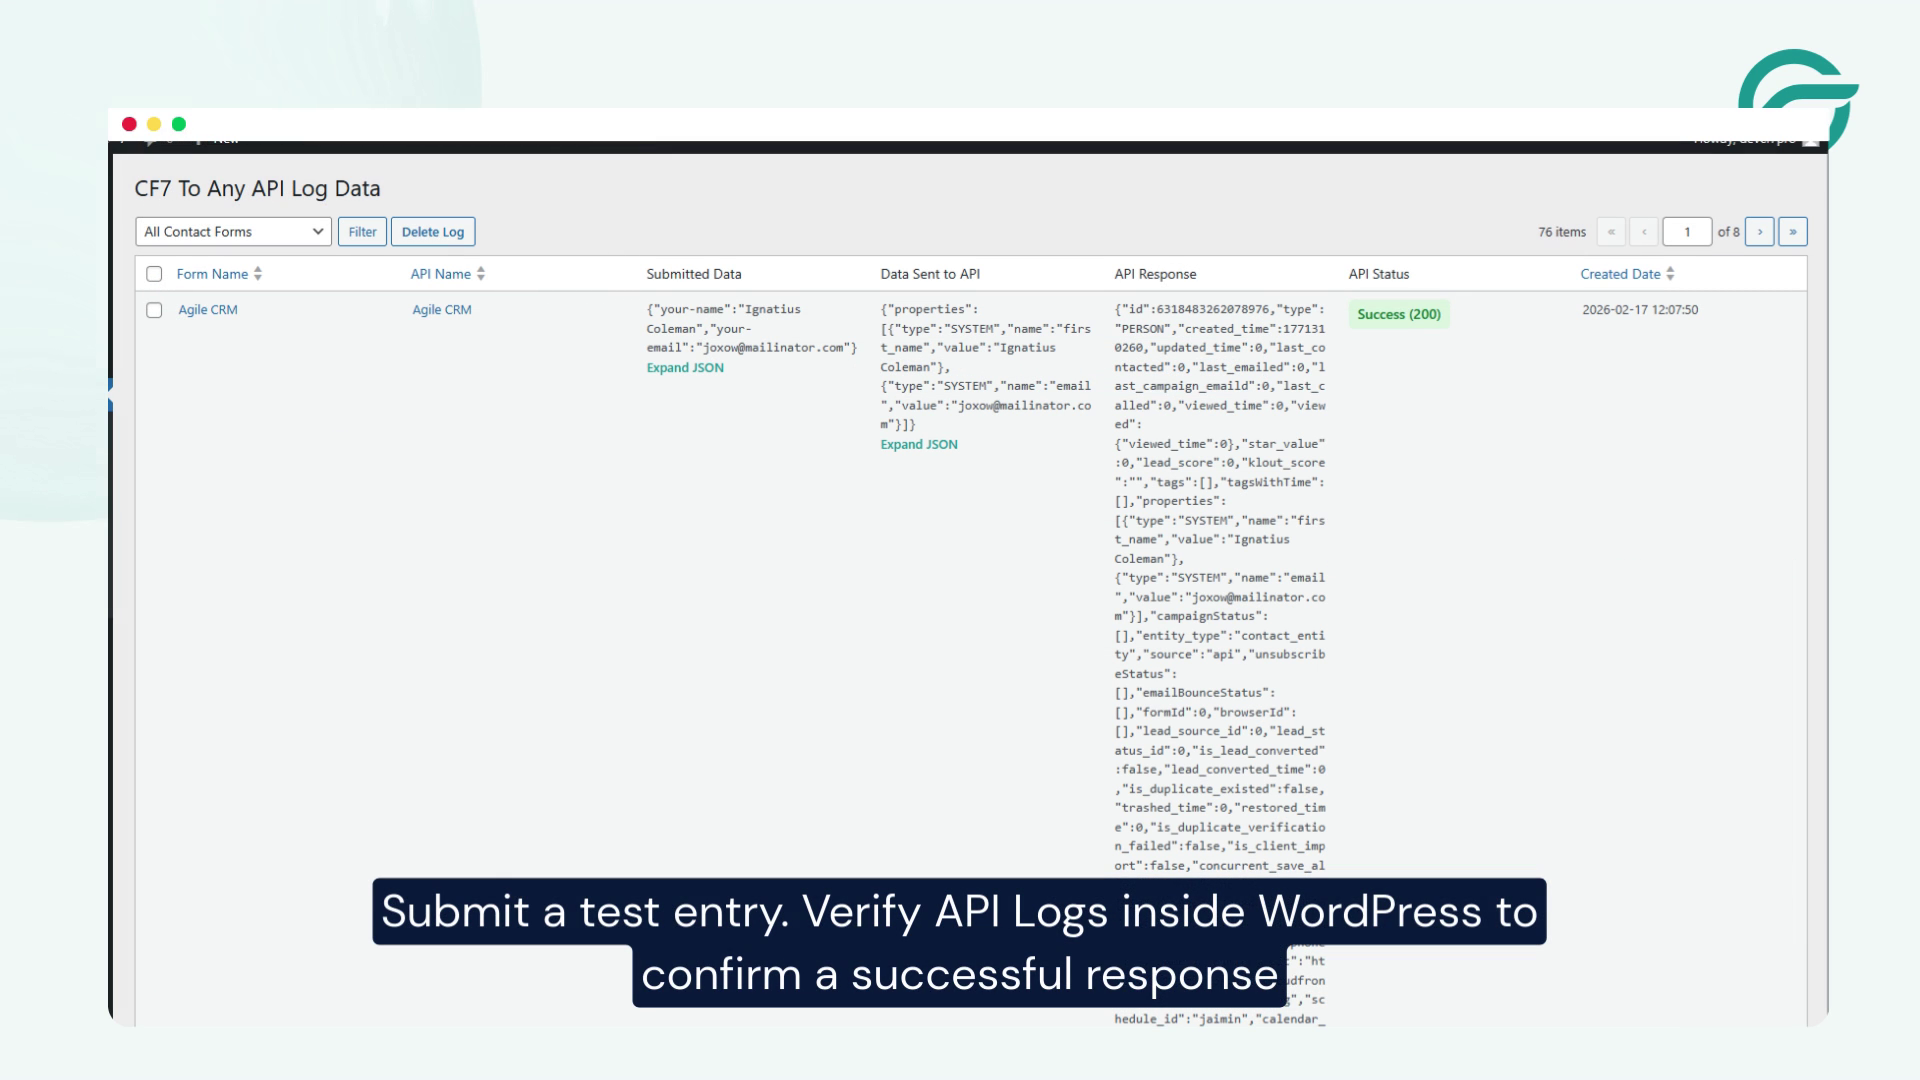
Submit a test form entry from your website.
Step 17: Verify API Logs
Check the API Logs in WordPress to confirm a successful response.
Final Thoughts
Integrating Contact Form 7 with Agile CRM using API is a powerful way to automate your lead capture and CRM workflow. Once set up, your form submissions will be instantly sent to Agile CRM, helping you manage contacts efficiently and improve response time.
This integration not only saves time but also ensures your sales and marketing teams always have up-to-date lead information.


