


Email marketing works best when your leads flow automatically into your mailing list. If you are using Contact Form 7 on WordPress and MailBluster for email campaigns, you can connect both easily using the Contact Form to Any API plugin.
This guide walks you through the complete setup, step by step.
Watch the Video Tutorial
Connect Contact Form 7 to MailBluster – Step-by-Step Video Guide
Prefer a visual walkthrough? Watch our detailed YouTube tutorial to see how to connect Contact Form 7 with MailBluster using the CF7 to Any API plugin. The video covers API key setup, header configuration, field mapping, and testing the integration in real time.
👉 Watch on YouTube:
This video is perfect if you want to follow along on screen and avoid common setup mistakes.
Step 1: Generate Your MailBluster API Key
First, you need an API key from MailBluster.
- Sign in to your MailBluster account.
- Navigate to Settings → API Keys.
- Generate a new API key and give it a recognizable name.
- Copy the Key Value safely, as you will need it in the next steps.
Step 2: Create a New Integration in WordPress
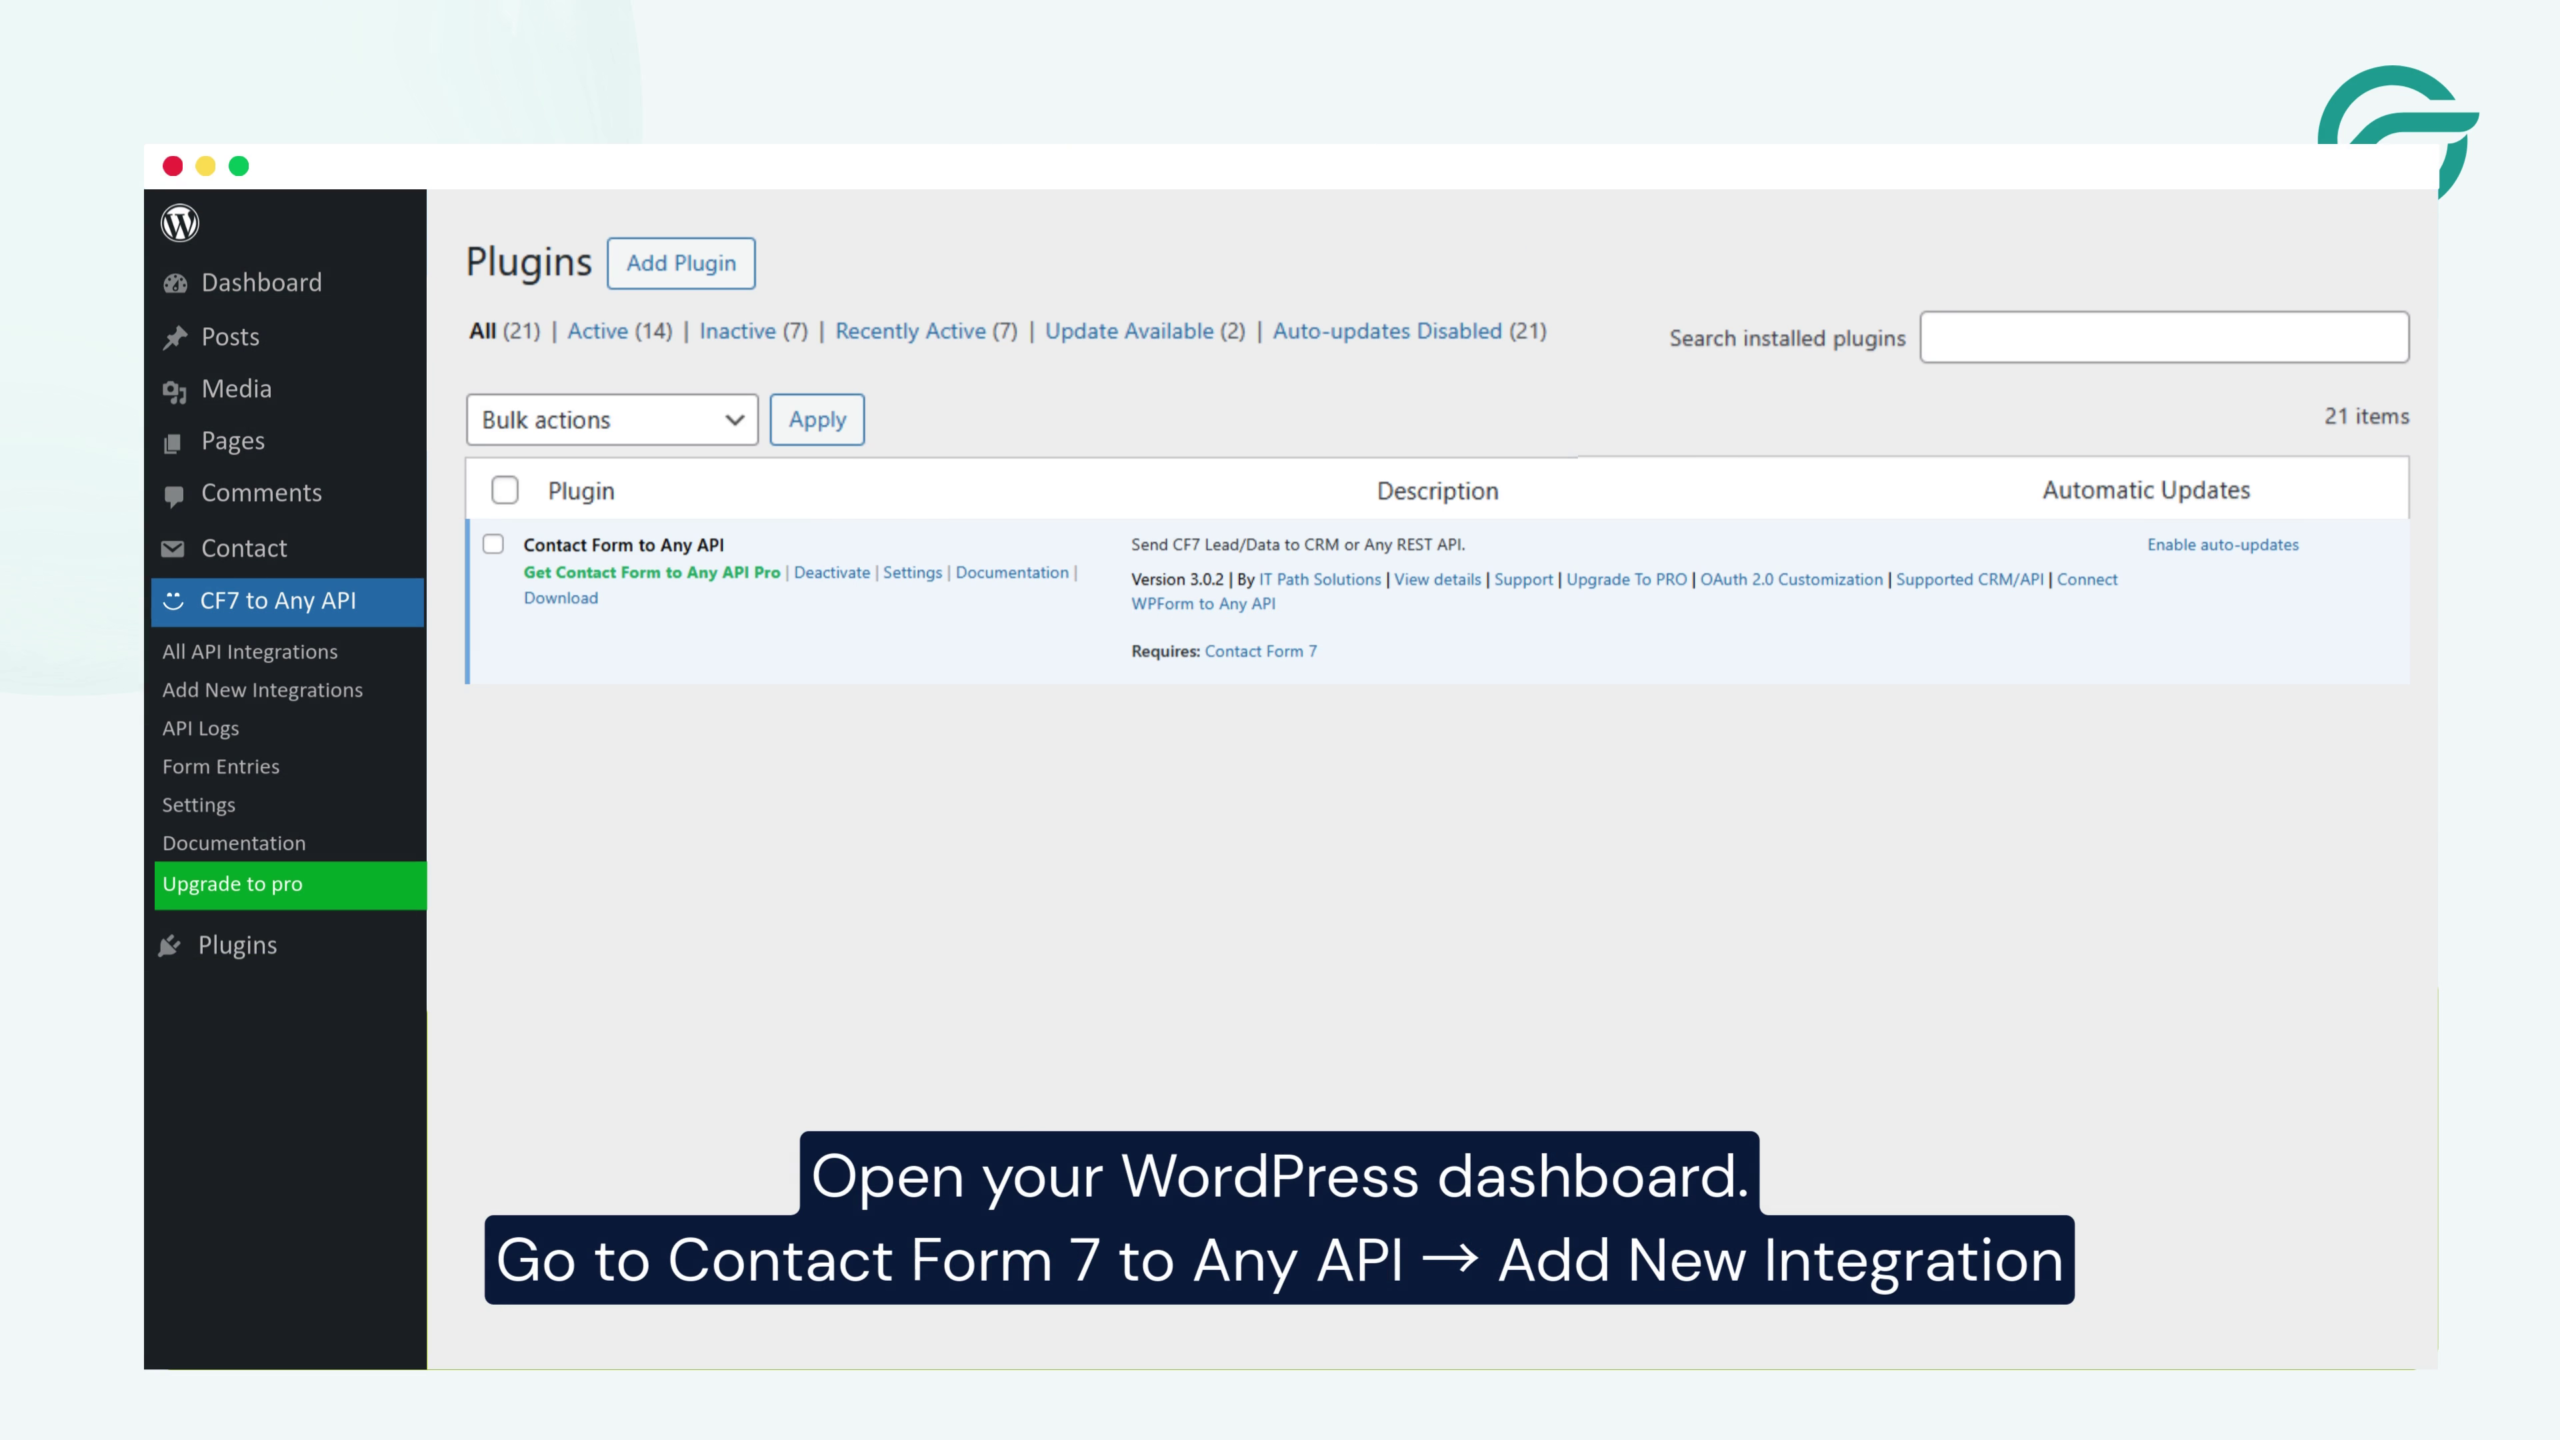
Now, move to your WordPress site.
- Open your WordPress Dashboard.
- Go to Contact Form 7 to Any API → Add New Integration.
This is where you will configure the connection between Contact Form 7 and MailBluster.
Step 3: Add Integration Details
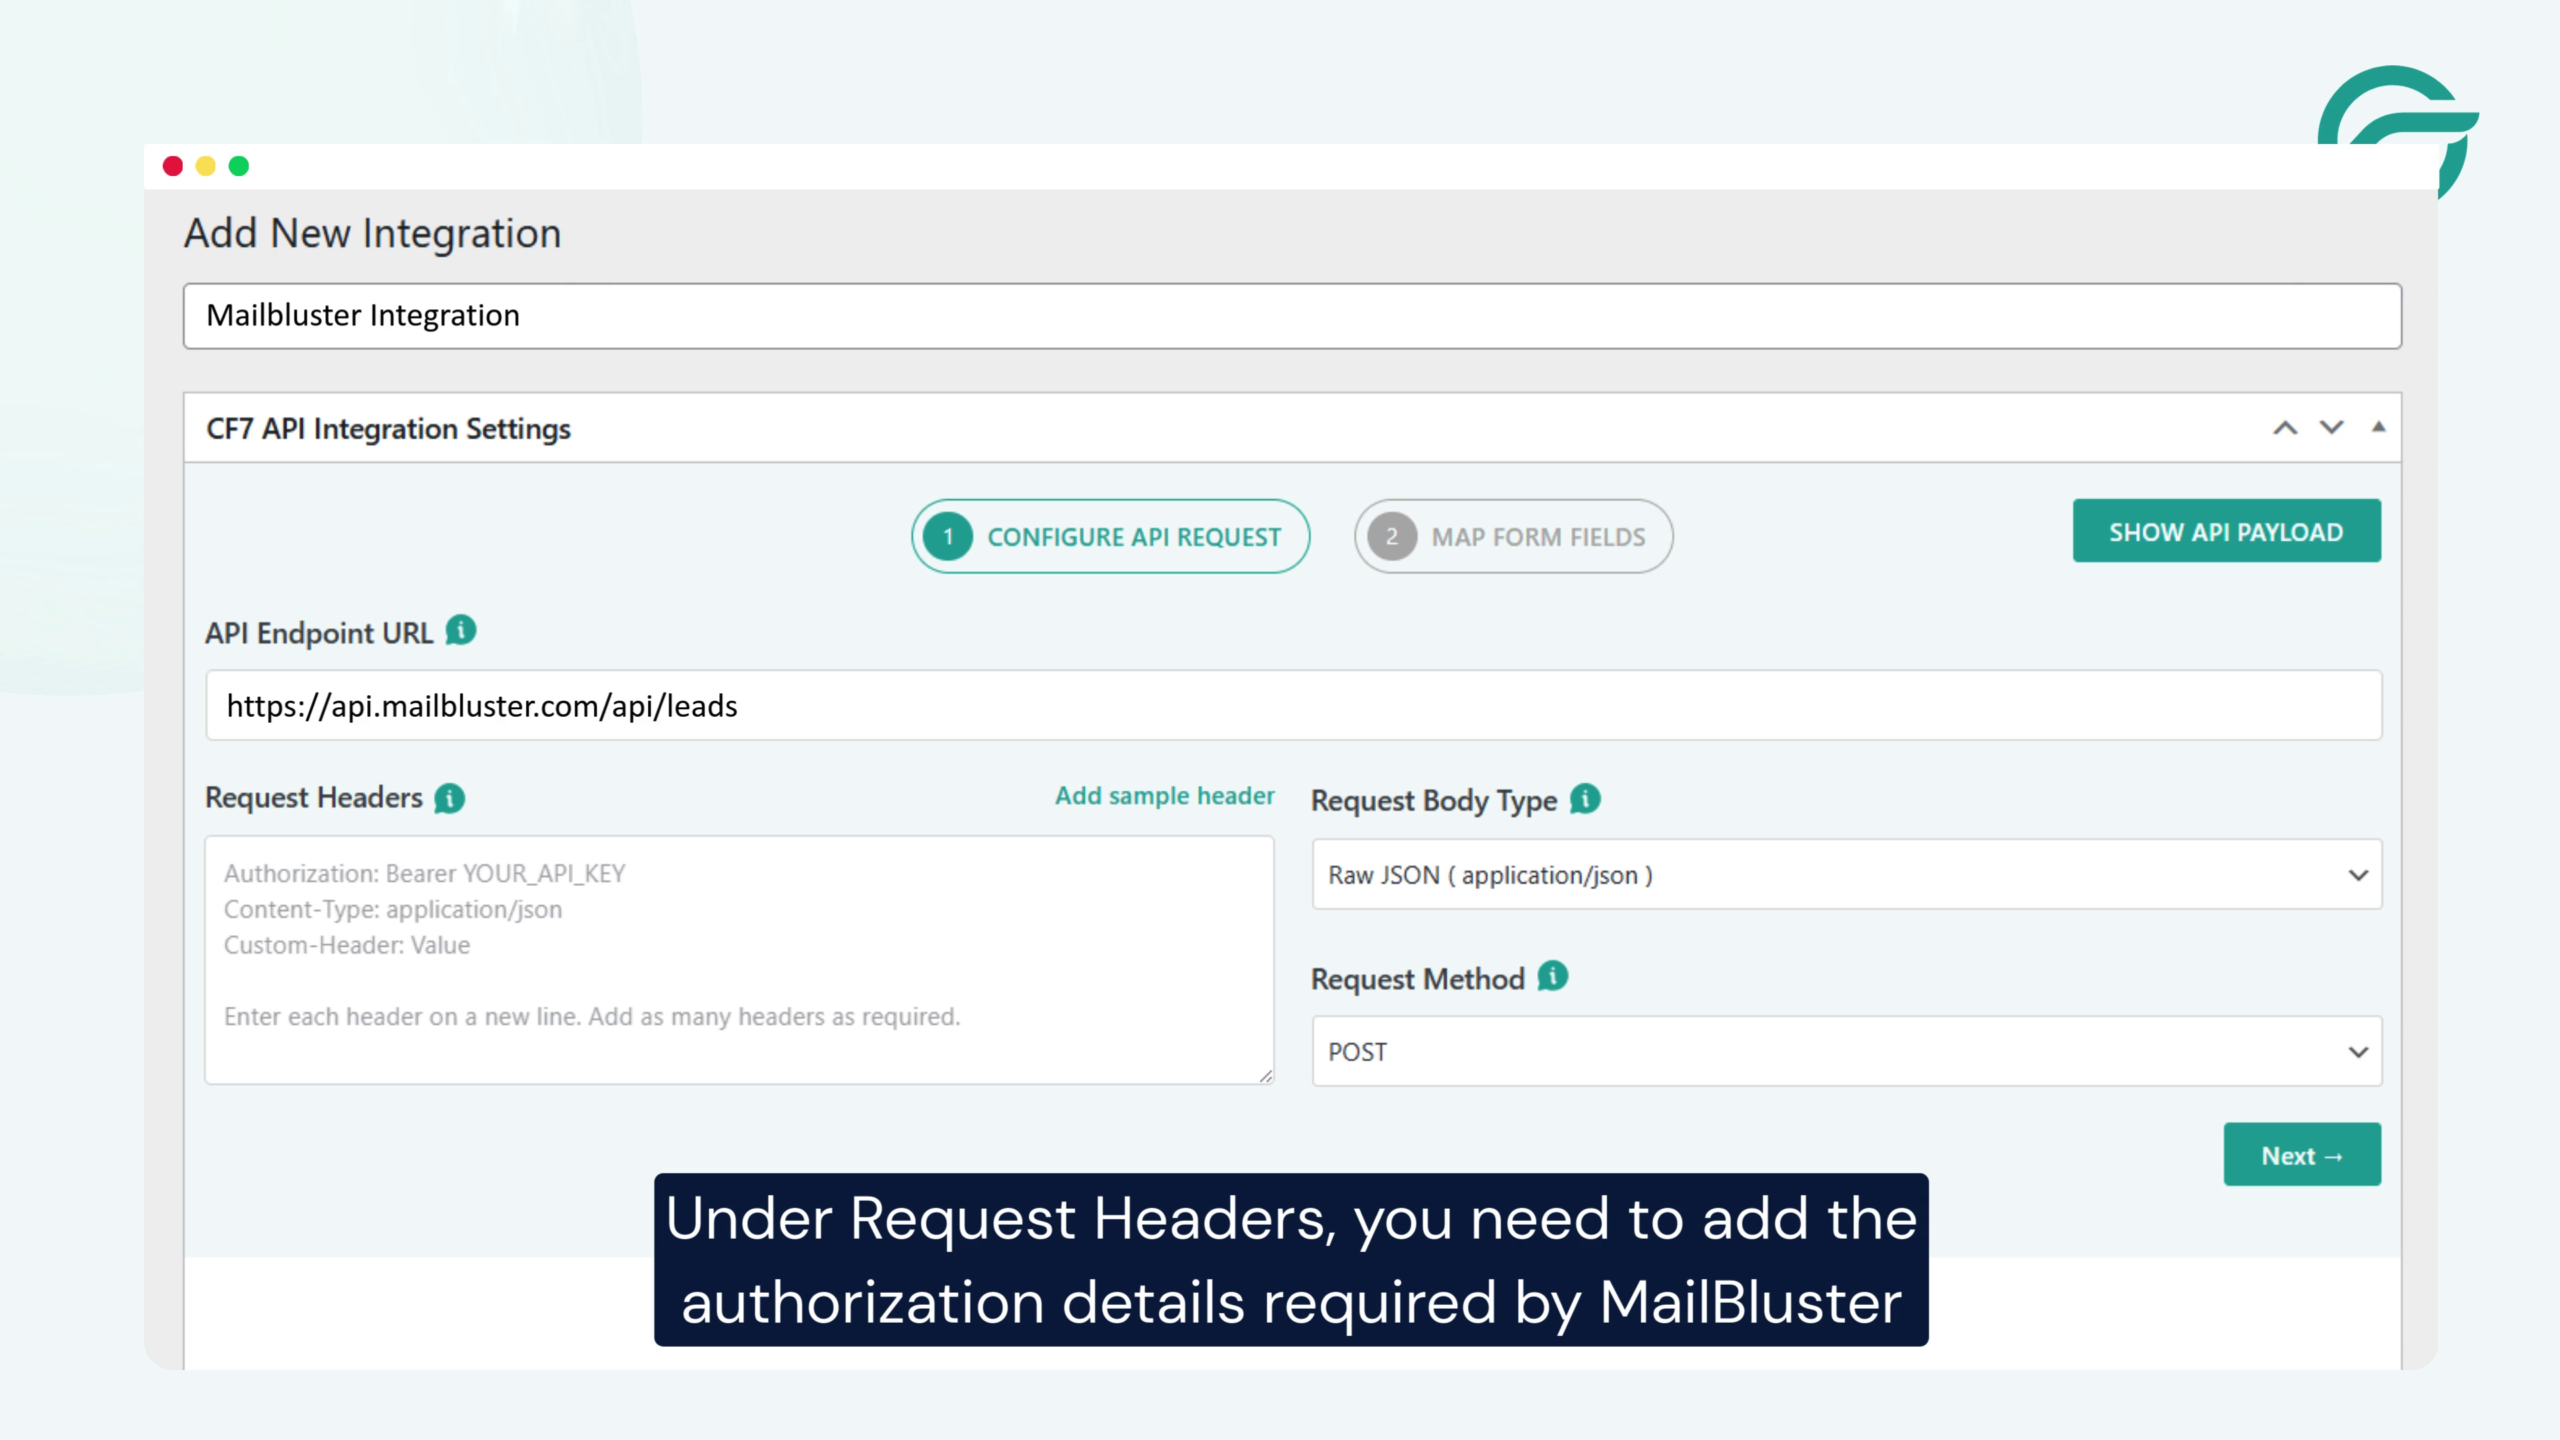
- Give your integration a clear title, for example, MailBluster Integration.
- Enter the MailBluster API Endpoint URL used for creating or updating subscribers.
This endpoint tells MailBluster where to receive the form data.
Step 4: Configure Request Headers
MailBluster requires authorization headers for secure API access.
Under Request Headers, add the following details:
- Authorization: Paste the MailBluster API key you generated earlier
- Content-Type: application/json
You can always find or regenerate your API key in MailBluster → Settings → API Keys if needed.
Step 5: Select the Contact Form
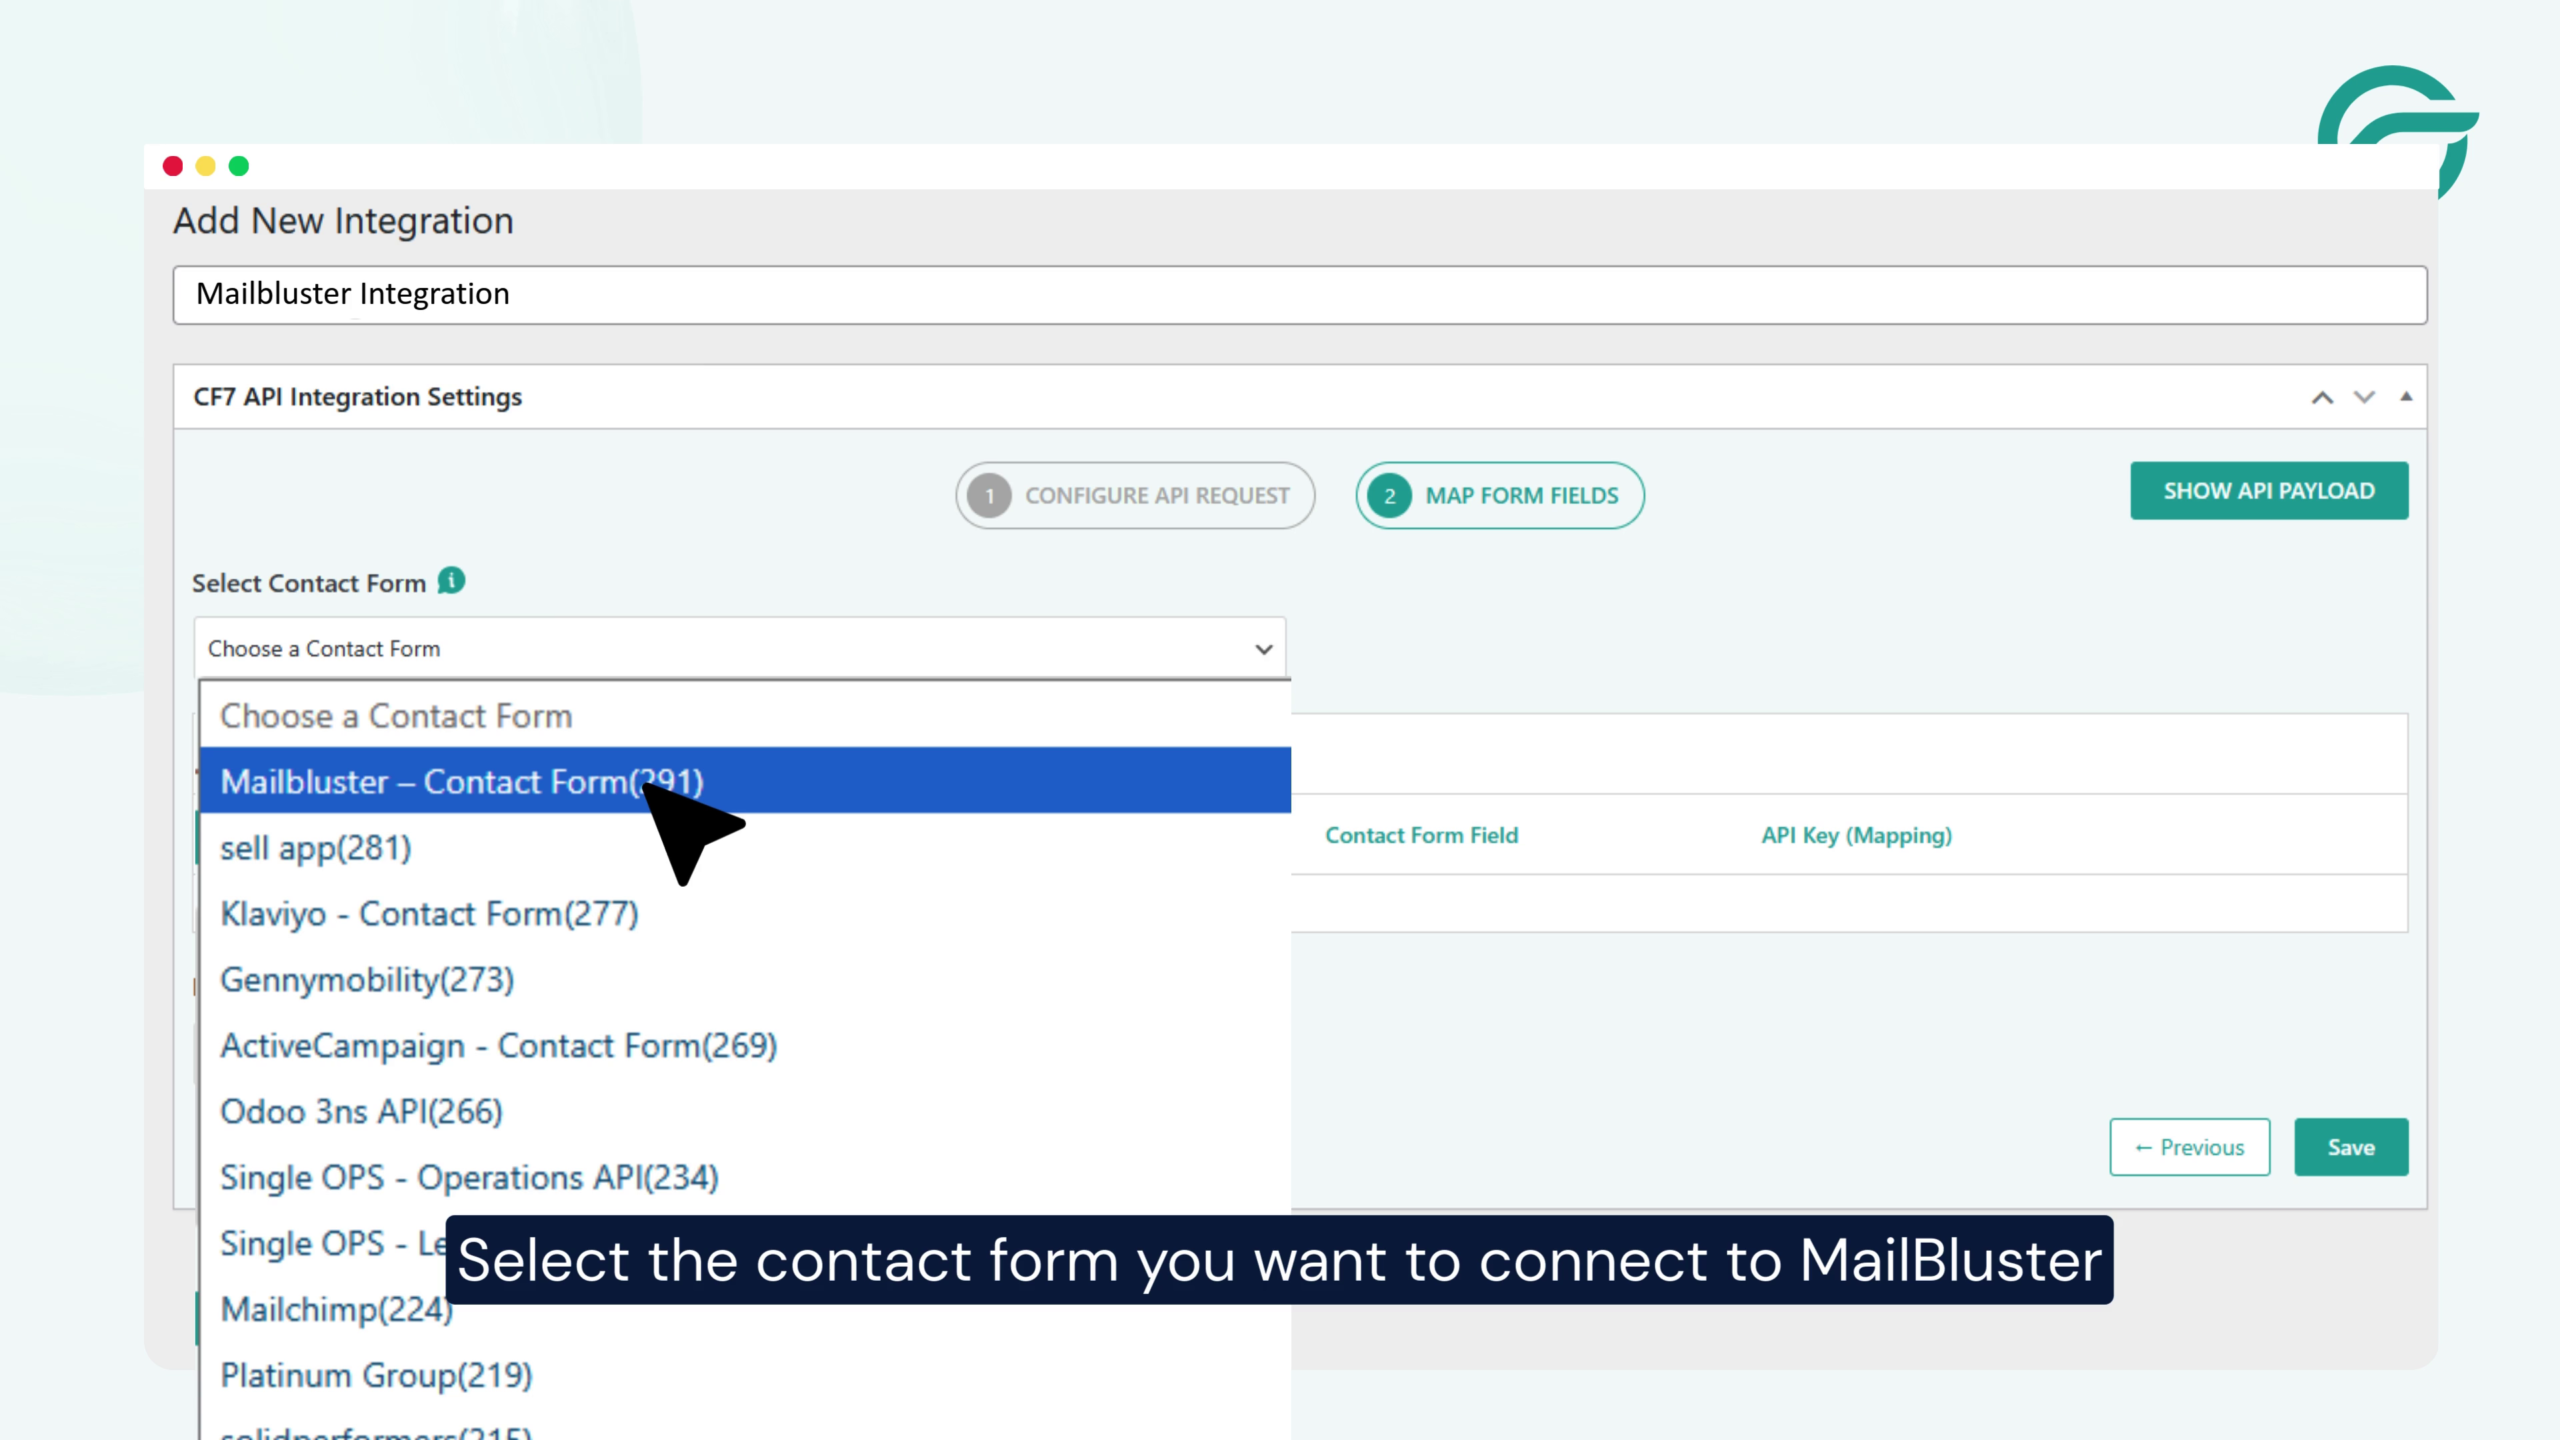
Choose the Contact Form 7 form that you want to connect with MailBluster.
This ensures only the selected form sends data to your email list.
Step 6: Map Form Fields to MailBluster Fields
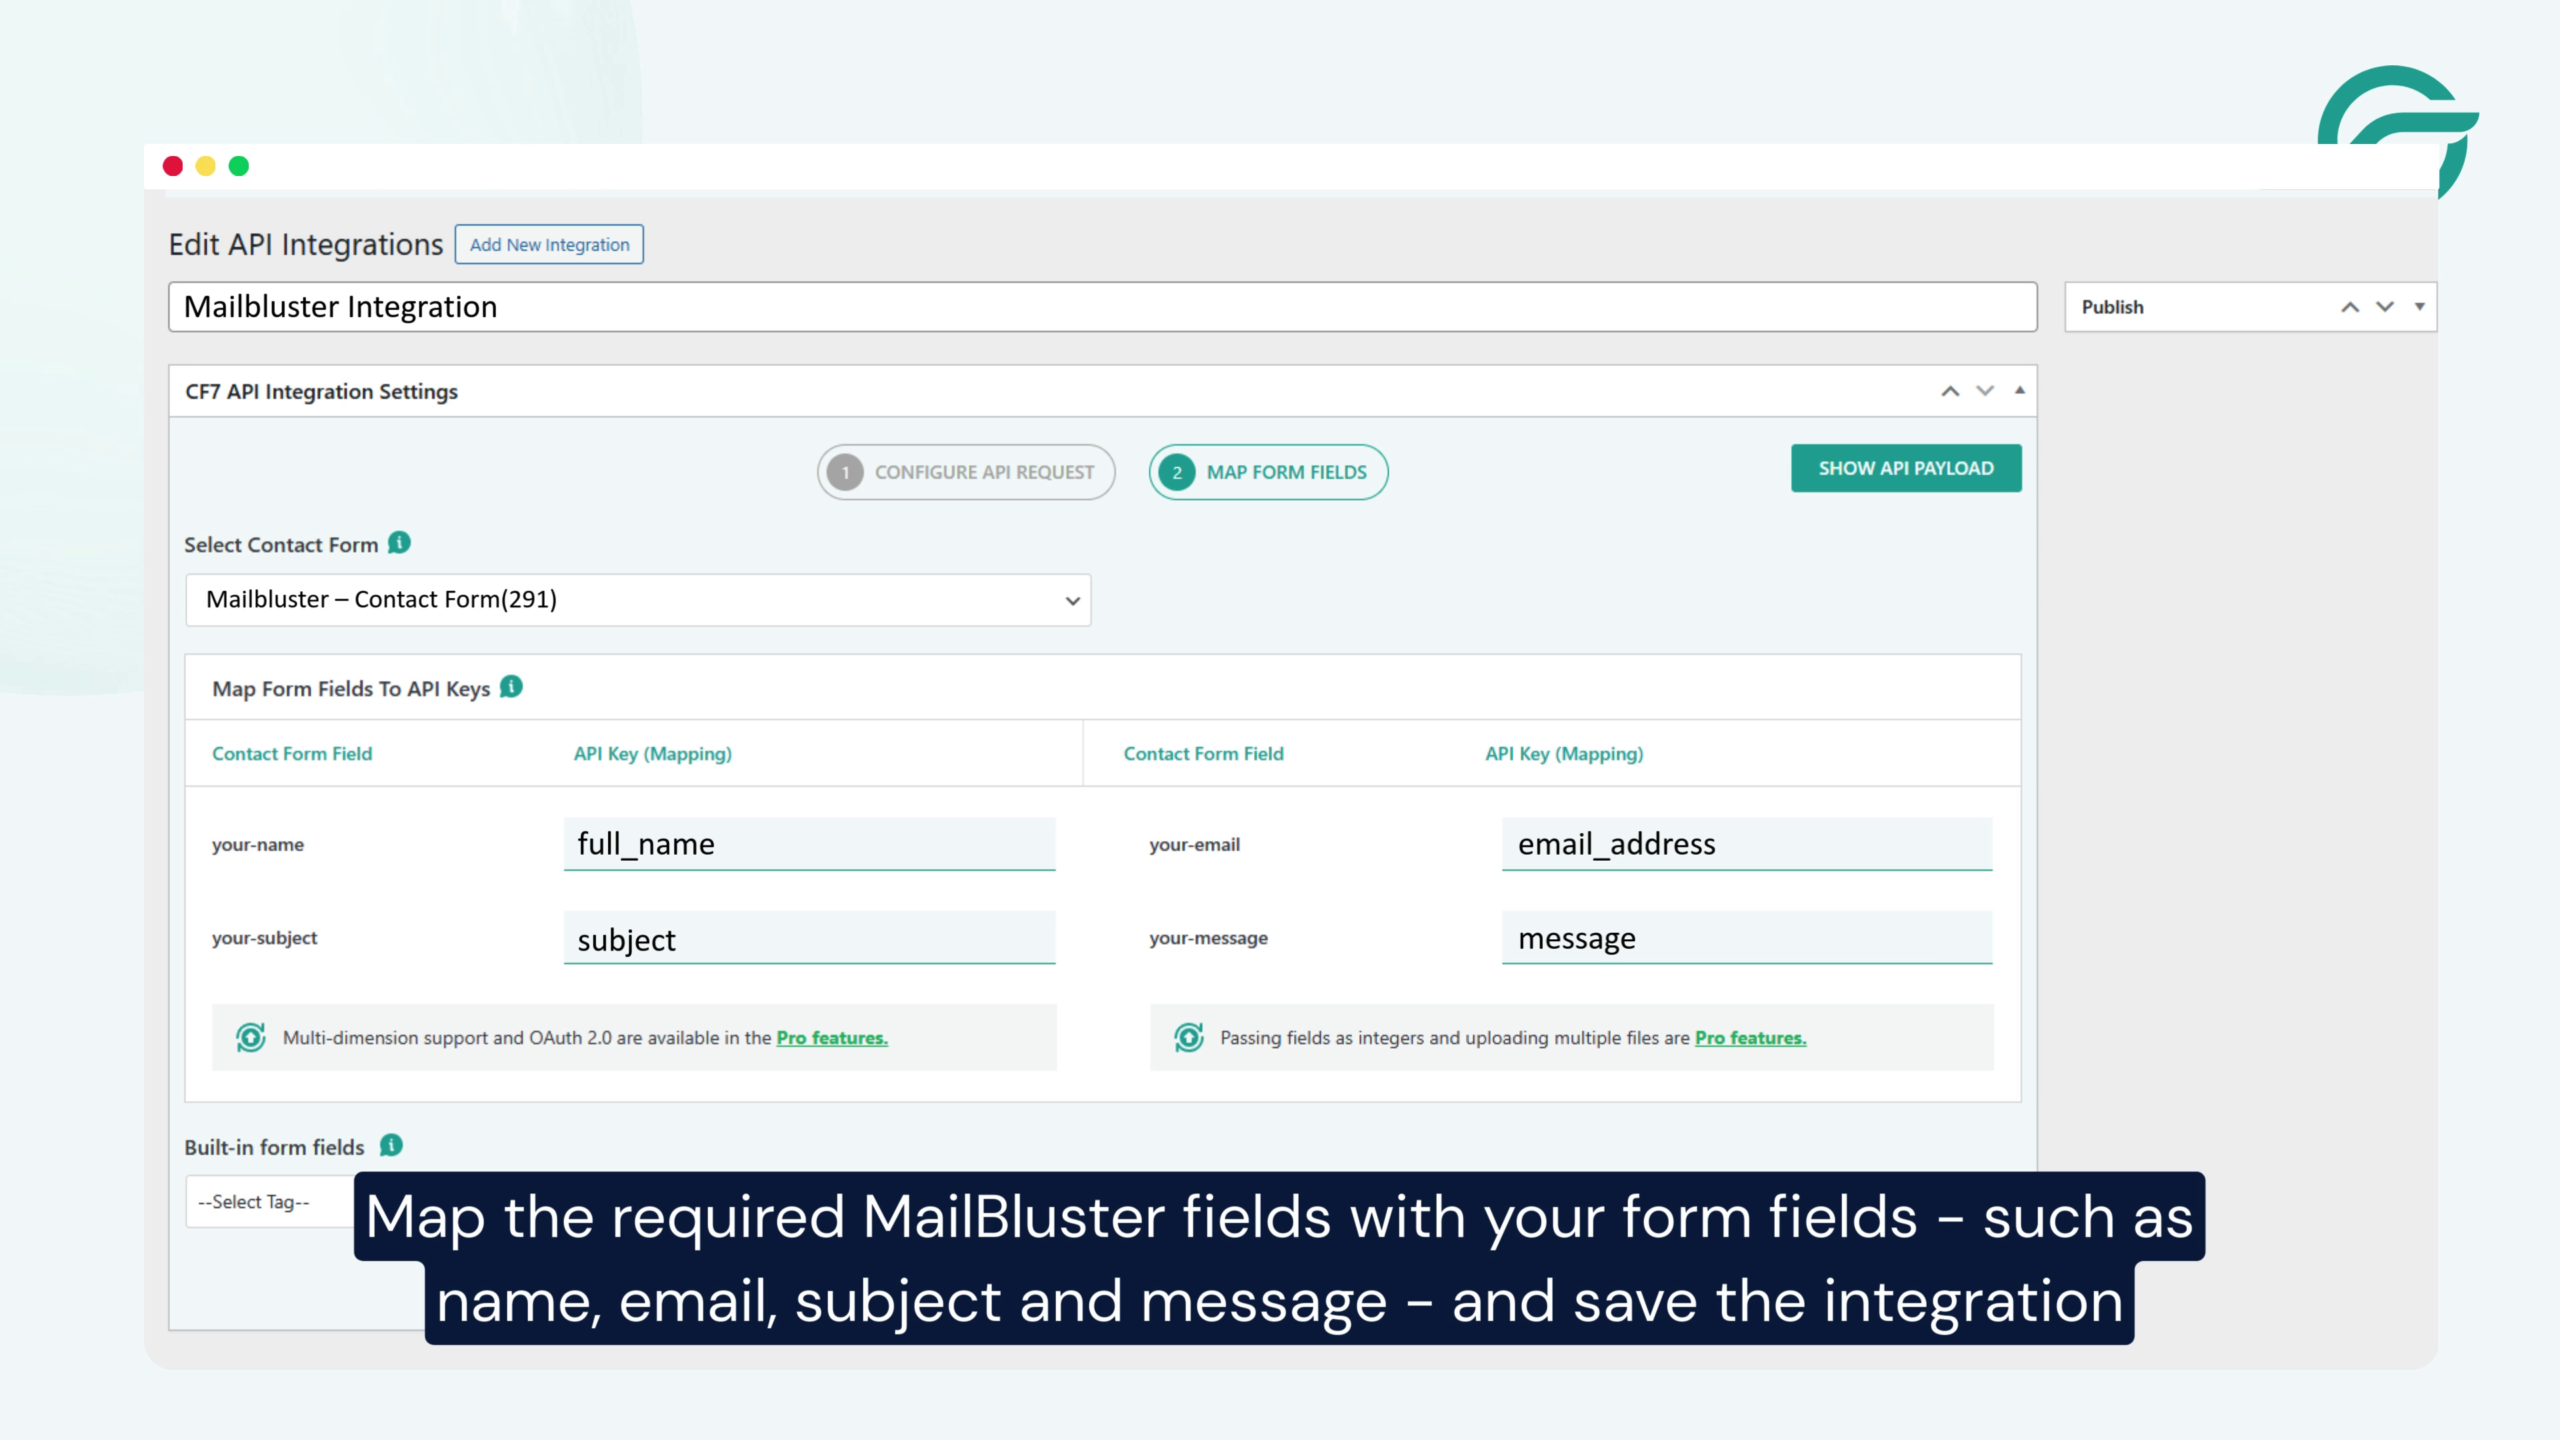
Now, map your form fields correctly.
- Match required MailBluster fields such as:
- Name
- Subject
- Message
Ensure the email field is mapped correctly, as it is mandatory for subscriber creation.
Once done, save the integration.
Step 7: Test and Verify the Integration
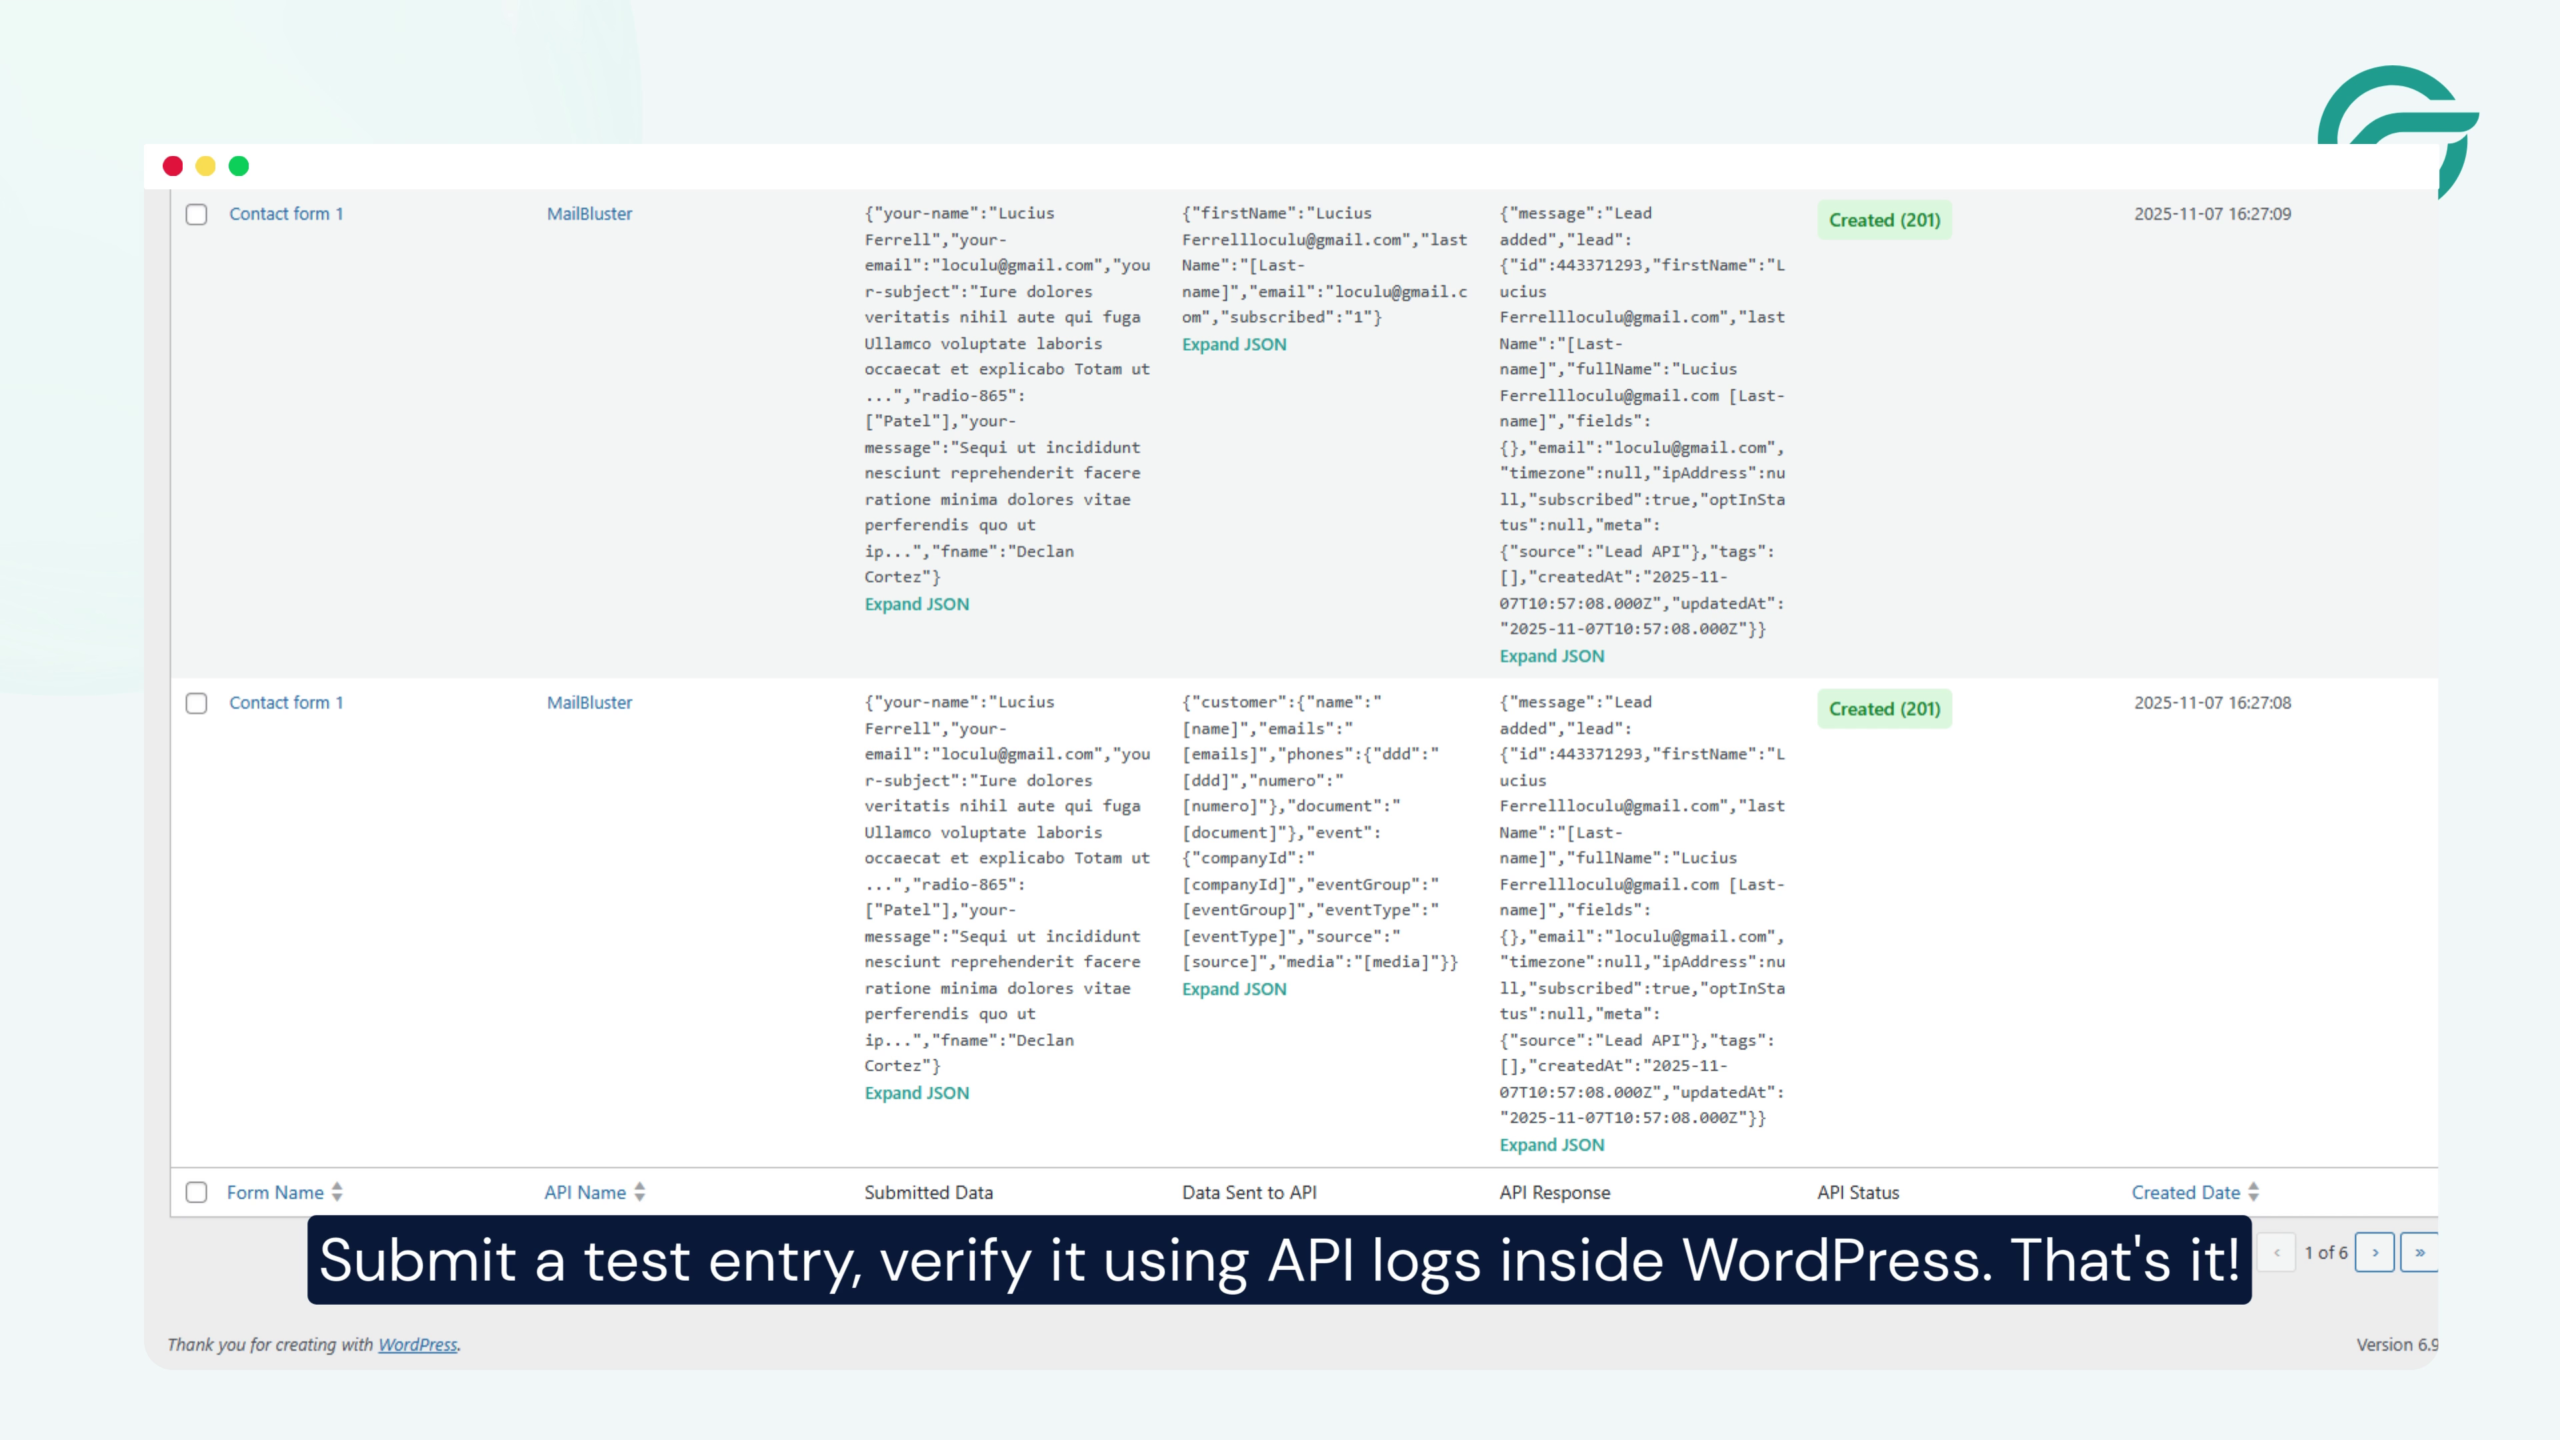
Finally, test everything.
- Submit a test entry using your Contact Form 7 form.
- Open the API Logs inside WordPress to verify the request and response.
If the log shows a successful response, your integration is complete.
Final Thoughts
By connecting Contact Form 7 with MailBluster using Contact Form To Any API plugin, you can automatically capture leads and keep your email list updated without manual work.
This setup is reliable, scalable, and perfect for improving your email marketing workflow.
Your Contact Form 7 submissions are now seamlessly flowing into MailBluster.


